0.确认你的Jdk版本是否1.8+;
1.下载安装CLI,路径是:百度SprinBoot CLI下载即可;
2.安装方式是:将下载下来的安装包解压缩到D盘根目录即可安装;
3.在系统变量Path中增加D:\spring-2.0.0.M5\bin的变量;
4.检查是否安装成功:win+R弹出cmd窗口并且输入spring --version显示出正确的spring版本号;
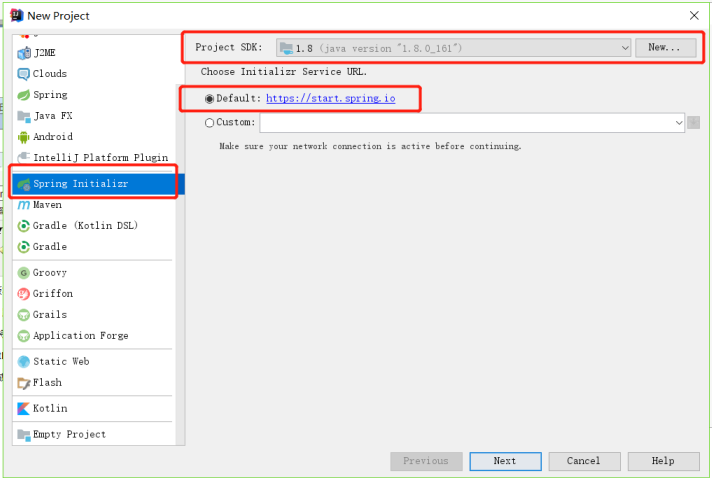
0.使用IDEA工具开始构建,新建项目
01.检查这三处是否一致,这里是默认的,如果没有可能是IDEA工具版本较低。
02.

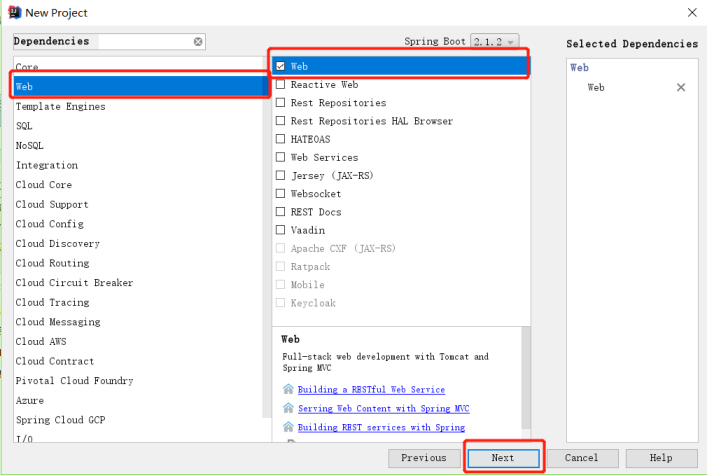
03.点击web,选中web。
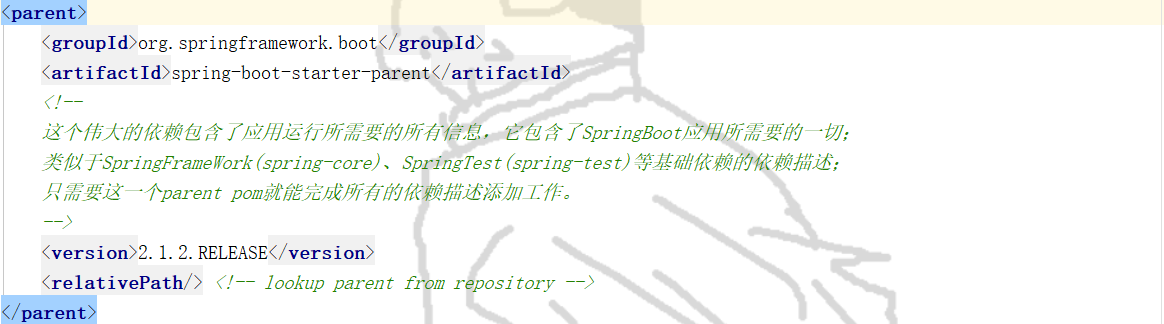
1.maven管理工具pom.xml解释
另外可以在
<dependencies>
   <dependency>
      <groupId>org.springframework.boot</groupId>
      <!--添加这个依赖之后就可以创建Y一个Web应用程序。
      strat poms部分,则可以在此引入所有实际在项目中使用到的依赖;
      'spring-boot-starter-web'依赖包含所有的spring-core,spring-web,-spring-webmvc,以及嵌入的Tomcat server和其他Web应用相关的库。
      -->
      <artifactId>spring-boot-starter-web</artifactId>
   </dependency>

   <dependency>
      <groupId>org.springframework.boot</groupId>
      <artifactId>spring-boot-starter-test</artifactId>
      <scope>test</scope>
   </dependency>
</dependencies>中添加项目所使用的依赖。
2.修改Application
package com.sb.demo;

import org.springframework.boot.SpringApplication;
import org.springframework.boot.autoconfigure.EnableAutoConfiguration;
import org.springframework.web.bind.annotation.RequestMapping;
import org.springframework.web.bind.annotation.RestController;

import javax.servlet.http.HttpServletRequest;

@EnableAutoConfiguration
@RestController
@RequestMapping("admin/")
public class DemoApplication {

   /**
    * 用户首页,用于登录之后给用户看一些信息
    * 信息可以从数据库中取,这边作为demo,暂时写死
    * @return
    */
   @RequestMapping("home")
   String home(HttpServletRequest request) {
      String userName = "Jef";
      int count = 100;
      return "欢迎您" + userName + ",这是您的第 " + count + " 次登录";
   }

   public static void main(String[] args) {
      SpringApplication.run(DemoApplication.class, args);
   }

}
4.访问一下试试:http://localhost:8889/admin/home
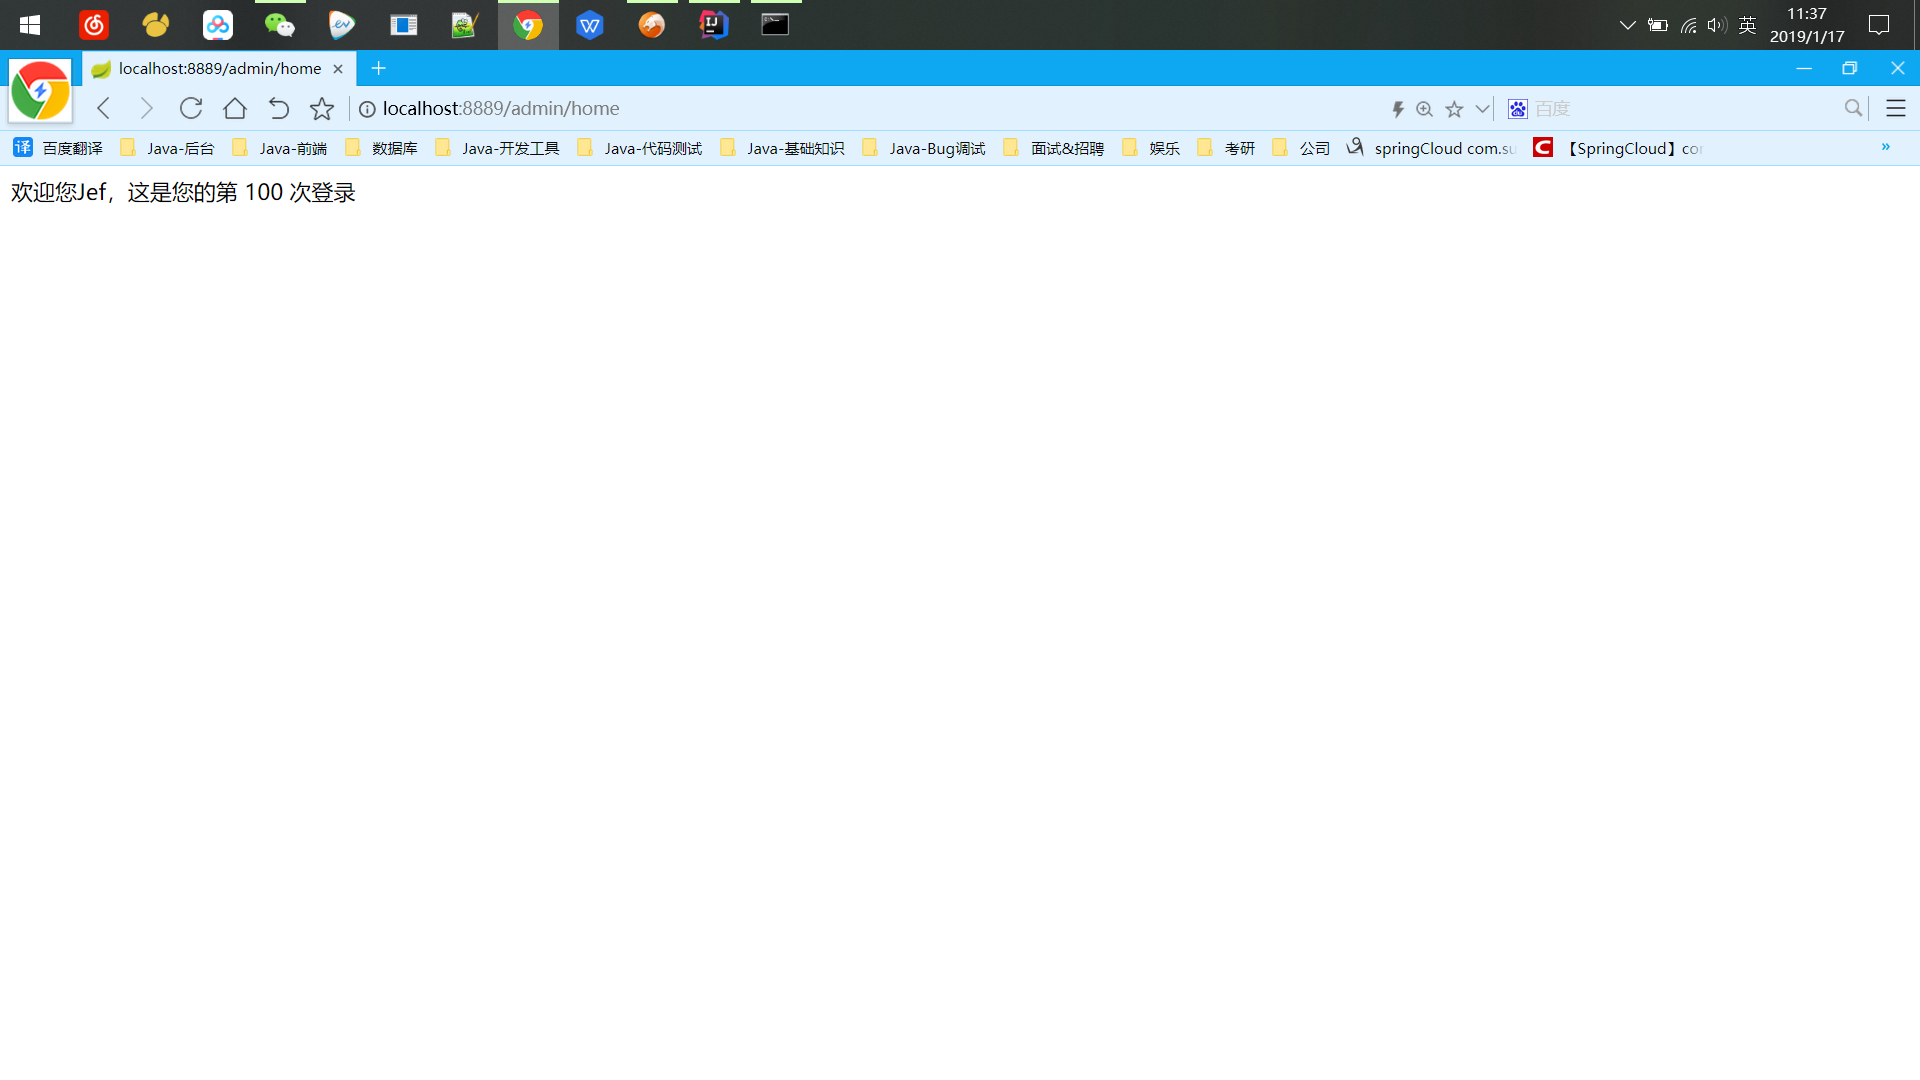
3.若是端口号冲突则将application.properties中增加/修改端口号:server.port=8889