Flutter获取相册中的图片和用相机拍照
在原生开发中,拍照及从图库选择图片是非常常见的需求,而且原生的图片选择第三方库也有很多并且很完善了。
Flutter也给我们提供了好用的图片选择插件,ios和Android都能用的呦!
image_picker
先上图
Flutter拍照:
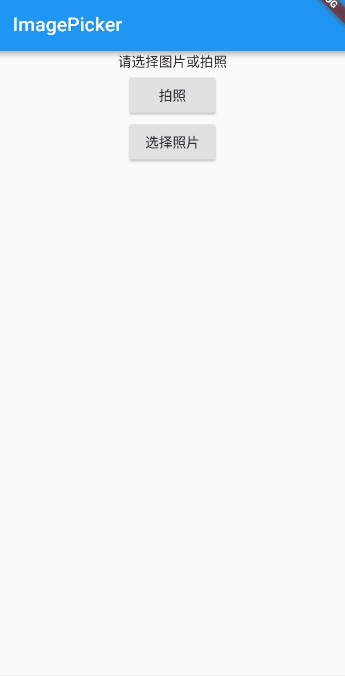
Flutter选择图片

使用方法
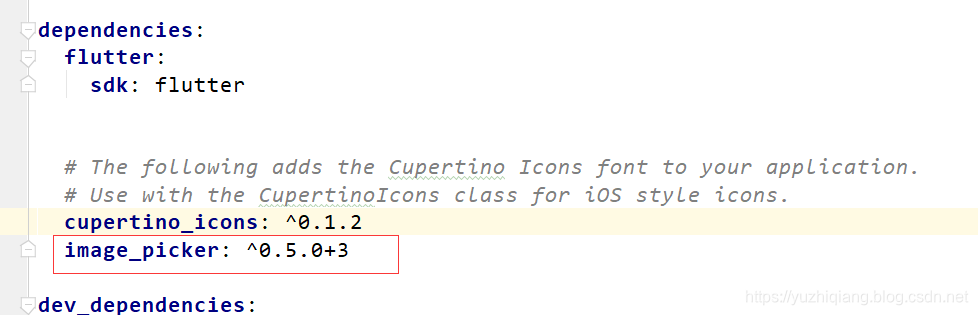
首先添加依赖
在pubspec.yaml加入image_picker的依赖,版本号在github上找最新的即可。
如下:
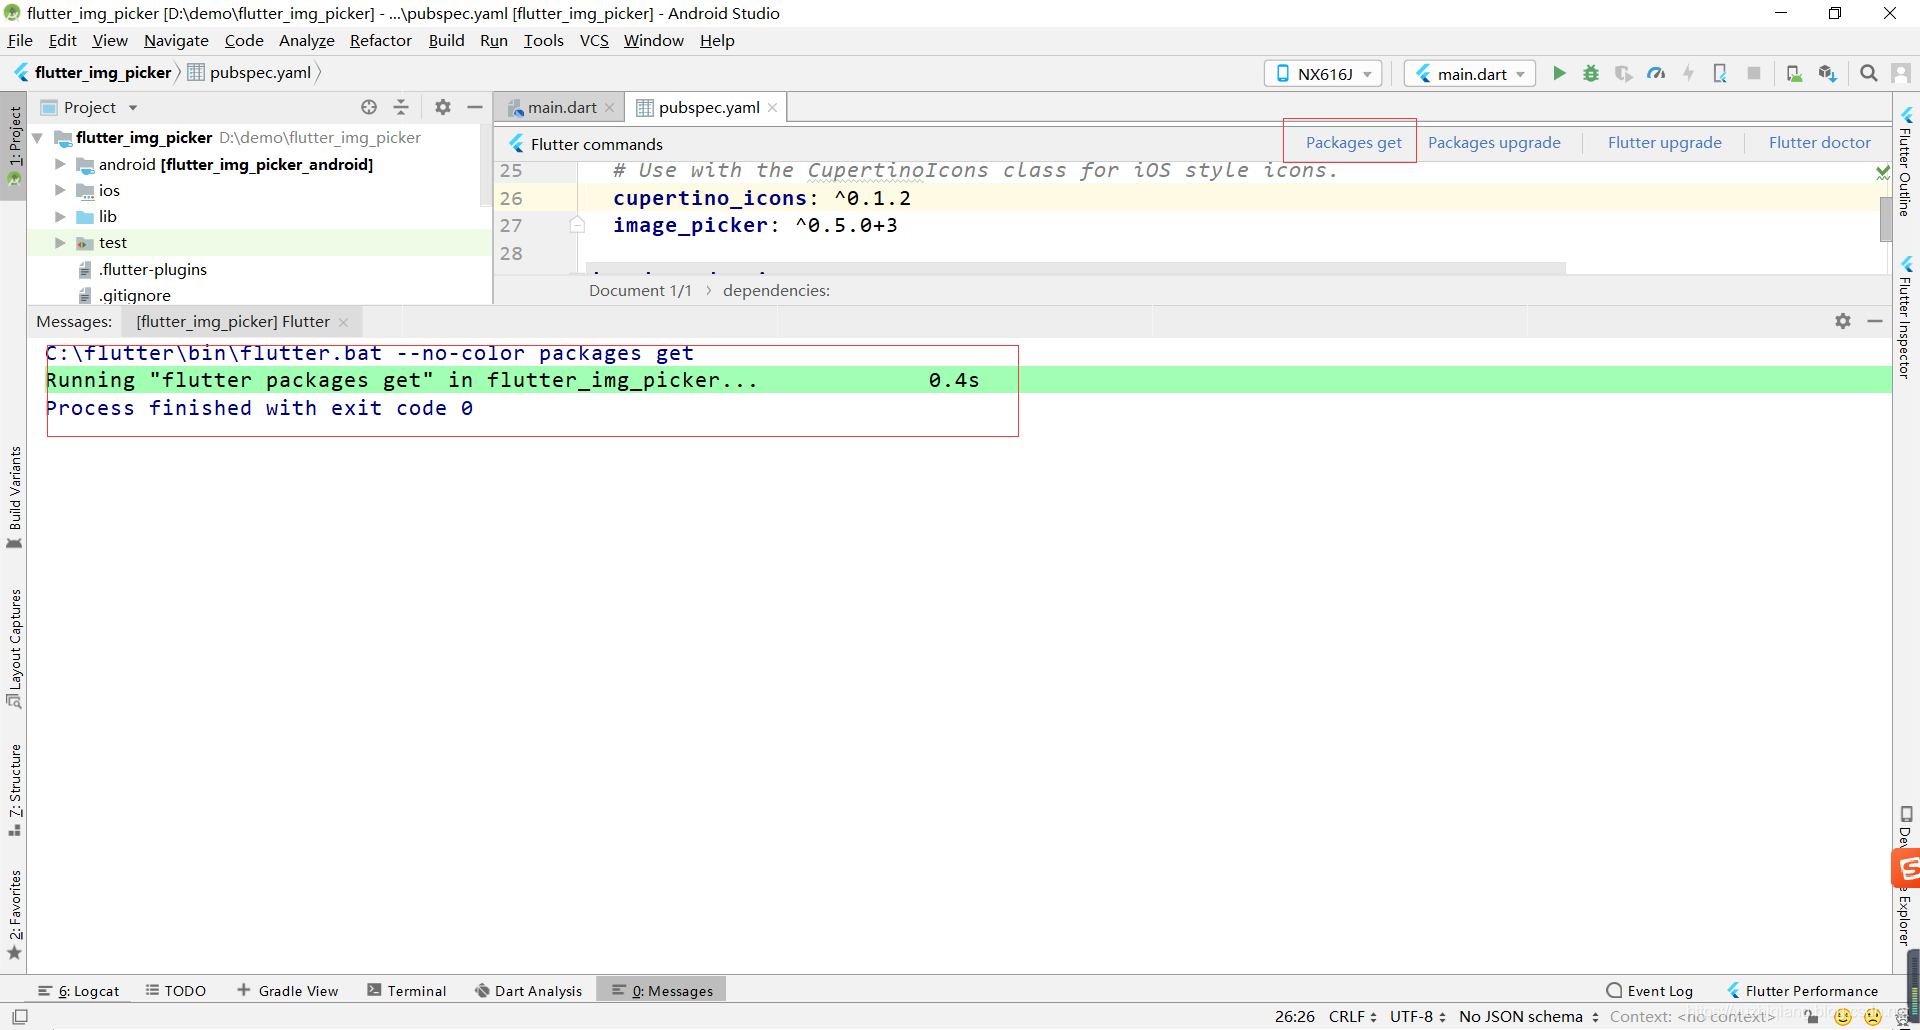
依赖添加完成点击右上角的 Packages get 出现finished及可。
使用
依赖添加完成之后我们就可以正常使用了
首先要导包:
import 'package:image_picker/image_picker.dart';
我们先来看看ImagePicker提供的方法,目前有两个,选图片和选视频。
其中选择图片可以通过图库和相机的方式获得。
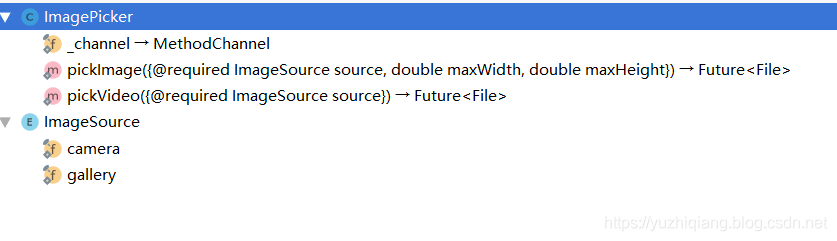
我们主要来看看图片
拍照
var image = await ImagePicker.pickImage(source: ImageSource.camera);
相册
var image = await ImagePicker.pickImage(source: ImageSource.gallery);
是不是超级简单,我们权限申请都不需要管。
下面是完整代码:
import 'package:flutter/material.dart';
import 'package:image_picker/image_picker.dart';

class ImagePickerWidget extends StatefulWidget {
  @override
  State<StatefulWidget> createState() {
    return _ImagePickerState();
  }
}

class _ImagePickerState extends State<ImagePickerWidget> {
  var _imgPath;

  @override
  Widget build(BuildContext context) {
    return Scaffold(
        appBar: AppBar(
          title: Text("ImagePicker"),
        ),
        body: SingleChildScrollView(
          child: Column(
            children: <Widget>[
              _ImageView(_imgPath),
              RaisedButton(
                onPressed: _takePhoto,
                child: Text("拍照"),
              ),
              RaisedButton(
                onPressed: _openGallery,
                child: Text("选择照片"),
              ),
            ],
          ),
        ));
  }

  /*图片控件*/
  Widget _ImageView(imgPath) {
    if (imgPath == null) {
      return Center(
        child: Text("请选择图片或拍照"),
      );
    } else {
      return Image.file(
        imgPath,
      );
    }
  }


  /*拍照*/
  _takePhoto() async {
    var image = await ImagePicker.pickImage(source: ImageSource.camera);

    setState(() {
      _imgPath = image;
    });
  }

  /*相册*/
  _openGallery() async {
    var image = await ImagePicker.pickImage(source: ImageSource.gallery);
    setState(() {
      _imgPath = image;
    });
  }
}
注意事项
当图片过长超过显示宽高度的话,可能会报 The overflowing RenderFlex has an orientation of Axis.vertical. 这个错,且底部会有黄色的警告。
具体报错信息大概如下:
══╡ EXCEPTION CAUGHT BY RENDERING LIBRARY ╞═════════════════════════════════════════════════════════
I/flutter (10595): The following message was thrown during layout:
I/flutter (10595): A RenderFlex overflowed by 177 pixels on the bottom.
I/flutter (10595):
I/flutter (10595): The overflowing RenderFlex has an orientation of Axis.vertical.
I/flutter (10595): The edge of the RenderFlex that is overflowing has been marked in the rendering with a yellow and
I/flutter (10595): black striped pattern. This is usually caused by the contents being too big for the RenderFlex.
I/flutter (10595): Consider applying a flex factor (e.g. using an Expanded widget) to force the children of the
I/flutter (10595): RenderFlex to fit within the available space instead of being sized to their natural size.
I/flutter (10595): This is considered an error condition because it indicates that there is content that cannot be
I/flutter (10595): seen. If the content is legitimately bigger than the available space, consider clipping it with a
I/flutter (10595): ClipRect widget before putting it in the flex, or using a scrollable container rather than a Flex,
I/flutter (10595): like a ListView.
这里我们直接使用 SingleChildScrollView(单个子控件的滚动布局控件) 即可。
需要demo的可以下载: Flutter拍照和相册选择图片Demo
如果你觉得本文对你有帮助,麻烦动动手指顶一下,算是对本文的一个认可。也可以关注我的 Flutter 博客专栏,我会不定期的更新,如果文中有什么错误的地方,还望指正,转载请注明转自喻志强的博客 ,谢谢!