介绍
使用requests可以模拟浏览器的请求,比起python内置的urllib模块,requests模块的api更加便捷(本质就是封装了urllib3)
注意:requests库发送请求将网页内容下载下来以后,并不会执行js代码,这需要我们自己分析目标站点然后发起新的request请求
安装
>: pip3 install requests
使用
各种请求方式:常用的就是requests.get()和requests.post()
>>> import requests
>>> r = requests.get('https://api.github.com/events')
>>> r = requests.post('http://httpbin.org/post', data = {'key':'value'})
>>> r = requests.put('http://httpbin.org/put', data = {'key':'value'})
>>> r = requests.delete('http://httpbin.org/delete')
>>> r = requests.head('http://httpbin.org/get')
>>> r = requests.options('http://httpbin.org/get')
基于GET请求
-
基本请求
import requests

response = requests.get(
    url='https://www.目标网址.com'
  )
response.encoding = 'utf-8'
# 以文本形式打印响应内容
print(response.text)
# 写入文本
with open('xxx.html', 'w') as f:
    f.write(response.text)
-
携带参数的GET请求
HTTP默认的请求方法就是GET
     * 没有请求体
     * 数据必须在1K之内!
     * GET请求数据会暴露在浏览器的地址栏中

GET请求常用的操作:
       1. 在浏览器的地址栏中直接给出URL,那么就一定是GET请求
       2. 点击页面上的超链接也一定是GET请求
       3. 提交表单时,表单默认使用GET请求,但可以设置为POST
分析请求参数key=vules
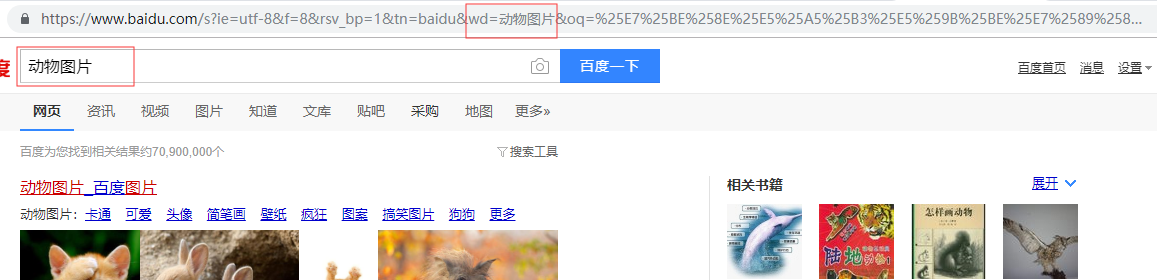
携带参数请求方式一: url拼接
import requests
response = requests.get(
    url='https://www.baidu.com/s?wd=动物图片',
    # 请求头信息
    headers = {
        'User-Agent' : 'Mozilla/5.0 (Windows NT 10.0; WOW64) AppleWebKit/537.36 (KHTML, like Gecko) Chrome/75.0.3770.100 Safari/537.36'
    }
)
response.encoding = 'utf-8'
print(response.text)
with open('动物图片1.html', 'w') as f:
    f.write(response.text)

携带参数请求方式二: params
import requests
response = requests.get(
    url='https://www.baidu.com/s',
    headers = {
        'User-Agent' : 'Mozilla/5.0 (Windows NT 10.0; WOW64) AppleWebKit/537.36 (KHTML, like Gecko) Chrome/75.0.3770.100 Safari/537.36'
    },
    params={
        'wd': '动物图片'
    }
)
response.encoding = 'utf-8'
print(response.text)
with open('动物图片2.html', 'w') as f:
    f.write(response.text)
基于POST请求
POST请求
(1). 数据不会出现在地址栏中
(2). 数据的大小没有上限
(3). 有请求体
(4). 请求体中如果存在中文,会使用URL编码!

#!!!requests.post()用法与requests.get()完全一致,特殊的是requests.post()有一个data参数,用来存放请求体数据
-
模拟浏览器的登录行为
headers = {
    'User-Agent': 'Mozilla/5.0 (Windows NT 6.1; WOW64) AppleWebKit/537.36 (KHTML, like Gecko) Chrome/62.0.3202.75 Safari/537.36',
    'Referer': 'http://www.aa7a.cn/user.php?&ref=http%3A%2F%2Fwww.aa7a.cn%2F',
}
res = requests.post('http://www.aa7a.cn/user.php',
                    headers=headers,
                    data={
                        'username': '[email protected]',
                        'password': 'xxx',
                        'captcha': '验证码',
                        'remember': 1,
                        'ref': 'http://www.aa7a.cn/',
                        'act': 'act_login'
                    }
                    )
#如果登录成功,cookie会存在于res对象中
cookie=res.cookies.get_dict()

#携带cookies向首页发送get请求
res=requests.get('http://www.aa7a.cn/',headers=headers,
                 cookies=cookie,
                 )

if '[email protected]' in res.text:
    print("登录成功")
else:
    print("没有登录")


'''
一 目标站点分析
    浏览器输入https://github.com/login
    然后输入错误的账号密码,抓包
    发现登录行为是post提交到:https://github.com/session
    而且请求头包含cookie
    而且请求体包含:
        commit:Sign in
        utf8:✓
        authenticity_token:lbI8IJCwGslZS8qJPnof5e7ZkCoSoMn6jmDTsL1r/m06NLyIbw7vCrpwrFAPzHMep3Tmf/TSJVoXWrvDZaVwxQ==
        login:egonlin
        password:123


二 流程分析
    先GET:https://github.com/login拿到初始cookie与authenticity_token
    返回POST:https://github.com/session, 带上初始cookie,带上请求体(authenticity_token,用户名,密码等)
    最后拿到登录cookie

```
ps:如果密码时密文形式,则可以先输错账号,输对密码,然后到浏览器中拿到加密后的密码,github的密码是明文
```

'''

import requests
import re

#第一次请求
r1=requests.get('https://github.com/login')
r1_cookie=r1.cookies.get_dict() #拿到初始cookie(未被授权)
authenticity_token=re.findall(r'name="authenticity_token".*?value="(.*?)"',r1.text)[0] #从页面中拿到CSRF TOKEN

#第二次请求:带着初始cookie和TOKEN发送POST请求给登录页面,带上账号密码
data={
    'commit':'Sign in',
    'utf8':'✓',
    'authenticity_token':authenticity_token,
    'login':'[email protected]',
    'password':'alex3714'
}
r2=requests.post('https://github.com/session',
             data=data,
             cookies=r1_cookie
             )

login_cookie=r2.cookies.get_dict()

#第三次请求:以后的登录,拿着login_cookie就可以,比如访问一些个人配置
r3=requests.get('https://github.com/settings/emails',
                cookies=login_cookie)

print('[email protected]' in r3.text) #True

自动登录github(自己处理cookie信息)
补充
-
获取请求头中的UA
添加headers(浏览器会识别请求头,不加可能会被拒绝访问,比如访问
通常我们在发送请求时都需要带上请求头,请求头是将自身伪装成浏览器的关键,常见的有用的请求头如下
Host
Referer #大型网站通常都会根据该参数判断请求的来源
User-Agent #客户端
Cookie #Cookie信息虽然包含在请求头里,但requests模块有单独的参数来处理他,headers={}内就不要放它了
获取浏览器的 User-Agent

headers = {
    'User-Agent': 'Mozilla/5.0 (Windows NT 10.0; WOW64) AppleWebKit/537.36 (KHTML, like Gecko) Chrome/75.0.3770.100 Safari/537.36'
}
import requests
response = requests.get(
    url='https://www.baidu.com/s',
    headers = headers,
    params={
        'wd': '动物图片'
    }
)
response.encoding = 'utf-8'
print(response.text)
print(response.status_code)  # 200  打印响应状态码
eg:
#爬取视频
#https://www.pearvideo.com/category_loading.jsp?reqType=5&categoryId=1&start=48&mrd=0.9993282952193101&filterIds=1625835,1625642,1625837,1625841,1625870,1625869,1625813,1625844,1625801,1625856,1625857,1625847,1625838,1625827,1625787
#https://www.pearvideo.com/category_loading.jsp?reqType=5&categoryId=1&start=0
#获取视频
import re
res=requests.get('https://www.pearvideo.com/category_loading.jsp?reqType=5&categoryId=1&start=0')


reg_text='<a href="(.*?)" class="vervideo-lilink actplay">'

obj=re.findall(reg_text,res.text)
print(obj)
for url in obj:
    url='https://www.pearvideo.com/'+url
    res1=requests.get(url)
    obj1=re.findall('srcUrl="(.*?)"',res1.text)
    print(obj1[0])
    name=obj1[0].rsplit('/',1)[1]
    print(name)
    res2=requests.get(obj1[0])
    with open(name,'wb') as f:
        for line in res2.iter_content():
            f.write(line)