8.3 作为简单容器使用的视图组
8.3.1.单选按钮组
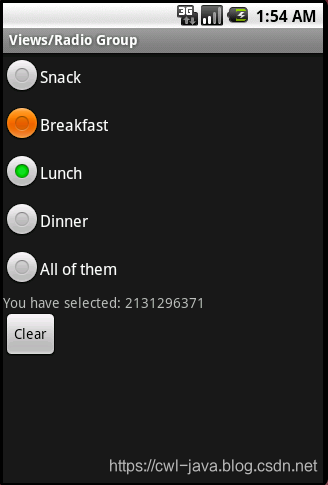
单选按钮组(RadioButton)是一组逻辑上相关的按钮,它们之中只能有一个被选中,单选按钮通常单选按钮被设计成圆形的外观。因此需要一个类将各个单选按钮包含在一起。
参考示例程序:RadioGroup1(ApiDemo=>Views=>Radio Group)
源代码:com/example/android/apis/view/RadioGroup1.java
布局文件:radio_group_1.xml
RadioGroup1 程序的运行结果如图所示:
此程序使用 RadioGroup 将几个单选按钮组织在一起,RadioGroup 的扩展关系如下:
 => android.view.View
 => android.view.ViewGroup
 => android.widget.LinearLayout
 => android.widget.RadioGroup
RadioGroup 本身扩展了线性布局,它的功能比较单一,是为了保证多个 RadioButton 只有一个被选中,这种关系通常也被称为多选互斥(multiple-exclusion)。
使用 RadioGroup 组成一个单选列表,需要将 RadioButton 放置在一个 RadioGroup 中。本例的布局文件内容如下所示:
<RadioGroup android:layout_width="fill_parent"
 android:layout_height="wrap_content"
 android:orientation="vertical" android:checkedButton="@+id/lunch"
 android:id="@+id/menu">
 <RadioButton android:text="@string/radio_group_1_breakfast"
 android:id="@+id/breakfast" />
 <RadioButton android:text="@string/radio_group_1_lunch"
 android:id="@id/ lunch" />
 <RadioButton android:text="@string/radio_group_1_dinner"
 android:id="@+id/ dinner" />
 <RadioButton android:text="@string/radio_group_1_all"
 android:id="@+id/ all" />
 <TextView android:text="@string/radio_group_1_selection"
 android:id="@+id/ choice" />
</RadioGroup>
RadioGroup 中的 XML 属性 android:checkedButton 表示这一组单选按钮 RadioButton 组中被选中的按钮,包含在一个 RadioGroup 之中的所有单选按钮只能有一个被选中。
根据扩展关系RadioGroup本身即是ViewGroup,也是LinearLayout,因此在RadioGroup中也可以包含RadioButton之外的其他控件。
8.3.2.使用滚动条
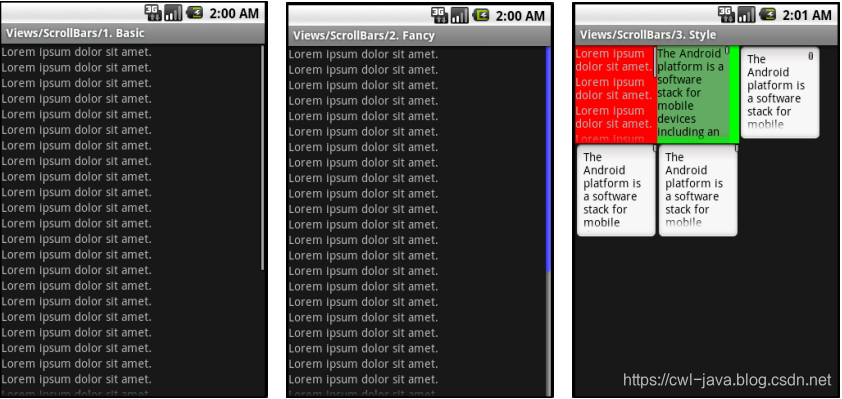
当屏幕上控件的内容超过屏幕本身的尺寸时,一般可以通过出现滚动条(ScrollBar)供用户拖动来显示没有显示的内容。Android 使用滚动视图(ScrollView)来支持滚动条。
参考示例程序:ScrollView(ApiDemo=>Views=>ScrollView=>各个程序)
源代码:
com/example/android/apis/view/ScrollBar1.java
com/example/android/apis/view/ScrollBar2.java
com/example/android/apis/view/ScrollBar3.java
布局文件:scrollbar1.xml、scrollbar2.xml 和 scrollbar3.xml
ScrollView 相关的程序的运行结果如图所示:
scrollbar1.xml 的内容如下所示:
<ScrollView xmlns:android="http://schemas.android.com/apk/res/android"
 android:layout_width="fill_parent"
 android:layout_height="wrap_content">
 <LinearLayout
 android:orientation="vertical"
 android:layout_width="fill_parent"
 android:layout_height="wrap_content">
 <LinearLayout
 android:id="@+id/layout"
 android:orientation="vertical"
 android:layout_width="fill_parent" android:layout_height="wrap_content">
 <TextView
 android:layout_width="fill_parent"
 android:layout_height="wrap_content"
 android:text="@string/scrollbar_1_text"/>
 <TextView
 android:layout_width="fill_parent"
 android:layout_height="wrap_content"
 android:text="@string/scrollbar_1_text"/>
 </LinearLayout>
</ScrollView>
在 scrollbar2.xml 和 scrollbar3.xml 文件的内容也与之类似。
ScrollView 类的扩展关系如下所示:
 => android.view.ViewGroup
 => android.widget.FrameLayout
 => android.widget.ScrollView
ScrollView 类通常在 XML 文件中使用,当屏幕上的内容预计超过屏幕尺寸时,用一个 ScrollView 将其他内容包含起来,这样就可以出现滚动条。
参考示例程序:ScrollView(Views=>Layout=>ScrollView=>2)
源代码:com/example/android/apis/view/ScrollView2.java
布局文件:scroll_view_2.xml
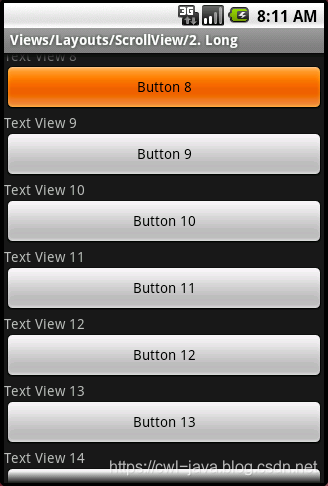
ScrollView2 程序的运行结果如图所示:
scroll_view_2.xml 布局文件的内容如下所示:
<ScrollView xmlns:android="http://schemas.android.com/apk/res/android"
 android:layout_width="fill_parent" android:layout_height="wrap_content"
 android:scrollbars="none">
 <LinearLayout
 android:id="@+id/layout"
 android:orientation="vertical"
 android:layout_width="fill_parent"
 android:layout_height="wrap_content">
 <TextView
 android:layout_width="fill_parent"
 android:layout_height="wrap_content"
 android:text="@string/scroll_view_2_text_1"/>
 <Button
 android:layout_width="fill_parent"
 android:layout_height="wrap_content"
 android:text="@string/scroll_view_2_button_1"/>
 </LinearLayout>
</ScrollView>
这里指定了 android:scrollbars="none"表示本屏幕中没有滚动杆,即使这样依然可以使用上下键和触摸屏进行上下移动。
源文件 ScrollView2.java 中的主要内容如下所示:
    public class ScrollView2 extends Activity {
        @Override
        protected void onCreate(Bundle savedInstanceState) {
            super.onCreate(savedInstanceState);
            setContentView(R.layout.scroll_view_2);
            LinearLayout layout = (LinearLayout) findViewById(R.id.layout);
            for (int i = 2; i < 64; i++) {
                TextView textView = new TextView(this);
                textView.setText("Text View " + i);
                LinearLayout.LayoutParams p = new LinearLayout.LayoutParams(
                        LinearLayout.LayoutParams.FILL_PARENT,
                        LinearLayout.LayoutParams.WRAP_CONTENT
                );
                layout.addView(textView, p);
                Button buttonView = new Button(this);
                buttonView.setText("Button " + i);
                layout.addView(buttonView, p);
            }
        }
    }
在这里是直接获得了 LinearLayout 的句柄,在其中用循环的方式增加了若干组(2-64)文本框和按钮,这样就形成了一个在界面上的长列表。本例子的第一组文本框和按钮是在布局文件中指定的,其他是在代码中指定的。
Android 应用虽然支持滚动视图,但是在手机上,一般的界面并不一定适合使用这种的方式,在大多数情况下还是应该协调屏幕的尺寸和元素,保证一个屏幕可以完全显示内容。
