在linux下配置VSCode的开发环境
工欲善其事,必先利其器
- 系统:Manjaro
- 内核版本:5.4.24
- gcc 版本:9.2.1
- VSCode:1.43.0
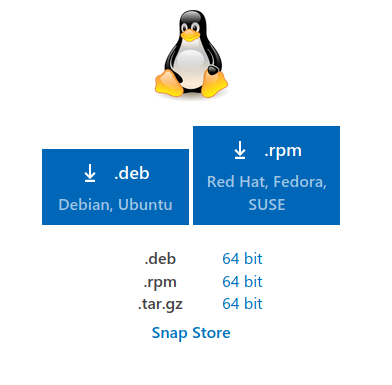
VSCode下载
由于我的Linux机是Manjaro(一个ArchLinux的版本),安装VSCode方式还和传统的Debian系以及RedHat系不一样。
正常情况下Arch版本可以通过如下方式安装
$ sudo pacman -S visual-studio-code-bin但我这系统提示签名未知信任,文件已损坏。所以直接上官网下载压缩包。
下载tar.gz压缩包并解压。
准备环境
- 创建工程项目目录
$ cd ~
$ mkdir -p workspace/clang/helloworld # 创建helloworld目录
$ cd workspace/clang/helloworld- 安装编译环境
VSCode只是个编辑器,编译工作仍然需要用户提供编译环境。
使用version或whereis来确保你的电脑安装了g++,gdb
$ g++ --version
$ gdb --version
$ whereis g++
$ whereis gdb这里我的电脑一开始whereis gdb显示有路径如下,但是无法调用version这样是不行的
$ whereis gdb
gdb: /usr/share/gdb
如果没有安装,则使用对应linux系列的命令进行安装,Manjaro情况如下
$ pacman -S g++ gdb启动VS Code
切换到工程文件夹目录,启动vscode,或者直接将目录文件夹拖入vscode。
接下来会的操作会自动在工程目录下建立一个.vscode文件夹,并在文件夹下建立,这些不需要手动进行
c_cpp_properties.json:编译器路径配置task.json:编译时的命令配置launch.json:Debug配置
写代码
- 新建
helloworld.cpp文件,写入每门语言的第一个程序Hello world
#include <iostream>
#include <string>
using namespace std;

int main(){
    cout << "Hello, world! from VS Code!" << endl;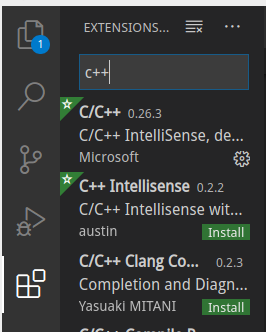
}- 安装C/C++插件
在左侧的插件选项卡里,搜索C++,安装微软的那个C/C++就行
回到helloworld.cpp,接着我们创建tasks.json,告诉VS Code如何编译该程序。
- 通过菜单的
Terminal>Configure Default Build Task。你会看到一个下拉框,选择C/C++:g++ build active file
这时候,在你的目录下会多出一个.vscode文件夹,里面自动生成了tasks.json。
内容大致如下
{
    // task.json
    "version": "2.0.0",
    "tasks": [
        {
            "type": "shell",
            "label": "g++ build active file",
            "command": "/usr/bin/g++",
            "args": [
                "-g",
                "${file}",
                "-o",
                "${fileDirname}/${fileBasenameNoExtension}"
            ],
            "options": {
                "cwd": "/usr/bin"
            },
            "problemMatcher": [
                "$gcc"
            ],
            "group": {
                "kind": "build",
                "isDefault": true
            }
        }
    ]
}command用来设置编译器,这里是g++的路径。args就是平时在命令行下,g++命令后面的参数。这里的编译文件为当前文件${file},编译输出为同一路径下的同名无后缀文件即helloworld。
- 回到
helloworld.cpp,通过菜单Terminal>Run Build Task来完成编译。如果成功终端输入如下

- 在终端中运行,输入命令
./helloworld

#include错误
若C程序中总有下划线,并且提示有检测到#include错误。请更新includePath
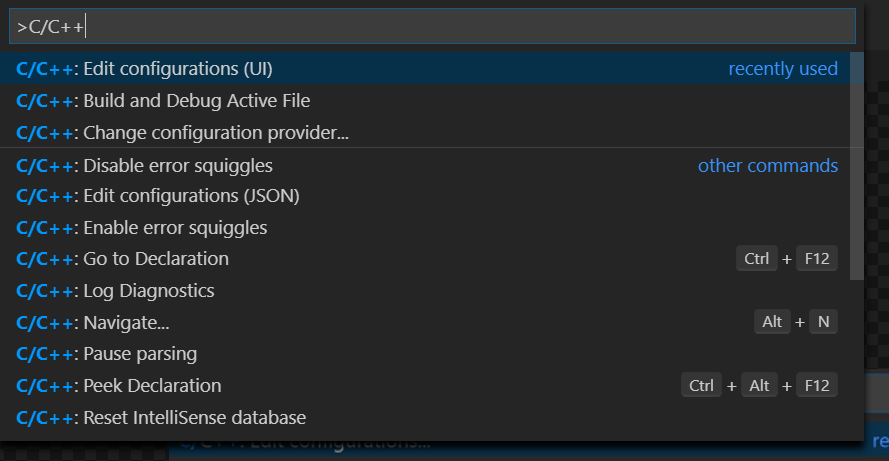
- 通过
Ctrl+Shift+P打开命令导航,运行命令C/C++: Edit Configurations(UI)
在includePath中添加,g++的位置include位置
通过命令$ g++ -v -E -x c++ -来查看,只需添加如图两个
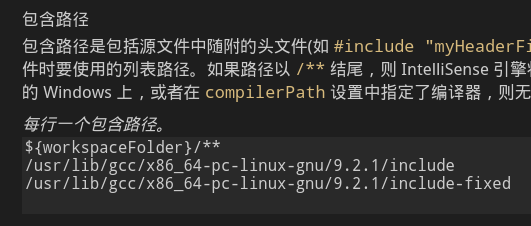
此时会自动生成c_cpp_properties.json文件
调试
- 通过菜单
Run>Add Configuration,选择C++ (GDB/LLDB)>g++ build and debug active file来创建launch.json文件
文件内容大致如下
{
    // launch.json
    "version": "0.2.0",
    "configurations": [
        {
            "name": "g++ build and debug active file",
            "type": "cppdbg",
            "request": "launch",
            "program": "${fileDirname}/${fileBasenameNoExtension}",
            "args": [],
            "stopAtEntry": false,
            "cwd": "${workspaceFolder}",
            "environment": [],
            "externalConsole": false,
            "MIMode": "gdb",
            "setupCommands": [
                {
                    "description": "为 gdb 启用整齐打印",
                    "text": "-enable-pretty-printing",
                    "ignoreFailures": true
                }
            ],
            "preLaunchTask": "g++ build active file",
            "miDebuggerPath": "/usr/bin/gdb"
        }
    ]
}其中miDebuggerPath是gdb的路径,另外还可以将stopAtEntry设置为true这样在进入主函数时自动设置断点。
完成
至此,一个项目的创建,编译,调试都已经可以在VS Code下进行。