Android studio案例——实现电话拨打、短信发送、相机、地图功能
概要
设计一个APP,实现实现电话拨打、短信发送、相机、地图功能的功能。
这里对电话拨打功能不作介绍,大家可以参考这篇文章:
Android studio案例——实现电话拨号.
一、短信发送
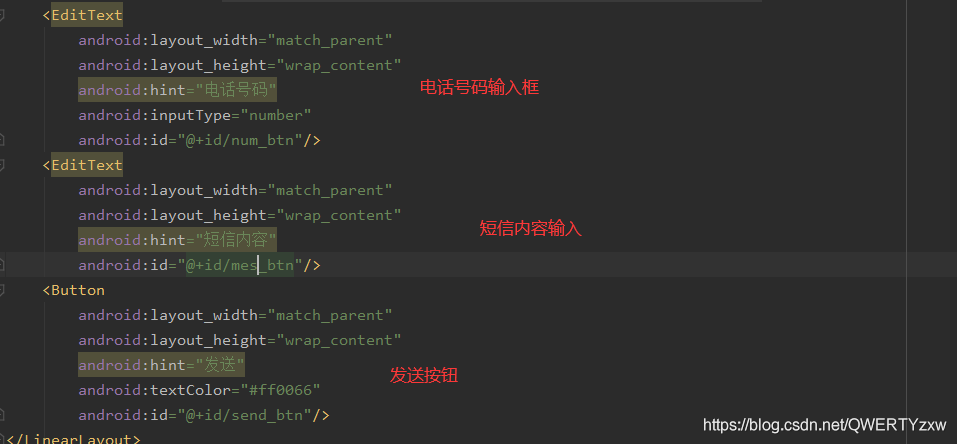
1、布局
.xml文件
<EditText
        android:layout_width="match_parent"
        android:layout_height="wrap_content"
        android:hint="电话号码"
        android:inputType="number"
        android:id="@+id/num_btn"/>
    <EditText
        android:layout_width="match_parent"
        android:layout_height="wrap_content"
        android:hint="短信内容"
        android:id="@+id/mes_btn"/>
    <Button
        android:layout_width="match_parent"
        android:layout_height="wrap_content"
        android:hint="发送"
        android:textColor="#ff0066"
        android:id="@+id/send_btn"/>
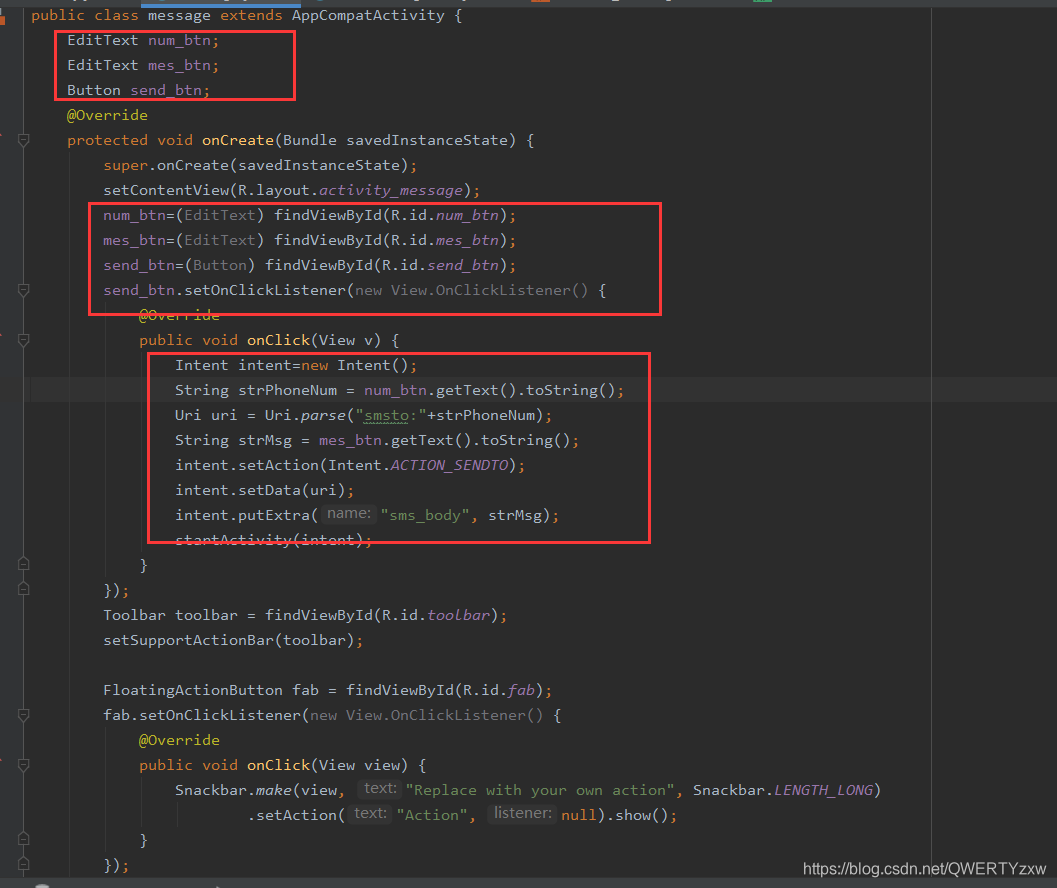
2、代码
.java文件
public class message extends AppCompatActivity {


    EditText num_btn;
    EditText mes_btn;
    Button send_btn;
    @Override
    protected void onCreate(Bundle savedInstanceState) {


        super.onCreate(savedInstanceState);
        setContentView(R.layout.activity_message);
        num_btn=(EditText) findViewById(R.id.num_btn);
        mes_btn=(EditText) findViewById(R.id.mes_btn);
        send_btn=(Button) findViewById(R.id.send_btn);
        send_btn.setOnClickListener(new View.OnClickListener() {


            @Override
            public void onClick(View v) {


                Intent intent=new Intent();
                String strPhoneNum = num_btn.getText().toString();
                Uri uri = Uri.parse("smsto:"+strPhoneNum);
                String strMsg = mes_btn.getText().toString();
                intent.setAction(Intent.ACTION_SENDTO);
                intent.setData(uri);
                intent.putExtra("sms_body", strMsg);
                startActivity(intent);
            }
        });
        Toolbar toolbar = findViewById(R.id.toolbar);
        setSupportActionBar(toolbar);

        FloatingActionButton fab = findViewById(R.id.fab);
        fab.setOnClickListener(new View.OnClickListener() {


            @Override
            public void onClick(View view) {


                Snackbar.make(view, "Replace with your own action", Snackbar.LENGTH_LONG)
                        .setAction("Action", null).show();
            }
        });
    }
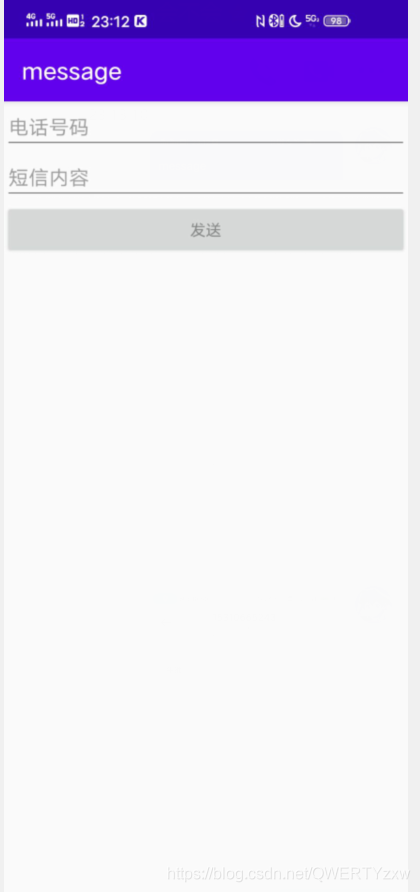
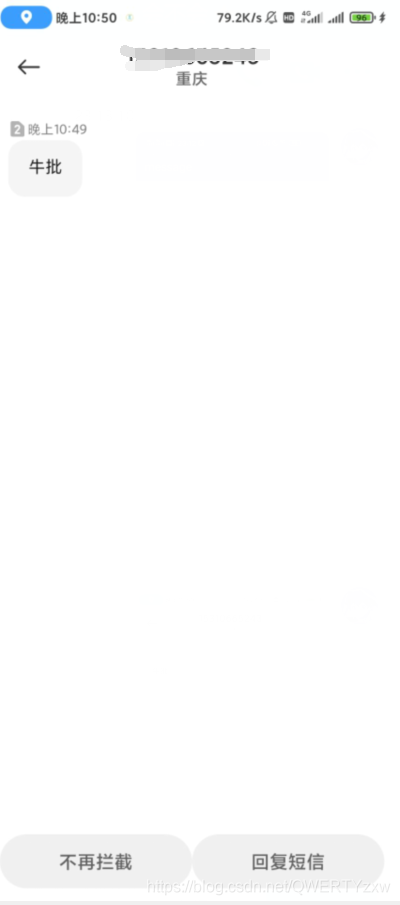
3、演示
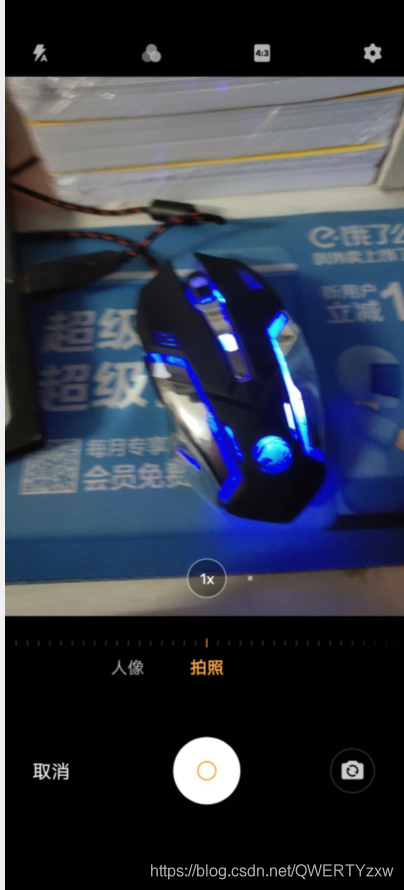
二、相机打开
1、代码
调用系统相机,因此没有布局。
.java
 case R.id.type3_btn:
                intent.setAction(MediaStore.ACTION_IMAGE_CAPTURE);
                break;
2、演示
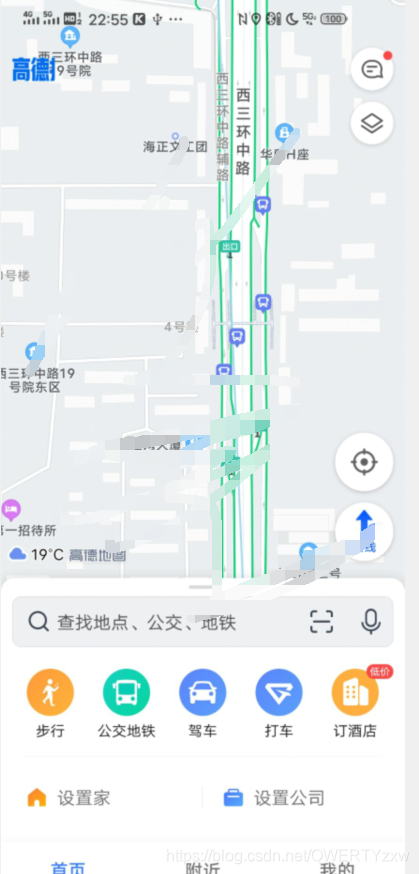
三、地图
1、代码
case R.id.type4_btn:
                Uri uri = Uri.parse("geo:39.9,116.3");
                intent.setAction(Intent.ACTION_VIEW);
                intent.setData(uri);
                break;
2、演示
扫描二维码关注公众号,回复:
13075149 查看本文章

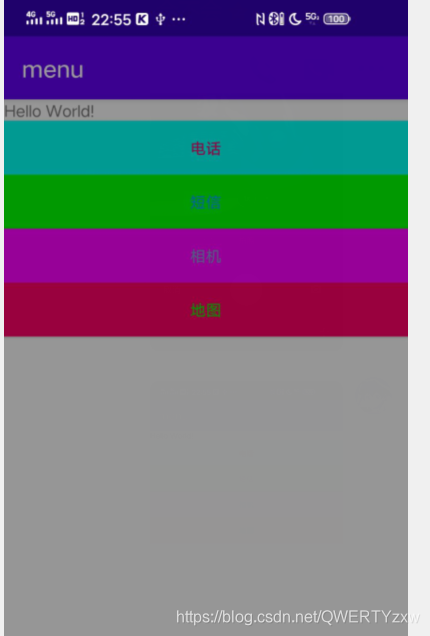
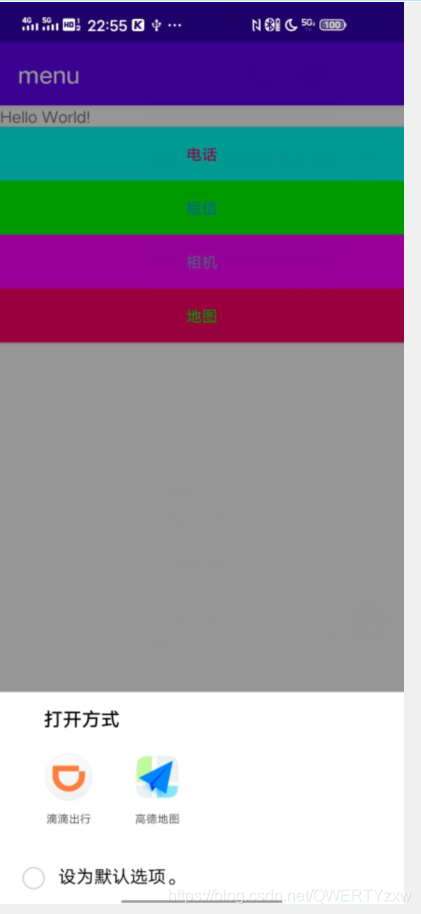
四、总界面
1、布局
.xml文件
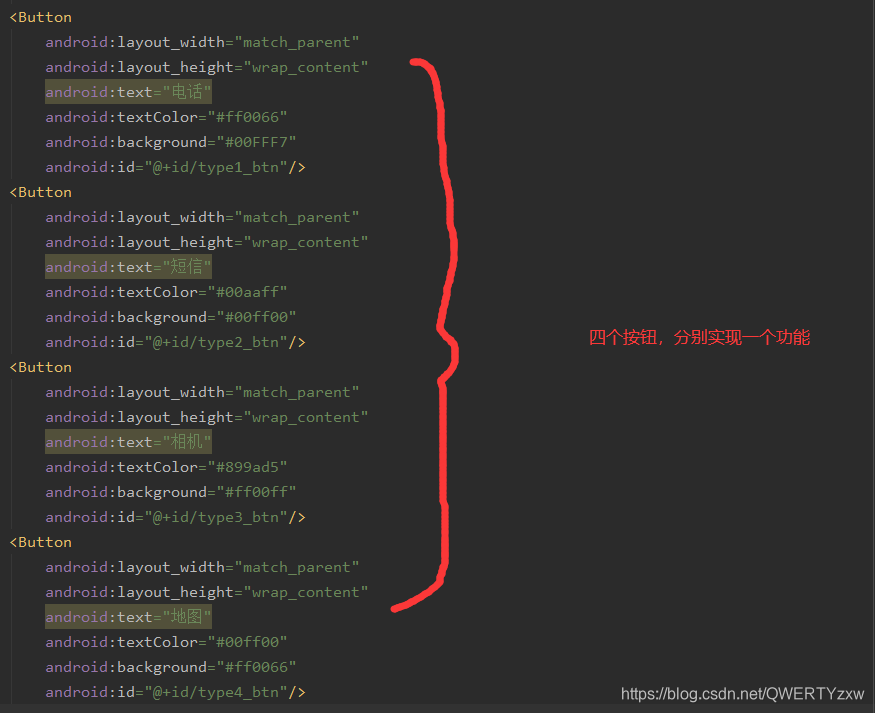
<Button
        android:layout_width="match_parent"
        android:layout_height="wrap_content"
        android:text="电话"
        android:textColor="#ff0066"
        android:background="#00FFF7"
        android:id="@+id/type1_btn"/>
    <Button
        android:layout_width="match_parent"
        android:layout_height="wrap_content"
        android:text="短信"
        android:textColor="#00aaff"
        android:background="#00ff00"
        android:id="@+id/type2_btn"/>
    <Button
        android:layout_width="match_parent"
        android:layout_height="wrap_content"
        android:text="相机"
        android:textColor="#899ad5"
        android:background="#ff00ff"
        android:id="@+id/type3_btn"/>
    <Button
        android:layout_width="match_parent"
        android:layout_height="wrap_content"
        android:text="地图"
        android:textColor="#00ff00"
        android:background="#ff0066"
        android:id="@+id/type4_btn"/>
2、代码
.java
public class MainActivity extends AppCompatActivity implements View.OnClickListener {


    Button type1_btn;
    Button type2_btn;
    Button type3_btn;
    Button type4_btn;
    @Override
    protected void onCreate(Bundle savedInstanceState) {


        super.onCreate(savedInstanceState);
        setContentView(R.layout.activity_main);
        type1_btn=(Button) findViewById(R.id.type1_btn);
        type2_btn=(Button) findViewById(R.id.type2_btn);
        type3_btn=(Button) findViewById(R.id.type3_btn);
        type4_btn=(Button) findViewById(R.id.type4_btn);
        type1_btn.setOnClickListener(this);
        type2_btn.setOnClickListener(this);
        type3_btn.setOnClickListener(this);
        type4_btn.setOnClickListener(this);
    }

    /**
     * Called when a view has been clicked.
     *
     * @param v The view that was clicked.
     */
    @Override
    public void onClick(View v) {


        Intent intent=new Intent();
        switch (v.getId()){


            case R.id.type1_btn:
                intent.setClassName("com.example.phone","com.example.phone.MainActivity");
                break;
            case R.id.type2_btn:
                intent.setClassName(this,"com.example.menu.message");
                break;
            case R.id.type3_btn:
                intent.setAction(MediaStore.ACTION_IMAGE_CAPTURE);
                break;
            case R.id.type4_btn:
                Uri uri = Uri.parse("geo:39.9,116.3");
                intent.setAction(Intent.ACTION_VIEW);
                intent.setData(uri);
                break;

        }
        startActivity(intent);
    }
}
3、效果演示