接着(上)部分的内容,本节关注物品栏中一些功能的实现,及
- 拾取操作的模拟
- 背包的显示与隐藏
- 物品提示信息
5.4 拾取模拟
有了(上)部分的铺垫,本节的目标是实现物品拾取功能。
物品拾取功能的逻辑分为三步:
- 查找所有物品中是否存在该物品
- 如果存在,num+1
- 如果不存在,查找空的网格,把新建的Inventory放入此方格中
首先,我们采用按键X模拟拾取动作
public GameObject InventoryItem;
void Update()
    {
        if (Input.GetKeyDown (KeyCode.X))    //每次按下X都随机拾取一种药品
        {
            GetId(Random.Range(1001,1004));
        }
    }
    public void GetId(int id)
    {
        InventoryItemGrid grid = null;
        foreach (InventoryItemGrid temp in itemGridList)    //这个循环判断temp.id是否等于当前网格的id,若是,  grid = temp,否则grid为null
        {
            if(temp.id == id)
                grid = temp;break;
        }
        if (grid != null)    //如果存在该物品
        {
            grid.PlusNumber();
        }
        else    //不存在
        {
            foreach(InventoryItemGrid temp in itemGridList)
            {
                if(temp.id == 0)
                {
                    grid = temp;break;
                }
            }
            if(grid != null)
            {
                GameObject itemGO = NGUITools.AddChild(grid.gameObject,InventoryItem);
                itemGO.transform.localPosition = Vector3.zero;    //每个物体在网格中的相对坐标都是0
                grid.SetId(id);
            }
        }
    }
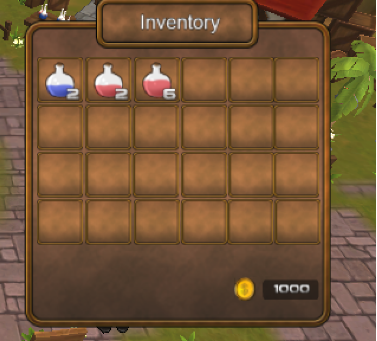
运行后,即可看到结果
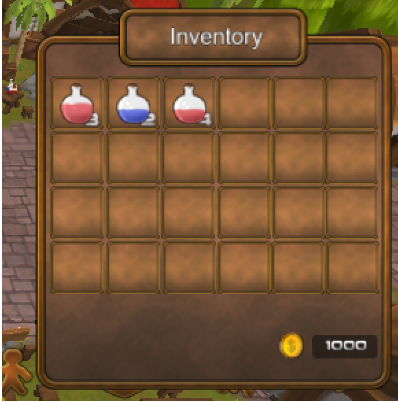
此时,网格中的的数字会被药品所遮挡。需要调整一下InventoryItemGrid和NumbelLabel的depth,由于Inventory是6,修改InventoryItemGrid和NumbelLabel的depth为7和9,即可解决。8留给新添加的物品
因此,在添加物品的时候,直接将其depth设置为8,即
itemGO.GetComponent<UISprite>().depth = 8; //通过访问UISprite元素以改变depth的值
5.5 背包的显示与隐藏
在开始时,背包默认为隐藏,只有点击背包按钮时,才进行显示。因此在Inventory的Awake()中和show()中设定,隐藏则在Hide()中设定。判断动画播放完成后,进行隐藏
   void Awake(){    //用Awake而不用Start是因为Awake是在脚本对象实例化时被调用,而Start是在第一帧被调用
        _instance = this;
        tween = this.GetComponent<TweenPosition> ();
        tween.AddOnFinished (this.OnTweenPlayFinished);    //通过AddOnFinished监听动画是否播放完成,若完成,则isShow = false,隐藏背包栏
        this.gameObject.SetActive (false);
    }

private bool isShow = false;    //初始化isShow为false,表示初始时不显示

    void Show()
    {
        isShow = true;
        this.gameObject.SetActive (true);
        tween.PlayForward ();
    }
    void Hide()
    {
        isShow = false;
        tween.PlayReverse ();
    }

    void OnTweenPlayFinished()    //播放完毕后,隐藏
    {
        if (isShow == false)
        {
            this.gameObject.SetActive(false);
        }
    }

    public void TransformState()
    {
        if (isShow == false)
        {
            Show ();
        }
        else
        {
            Hide ();
        }
    }
但这里会出现如下的错误,主要原因是Inventory设置为隐藏时,Inventory的子文件InventoryItemGrid将无法访问。
因此,Inventory不需要隐藏,只要播放tween动画后Inventory处在Camera之外即可。

故删除OnTweenPlayFinished() 函数即可实现功能。
5.6 背包物品的提示信息
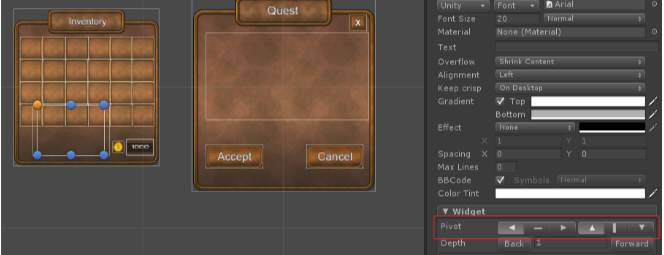
为了提高游戏性,在鼠标放在物品之上时,需要显示物品信息。在背包Inventory中添加一个Child Sprite,作为信息描述界面,并在其中添加一个Child Label,如下所示

当鼠标放在物品上时,要实现的功能包括
- 更新DesLabel的描述
- 更新InventoryDes的位置
接下来实现上述两个功能。将InventoryDes的中心点设置为左上角,即Widget中的Pivot设置为LeftTop
首先,DesLabel的描述如下,
public class InventoryDes : MonoBehaviour {

    public static InventoryDes _instance;    //描述设置为实例
    private UILabel label;
    // Use this for initialization
    void Awake () {
        _instance = this;
        label = this.GetComponentInChildren<UILabel> ();
    }

    // Update is called once per frame
    void Update () {

    }

    public void Show(int id)
    {
        ObjectsInfo.ObjectInfo info = ObjectsInfo._instance.GetObjectInfoFromDict (id);    //通过Show()传递的id获取info信息。
        string des = "";
        switch (info.type) {    //判断info中的物品种类
        case ObjectsInfo.ObjectType.Drug:
            des = GetDrugDes(info);
            break;
                }
        label.text = des;
    }

    string GetDrugDes(ObjectsInfo.ObjectInfo info)    //具体描述,返回一个string
    {
        string str = "";
        str += "名称:" + info.name + "\n";
        str += "回复血量值:" + info.hp + "\n";
        str += "回复魔法值:" + info.mp +"\n";
        str += "出售价:" + info.price_sell + "\n";
        str += "购买价:" +info.price_buy + "\n";

        return str;
    }

}
之后,为了监听鼠标是否移动到物品上方,我们在Prefabs之中的InventoryInsideItem,添加EventListener和EventTrigger,并在InventoryInsideItem脚本中新建两个函数处理这两个事件
    public void OnHoverOver()
    {
        print ("enter");
    }

    public void OnHoverOut()
    {
        print ("exit");
    }
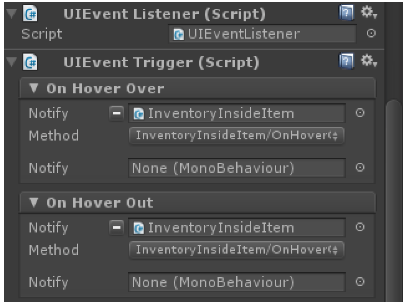
即可在鼠标移动到物品上是显示enter,移出时显示exit,事件被成功监听,可以对事件中的代码进行操作。
为了实现显示提示的效果,我们需要在InventoryInsideItem中调用Show()函数时获取当前的id,因此可以利用InventoryInsideItem中的SetIconName(string icon_name)函数,添加一个形参id,传入id值,更新OnHoverOver()和OnHoverOut()
private int id;
    private bool isHover = false;    //isHover作为标志位
    public void OnHoverOver()
    {
        isHover = true;
    }

    public void OnHoverOut()
    {
        isHover = false;
    }
void Update()
    {
        if (isHover)
        {
            InventoryDes._instance.Show (id);    //若isHover为true,显示信息
        }
    }
如下所示

最后只需要实现跟随鼠标功能即可
在每次调用InventoryDes中的Show()时,需要更改提示框的位置。在Show()中添加
this.gameObject.SetActive (true);
timer1 = 0.1f;
transform.position = UICamera.currentCamera.ScreenToWorldPoint (Input.mousePosition);
以获取当前鼠标的位置信息,并赋值给提示框,将提示框在Awake()中进行隐藏
this.gameObject.SetActive (false);
之后,在Update()中判断提示框是否处于隐藏来计时,并在计时结束后隐藏提示框
    void Update () {
        if (this.gameObject.activeInHierarchy == true)    //当前提示框是否处于隐藏状态,true表示显示
        {
            timer1 -= Time.deltaTime;    //将timer1减0.1秒
        }
        if (timer1 <= 0)    //当计时器小于0时,即鼠标离开后,隐藏提示框
        {
            this.gameObject.SetActive(false);
        }
    }
至此,就实现了提示框跟随鼠标移动的功能。
总结:背包系统的工程量较大,实现之前需要对整体的逻辑进行整理,否则挺容易出Bug的。。