前言

切换的时候,不重新调接口
具体实现
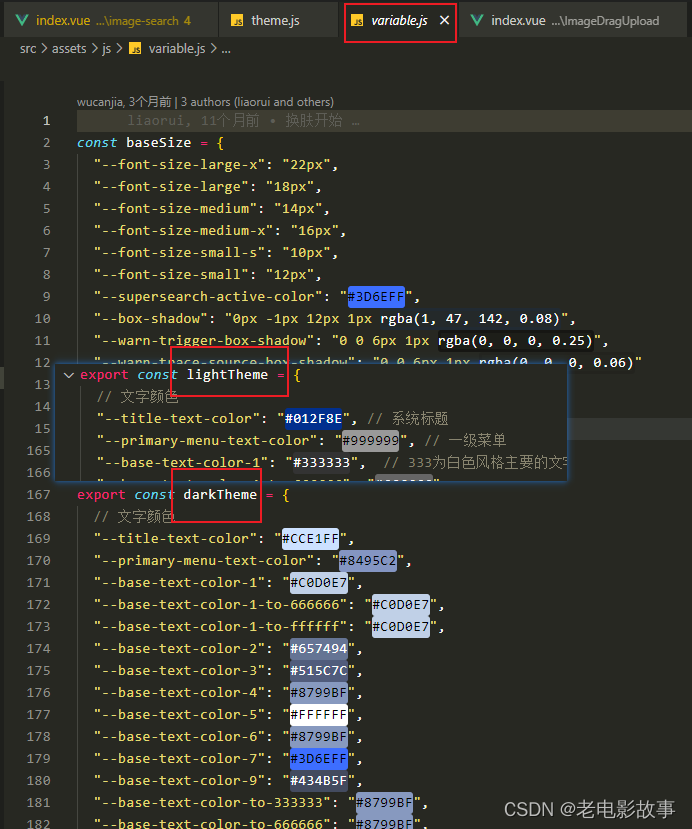
1、首先创建一个存放公共css变量的js文件
将需要定义的css变量存放到该js文件,例如(variable.js)
2、在页面使用这些css变量

3、安装css-vars-ponyfill 插件
npm i css-vars-ponyfill
「css-vars-ponyfill」 官方概念:在传统浏览器和现代浏览器中为CSS自定义属性(又名“CSS变量”)提供客户端支持的ponyfill。 (具体用法与概念请查阅官方网站)
4、封装切换主题的js,在main.js做初始化调用
theme.js
// theme.js
import {

     lightTheme, darkTheme } from "@/assets/js/variable"
import cssVars from "css-vars-ponyfill"
export const initTheme = (theme) => {


  document.documentElement.setAttribute("data-theme", theme ? "dark" : "light")
  cssVars({


    watch: true, // 当添加,删除或修改其<link>或<style>元素的禁用或href属性时,ponyfill将自行调用
    variables: theme ? darkTheme : lightTheme, // variables 自定义属性名/值对的集合
    onlyLegacy: false, // false  默认将css变量编译为浏览器识别的css样式  true 当浏览器不支持css变量的时候将css变量编译为识别的css
  })
}
5、main.js调用
import {

     initTheme } from './theme'
let theme = localStorage.getItem('theme') === 'light' ? false : true
initTheme(theme)
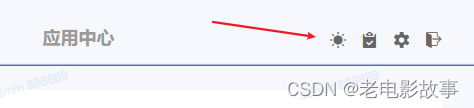
6、home.vue切换主题(我这边在文件夹是有图片的)
<template>
  <div class="home">
    <div>
      <el-switch
        v-model="theme"
        @change="changeSkin"
        active-text="黑色背景"
        inactive-text="白色背景"
      >
      </el-switch>
    </div>
    <div class="box">
      <div class="left"></div>
      <div class="right"></div>
    </div>
    <div class="less_box add">
      <img :src="avatar" alt="" />
      <el-input v-model="input" placeholder="请输入内容"></el-input>
    </div>
  </div>
</template>

<script>
import {

     initTheme } from '@/theme'
import {

     mapState, mapMutations } from 'vuex'
// import BUS from '@/utils/bus'
export default {


  data () {


    return {


      theme: true,
      input: ''
    }
  },
  computed: {


    ...mapState({

     sysTheme: 'theme' }),
    avatar () {


      // let theme = this.sysTheme === false ? 'light' : 'dark'
      return require(`@/assets/images/logo-${

      this.sysTheme}.png`)
    }
  },
  watch: {


  },
  mounted () {


    console.log(this.sysTheme);
    this.theme = this.sysTheme === 'dark' ? true : false
    // document.body.style.setProperty('--bottom-bg', '#0094ff');
    // initTheme(this.theme)
    // console.log(1111);
  },
  methods: {


    ...mapMutations({


      setTheme: 'setTheme'
    }),
    changeSkin () {


      localStorage.setItem('theme', this.theme ? 'dark' : 'light')
      this.setTheme(this.theme ? 'dark' : 'light')
      initTheme(this.theme)
    },
    // setThemeValue (theme) {


    //   theme = theme ? "light" : "dark";
    //   this.avatar = require(`@/assets/images/logo-${theme}.png`);
    // }
  }
}
</script>
<style lang="less" scoped>
.home {


  .box {


    margin-top: 100px;
    display: flex;
    justify-content: center;
    align-items: center;
    .left {


      background-color: var(--left-bg);
      height: 500px;
      flex: 1;
    }
    .right {


      background-color: var(--right-bg);
      height: 500px;
      flex: 1;
    }
  }
  .less_box {


    height: 200px;
    width: 1500px;
    display: flex;
  }
}
</style>
7、在app.vue中使用

8、vuex持久化
import Vue from "vue";
import Vuex from "vuex";
// import createPersistedState from 'vuex-persistedstate'
Vue.use(Vuex);

export default new Vuex.Store({


  state: {


    theme: localStorage.getItem('theme') === 'light' ? 'light' : 'dark'
  },
  mutations: {


    setTheme (state, data) {


      state.theme = data
    }
  },
  actions: {

    },
  modules: {

    },
  // plugins: [
  //   createPersistedState({


  //     storage: window.localStorage,
  //     reducer (val) {


  //       // console.log(val);
  //       return val
  //     }
  //   })]
});
到此所有的颜色切换和图片切换都已经完成,说一下图片切换的思路:图片的路径主要使用computed来获取,这样子我们在更改主题的时候,vuex保存的主题值就会发生变化,而computed会监视该变化从而达到更换图片路径的效果。