QML中经常会用到锚点布局,本篇简单演示一下锚点布局的使用。
目录
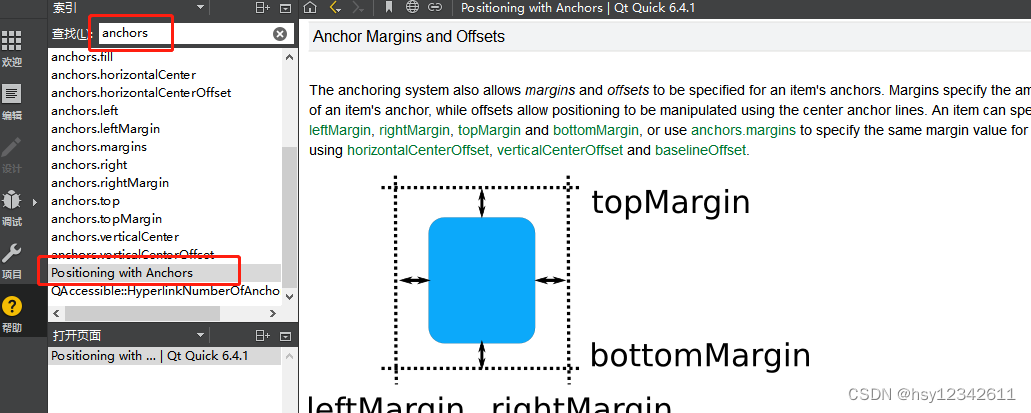
1.锚点布局的说明


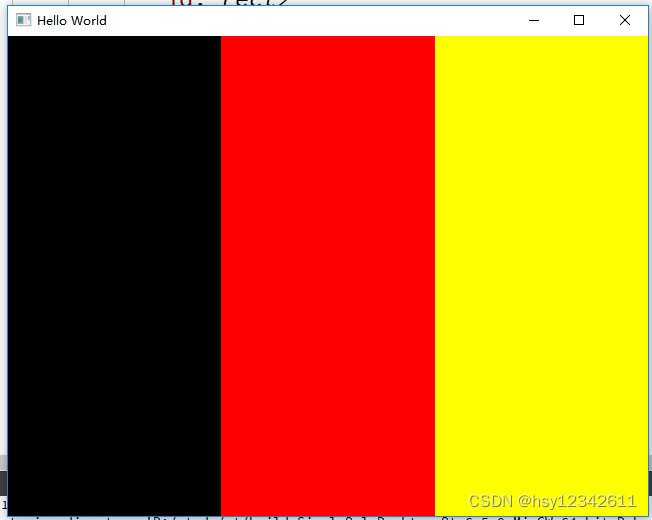
2.锚点布局三等分窗口
main.qml
import QtQuick 2.15
import QtQuick.Window 2.15
import QtQuick.Controls 2.15
// 别名必须大写,小写会报错:Invalid import qualifier ID
import './index.js' as MyJs

Window {
    width: 640
    height: 480
    visible: true
    title: qsTr("Hello World")

    Item {
           //锚点填充
           anchors.fill: parent

           Rectangle {
               id: rect1
               anchors.left: parent.left
               anchors.top: parent.top
               anchors.bottom: parent.bottom
               width: parent.width / 3
               color: "black"
           }

           Rectangle {
               id: rect2
               anchors.left: rect1.right
               anchors.top: parent.top
               anchors.bottom: parent.bottom
               width: parent.width / 3
               color: "red"
           }

           Rectangle {
               id: rect3
               anchors.left: rect2.right
               anchors.top: parent.top
               anchors.bottom: parent.bottom
               anchors.right: parent.right
               //width: parent.width / 3
               color: "yellow"
           }

       }

}
3.锚点布局拆分窗口

main.qml
import QtQuick 2.15
import QtQuick.Window 2.15
import QtQuick.Controls 2.15
// 别名必须大写,小写会报错:Invalid import qualifier ID
import './index.js' as MyJs

Window {
    width: 640
    height: 480
    visible: true
    title: qsTr("Hello World")

    Item {
           //锚点填充
           anchors.fill: parent

           Rectangle {
               anchors.fill: parent
               anchors.topMargin: 100
               anchors.leftMargin: 50
               id: rect1
               color: "red"

                Component.onCompleted: {
                    console.log(rect1.width, ' ', rect1.height, ' ', rect1.x, " ", rect1.y)
                }
           }

           Rectangle {
            id: rect2
            anchors.top: parent.top
            anchors.left: parent.left
            anchors.right: parent.right
            anchors.bottom: rect1.top
            color: "blue"
           }

           Rectangle {
            id: rect3
            anchors.top: rect2.bottom
            anchors.left: parent.left
            anchors.right: rect1.left
            anchors.bottom: parent.bottom
            color: "green"
           }

       }

}
4.窗口拖动


index.js
// qv4 - 只支持es5,不支持es6
function Cal(num) {
    this.Num = num

    this.add = function(data) {
        return this.Num + data
    }

    this.sub = function(data) {
        return this.Num - data
    }
}

// Math.random()*n : 生成[0, n)之间的随机数
function getRandomColor(n) {
    // 向下取整
    return Math.floor(Math.random() * n)
}

function getColorObj() {
    let red = getRandomColor(256)
    let green = getRandomColor(256)
    let blue = getRandomColor(256)
    return {red: red / 255, green: green / 255, blue: blue / 255}
}
main.qml
import QtQuick 2.15
import QtQuick.Window 2.15
import QtQuick.Controls 2.15
// 别名必须大写,小写会报错:Invalid import qualifier ID
import './index.js' as MyJs

Window {
    width: 640
    height: 480
    visible: true
    title: qsTr("Hello World")

    // Column是不可见元素
    Column {
        id: col1
        Button {
            text: "你好啊"

            //槽函数
            onClicked: {
                console.log("onClicked")
                console.log(add(111, 222))

                let my = new MyJs.Cal(1000)
                console.log(my.add(1))
                console.log(my.sub(1))

                rect.color = "yellow"

                let rgba = MyJs.getColorObj()
                rect.color = Qt.rgba(rgba.red, rgba.green, rgba.blue, 1.0)

            }

            function add(data1, data2) {
                return data1 + data2;
            }
        }
        Label {
            id: labl
            text: "Label"
            color: "blue"

            // 鼠标拖拽
            MouseArea {
                anchors.fill: parent
                drag.target: col1 //labl
            }
        }
    }

    // x y z布局,x y是相对于父窗口的位置
    // z=0 1 2 3 ... 越大越在上面
    Rectangle {
        id: rect
        x: col1.x
        y: col1.y + col1.height
        width: 100
        height: 100
        color: "red"

        Button {
            x: 0
            y: 0
            text: "clieck 1"
        }

        Button {
            x: 0
            y: 50
            text: "clieck 2"
        }
    }

    /*
    Rectangle {
        id: rect1
        x: parent.width - 100
        y: 0
        width: 100
        height: 100
        color: "yellow"
    }
    */

    // 锚点布局(anchor-layout) - 另一个:x y z直接定位布局
    // 任何可视化布局有x y z height width
    //

    Item {
        //锚点填充
        anchors.fill: parent

        /*
        Rectangle {
            id: rect2
            //锚定位
            // 靠右
            //anchors.right: parent.right
            // 上下左右居中
            // anchors.centerIn: parent
            // 靠左居中
            anchors.left: parent.left
            anchors.verticalCenter: parent.verticalCenter

            width: 100
            height: 100
            color: "black"
        }
        */


    }

}
5.完整代码
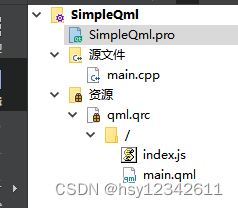
SimpleQml.pro
QT += quick

CONFIG += c++17

# You can make your code fail to compile if it uses deprecated APIs.
# In order to do so, uncomment the following line.
#DEFINES += QT_DISABLE_DEPRECATED_BEFORE=0x060000    # disables all the APIs deprecated before Qt 6.0.0

SOURCES += \
        main.cpp

RESOURCES += qml.qrc

# Additional import path used to resolve QML modules in Qt Creator's code model
QML_IMPORT_PATH =

# Additional import path used to resolve QML modules just for Qt Quick Designer
QML_DESIGNER_IMPORT_PATH =

# Default rules for deployment.
qnx: target.path = /tmp/$${TARGET}/bin
else: unix:!android: target.path = /opt/$${TARGET}/bin
!isEmpty(target.path): INSTALLS += target
main.cpp
#include <QGuiApplication>
#include <QQmlApplicationEngine>


int main(int argc, char *argv[])
{
#if QT_VERSION < QT_VERSION_CHECK(6, 0, 0)
    QCoreApplication::setAttribute(Qt::AA_EnableHighDpiScaling);
#endif
    QGuiApplication app(argc, argv);

    QQmlApplicationEngine engine;
    const QUrl url(QStringLiteral("qrc:/main.qml"));
    QObject::connect(&engine, &QQmlApplicationEngine::objectCreated,
                     &app, [url](QObject *obj, const QUrl &objUrl) {
        if (!obj && url == objUrl)
            QCoreApplication::exit(-1);
    }, Qt::QueuedConnection);
    engine.load(url);

    return app.exec();
}