本文转载自:https://blog.csdn.net/chou342175867/article/details/79632525
先说下几点注意:
1、maven版本要与ideal版本匹配,并且ideal版本在2018.1.3以上,不然启动后总是退出,还不报错
2、maven镜像中,要删除阿里云的国内镜像,配置如下面的镜像,不然spring cloud有些版本get不到
1.Spring Cloud Eureka 服务注册中心 Eureka原理 参考原文
2.项目工具及环境
- JDK1.8
- Spring boot 2.0.0
- Intellij Idea 2018.1.4
- maven 3.5.3
maven下载资源包的时候会遇到无法下载的问题;更改maven镜像为国外的地址
<mirror>
<id>ui</id>
<mirrorOf>central</mirrorOf>
<name>Human Readable Name for this Mirror.</name>
<url>http://uk.maven.org/maven2/</url>
</mirror>
<mirror>
<id>sprintio</id>
<mirrorOf>central</mirrorOf>
<name>Human Readable Name for this Mirror.</name>
<url>https://repo.spring.io/libs-snapshot/</url>
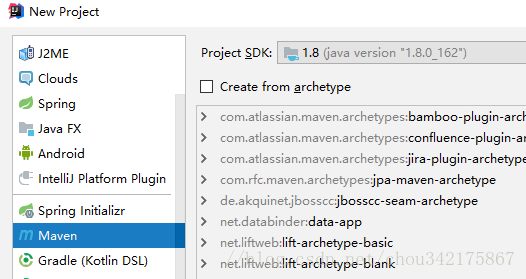
3.开始创建项目开始搭建
1.先打建一个最基础的maven项目,然后就自己next,再依次填写即可
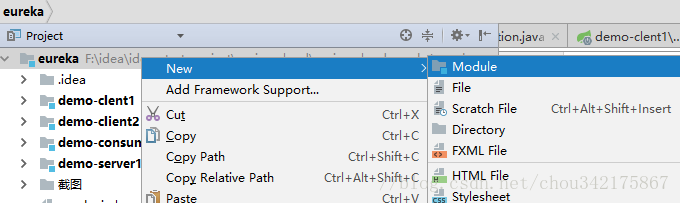
2.删除最该maven项目下的src文件夹,新建moudel
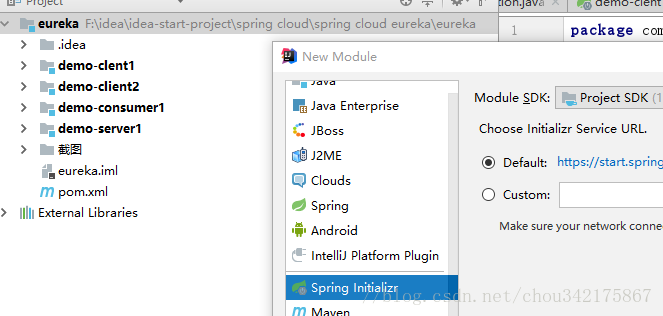
新建spring boot项目
先不选择依赖然后搭建项目基本目录

4.进行配置
1.. 配置项目的公共pom.xml
 <?xml version="1.0" encoding="UTF-8"?>
<project xmlns="http://maven.apache.org/POM/4.0.0"
         xmlns:xsi="http://www.w3.org/2001/XMLSchema-instance"
         xsi:schemaLocation="http://maven.apache.org/POM/4.0.0 http://maven.apache.org/xsd/maven-4.0.0.xsd">
    <modelVersion>4.0.0</modelVersion>

    <groupId>cn.qx</groupId>
    <artifactId>eureka</artifactId>
    <packaging>pom</packaging>
    <version>1.0-SNAPSHOT</version>
    <modules>
        <module>demo-server1</module>
        <module>demo-clent1</module>
    </modules>

    <parent>
        <groupId>org.springframework.boot</groupId>
        <artifactId>spring-boot-starter-parent</artifactId>
        <version>2.0.0.RELEASE</version>
        <relativePath/> <!-- lookup parent from repository -->
    </parent>

    <properties>
        <project.build.sourceEncoding>UTF-8</project.build.sourceEncoding>
        <project.reporting.outputEncoding>UTF-8</project.reporting.outputEncoding>
        <java.version>1.8</java.version>
        <spring-cloud.version>Finchley.M8</spring-cloud.version>
    </properties>

    <dependencies>
        <dependency>
            <groupId>org.springframework.boot</groupId>
            <artifactId>spring-boot-starter-cache</artifactId>
        </dependency>
        <!--<dependency>-->
            <!--<groupId>org.springframework.cloud</groupId>-->
            <!--<artifactId>spring-cloud-config-server</artifactId>-->
        <!--</dependency>-->

        <dependency>
            <groupId>org.springframework.session</groupId>
            <artifactId>spring-session-core</artifactId>
        </dependency>

        <dependency>
            <groupId>mysql</groupId>
            <artifactId>mysql-connector-java</artifactId>
            <scope>runtime</scope>
        </dependency>
        <dependency>
            <groupId>org.projectlombok</groupId>
            <artifactId>lombok</artifactId>
            <optional>true</optional>
        </dependency>
        <dependency>
            <groupId>org.springframework.boot</groupId>
            <artifactId>spring-boot-starter-test</artifactId>
            <scope>test</scope>
        </dependency>
    </dependencies>

    <dependencyManagement>
        <dependencies>
            <dependency>
                <groupId>org.springframework.cloud</groupId>
                <artifactId>spring-cloud-dependencies</artifactId>
                <version>${spring-cloud.version}</version>
                <type>pom</type>
                <scope>import</scope>
            </dependency>
        </dependencies>
    </dependencyManagement>

    <build>
        <plugins>
            <plugin>
                <groupId>org.springframework.boot</groupId>
                <artifactId>spring-boot-maven-plugin</artifactId>
            </plugin>
        </plugins>
    </build>

    <repositories>
        <repository>
            <id>spring-milestones</id>
            <name>Spring Milestones</name>
            <url>https://repo.spring.io/milestone</url>
            <snapshots>
                <enabled>false</enabled>
            </snapshots>
        </repository>
    </repositories>


</project>
2.. eureka-server的pom.xml文件的配置
<?xml version="1.0" encoding="UTF-8"?>
<project xmlns="http://maven.apache.org/POM/4.0.0"
xmlns:xsi="http://www.w3.org/2001/XMLSchema-instance"
xsi:schemaLocation="http://maven.apache.org/POM/4.0.0 http://maven.apache.org/xsd/maven-4.0.0.xsd">
<parent>
<artifactId>eureka</artifactId>
<groupId>cn.qx</groupId>
<version>1.0-SNAPSHOT</version>
</parent>
<modelVersion>4.0.0</modelVersion>
<artifactId>demo-sever1</artifactId>
<dependencies>
<dependency>
<groupId>org.springframework.cloud</groupId>
<artifactId>spring-cloud-starter-netflix-eureka-server</artifactId>
</dependency>
</dependencies>
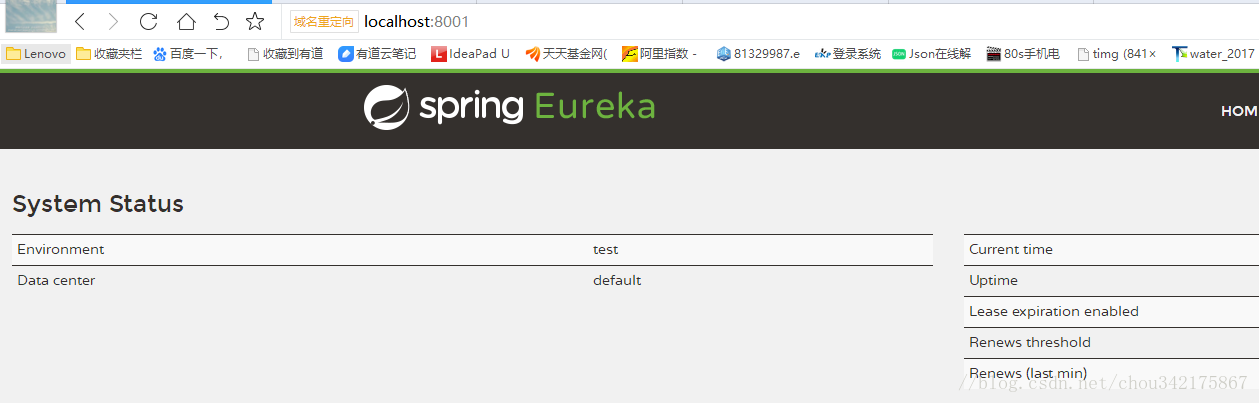
</project>3.. eureka-server的application.yml
server:
  port: 8001
spring:
  application:
    name: demo-server1

eureka:
  instance:
    hostname: localhost
  client:
    register-with-eureka: false
    fetch-registry: false
    service-url:
      #defaultZone: http://peer2:8002/eureka,http://peer3:8003/eureka
      defaultZone: http://localhost:8001/eureka/
4.. eureka-server的启动注解
import org.springframework.boot.SpringApplication;
import org.springframework.boot.autoconfigure.SpringBootApplication;
import org.springframework.cloud.netflix.eureka.server.EnableEurekaServer;

@SpringBootApplication
@EnableEurekaServer
public class DemoServer1Application {

    public static void main(String[] args) {
        SpringApplication.run(DemoServer1Application.class, args);
    }
}
配置好后启动即可。
5.eureka-client客户端,可以业务工程可以理解为服务提供者
- eureka-client的pom.xml
<?xml version="1.0" encoding="UTF-8"?>
<project xmlns="http://maven.apache.org/POM/4.0.0"
         xmlns:xsi="http://www.w3.org/2001/XMLSchema-instance"
         xsi:schemaLocation="http://maven.apache.org/POM/4.0.0 http://maven.apache.org/xsd/maven-4.0.0.xsd">
    <parent>
        <artifactId>eureka</artifactId>
        <groupId>cn.qx</groupId>
        <version>1.0-SNAPSHOT</version>
    </parent>
    <modelVersion>4.0.0</modelVersion>

    <artifactId>demo-client1</artifactId>

<dependencies>
    <dependency>
        <groupId>org.springframework.cloud</groupId>
        <artifactId>spring-cloud-starter-netflix-eureka-client</artifactId>
    </dependency>
    <!--必须引入-->
    <dependency>
        <groupId>org.springframework.boot</groupId>
        <artifactId>spring-boot-starter-web</artifactId>
    </dependency>
</dependencies>
</project>- ureka-client的application.yml
spring:
  application:
    name: demo-clent
server:
  port: 9001

eureka:
  client:
    service-url:
defaultZone: http://localhost:8001/eureka/- eureka-client启动注解
import org.springframework.boot.SpringApplication;
import org.springframework.boot.autoconfigure.SpringBootApplication;
import org.springframework.cloud.client.discovery.EnableDiscoveryClient;
import org.springframework.cloud.netflix.eureka.EnableEurekaClient;

@SpringBootApplication
@EnableEurekaClient
public class DemoClent1Application {

    public static void main(String[] args) {
        SpringApplication.run(DemoClent1Application.class, args);
    }
}- eureka-client创建一个HelloController提供外界访问
import org.springframework.web.bind.annotation.RequestMapping;
import org.springframework.web.bind.annotation.RequestParam;
import org.springframework.web.bind.annotation.RestController;

@RestController
public class HelloController {

    @RequestMapping("/info")
    public String Hello(){
        return "hello xxx,this is demo-client1 messge";
    }
    /*
        服务提供者
     */
    @RequestMapping("/producerHello")
    public String Hello(@RequestParam("name") String name){
        return "hello " + name + ",this is demo-client1 messge";
    }
}- 可以再创建一个服务提供者,仅仅application.yml端口不一样,其它的无区别
spring:
  application:
    name: demo-clent
server:
  port: 9002

eureka:
  client:
    service-url:
defaultZone: http://localhost:8001/eureka/- eureka-consumer配置及代码
ss- eureka-consumer的pom.xml
<?xml version="1.0" encoding="UTF-8"?>
<project xmlns="http://maven.apache.org/POM/4.0.0"
         xmlns:xsi="http://www.w3.org/2001/XMLSchema-instance"
         xsi:schemaLocation="http://maven.apache.org/POM/4.0.0 http://maven.apache.org/xsd/maven-4.0.0.xsd">
    <parent>
        <artifactId>eureka</artifactId>
        <groupId>cn.qx</groupId>
        <version>1.0-SNAPSHOT</version>
    </parent>
    <modelVersion>4.0.0</modelVersion>

    <artifactId>demo-consumer1</artifactId>

<dependencies>
    <dependency>
        <groupId>org.springframework.cloud</groupId>
        <artifactId>spring-cloud-starter-netflix-eureka-client</artifactId>
    </dependency>
    <!--与原来的feign依赖包引用不一样-->
    <dependency>
        <groupId>org.springframework.cloud</groupId>
        <artifactId>spring-cloud-starter-openfeign</artifactId>
    </dependency>
    <!--必须引入-->
    <dependency>
        <groupId>org.springframework.boot</groupId>
        <artifactId>spring-boot-starter-web</artifactId>
    </dependency>
</dependencies>
</project>- eureka-consumer的application.yml
spring:
  application:
    name: demo-consumer1

server:
  port: 7001

eureka:
  client:
    service-url:
      defaultZone: http://localhost:8001/eureka/
- eureka-consumer的代码
import org.springframework.boot.SpringApplication;
import org.springframework.boot.autoconfigure.SpringBootApplication;
import org.springframework.cloud.netflix.eureka.EnableEurekaClient;
import org.springframework.cloud.openfeign.EnableFeignClients;

@EnableEurekaClient
@EnableFeignClients
@SpringBootApplication
public class DemoConsumer1Application {

    public static void main(String[] args) {
        SpringApplication.run(DemoConsumer1Application.class, args);
    }
}
//@EnableDiscoveryClient :启用服务注册与发现
//@EnableFeignClients:启用feign进行远程调用
eureka-consumer的feign调用实现
//name:远程服务名,即spring.application.name配置的名称
@Service
@FeignClient(name= "demo-clent")
public interface HelloRemote {
    //需要匹配服务提供者接口名称
    @RequestMapping(value = "/producerHello")
    public String sayHello(@RequestParam(value="name") String name);
}
eureka-consumer的web层调用实现
@RestController
public class ConsumerController {

    @Autowired
    HelloRemote helloRemote;

    /*
        消费者的接口,去调用服务提供者
        问题:只能使用@RequestMapping("/consumerHello/{name}")  @PathVariable("name")方法 不知道有没有其它方式代替?
     */
    @RequestMapping("/consumerHello/{name}")
    public String index(@PathVariable("name") String name){
        return helloRemote.sayHello(name);
    }
    //有问题的
//    @RequestMapping("/consumerHello2")
//    public String index2(@RequestParam("name") String name){
//        return helloRemote.sayHello(name);
//    }
    @RequestMapping("/info")
    public String info(){
        return " Hi,I am a consumer!";
    }
}
测试
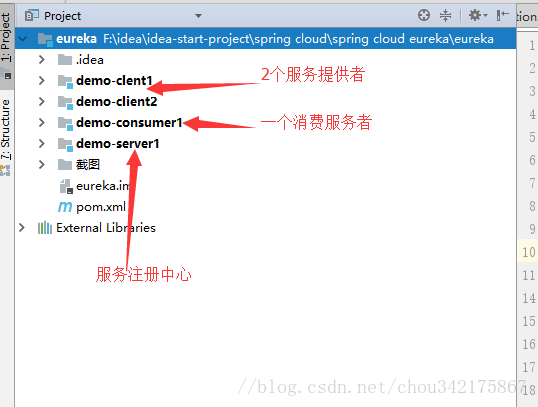
分别启动DemoServer1,DemoClient1,DemoClient2,DemoConsumer工程
- 在浏览器中输入http://localhost:8001/ 会出现2个 DEMO-CLENT项目,一个DEMO-CONSUMER1
- 在浏览器中输入http://localhost:9001/info会出现 hello xxx,this is demo-client1 messge
- 在浏览器中输入http://localhost:9002/info会出现 hello xxx,this is demo-client2 messge
- 在浏览器中输入http://localhost:7001/consumerHello/name会出现 hello name,this is demo-client1 messge ,多次访问会出现hello name,this is demo-client2 messge;因为服务中心自动提供了服务均衡负载的功能
Eureka-Server集群的配置参考Eureka-Server集群
问题集合
- 问题: eureka-client注册不上
- 解决: 添加 spring-boot-starter-web依赖包
<dependency>
        <groupId>org.springframework.boot</groupId>
        <artifactId>spring-boot-starter-web</artifactId>
</dependency>- 问题:spring-cloud-starter-feign依赖包引入不进来
- 解决:feign的依赖包名字有点改变,需要引入spring-cloud-starter-openfeign