一、grep概述
文本过滤命令:grep是一种文本搜索工具,根据用户指定的“模式”对目标文本进行匹配检查,打印匹配到的行。
grep:由正则表达式或者字符及基本文本字符所编写的过滤条件。
1、grep匹配字符
  -E  ##扩展正则表达式
  grep root passwd   ##模糊过滤root字符
  grep -E "\<root" passwd  ##模糊过滤以root开头的字符
  grep -E "\<root\>" passwd  ##精确过滤以root字符
  grep -E -i "\<root\>" passwd  ##忽略大小写过滤root字符
  grep -E -i "^\<root\>" passwd ##忽略大小写过滤以root字符开头的行
  grep -E -i "\<root\>$" passwd ##忽略大小写过滤以root字符结尾的行
  grep -E  "root|ROOT" passwd ##模糊过滤root和ROOT字符
命令操作内容
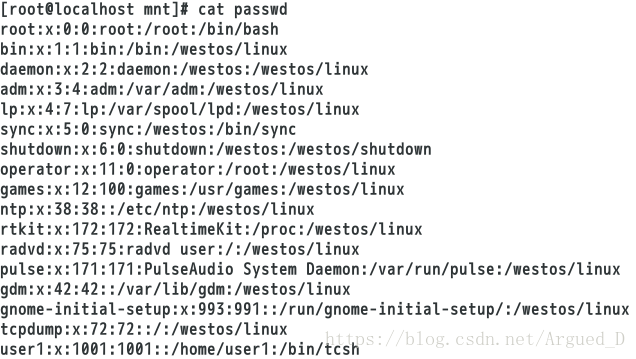
[root@localhost ~]# cp /etc/passwd /mnt/
[root@localhost ~]# cd /mnt
[root@localhost mnt]# ls
passwd
[root@localhost mnt]# grep root passwd   ##查看passwd中root字符行
[root@localhost mnt]# vim passwd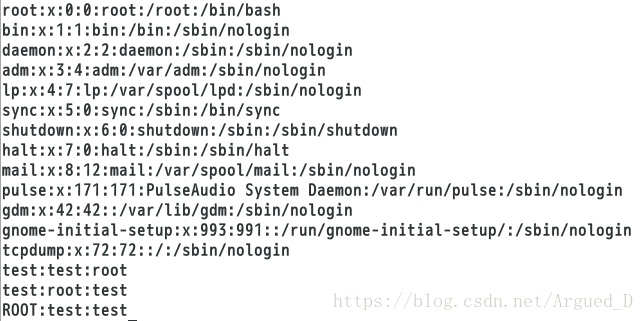
为了可以看到实验的结果在passwd文件里添加最后三行。
[root@localhost mnt]# grep ^root passwd   ##查看passwd中以root开头的字符行
[root@localhost mnt]# grep root$ passwd   ##查看passwd中以root结尾的字符行
[root@localhost mnt]# grep -i ^root passwd  ##忽略大小写查看passwd中以root开头的字符行
[root@localhost mnt]# grep -i -E "^root|root$" passwd  ##查看passwd中以root开头和结尾所有的字符行
[root@localhost mnt]# grep -i root passwd | grep -v -i -E "^root|root$"   ##查看passwd中以root在中间所有的字符行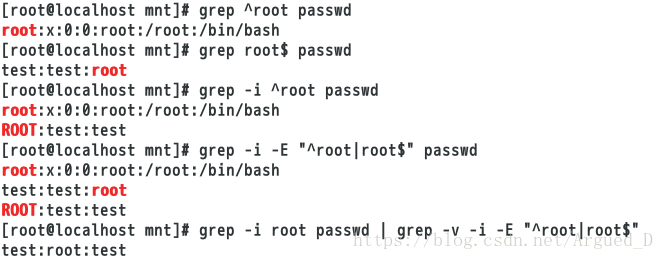
怎么过滤root在中间的行
[root@localhost mnt]# grep -i root passwd   ##过滤有root行
[root@localhost mnt]# grep -i root passwd | grep -v -i -E "^root|root$"   ##过滤含有root的行并且反向过滤root开头和结尾的行,保留root在中间的行
[root@localhost mnt]# grep -v -i -E "^root|root$" passwd | grep -i root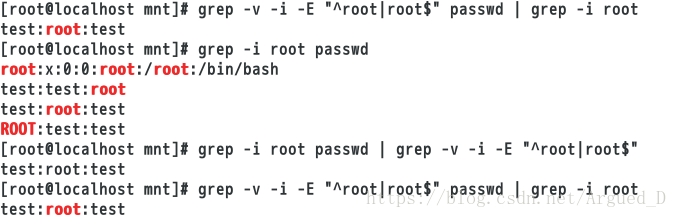
2、grep中字符的匹配次数设定
  grep -E "x.." prc     ##x后至少2个字符
  grep -E "x..\>" prc   ##x后2个字符结尾
  grep -E "x..y\>" prc  ##x..y结尾ie
  grep -E "\<x..y\>" prc  ##x开头,2个字符,y结尾

*     字符出现[0-任意次]
\?   字符出现[0-1次]
\+    字符出现[1-任意次]
\{n\}   字符出现[n次]
\{m,n\} 字符出现[最少出现m次,最多出现n次]
\{0,n\} 字符出现[0-n次]
\{m,\}  字符出现[至少m次]
\{xy\}\{n\}xy 关键字出现[n次]
*     关键字之间匹配任意字符
命令操作内容
[root@localhost mnt]# vim test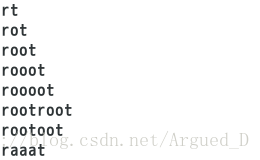
[root@localhost mnt]# grep 'r..t' test  ##过滤rt中间两个字符的行
[root@localhost mnt]# grep 'r*t' test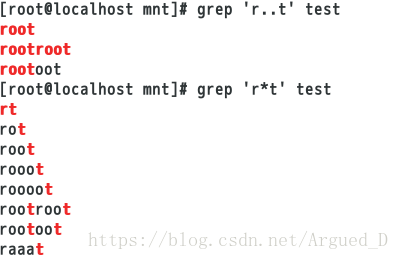
[root@localhost mnt]# grep -E 'ro*t' test   ##o字符出现0-任意次
[root@localhost mnt]# grep -E 'ro?t' test  ##o字符出现0-1次
[root@localhost mnt]# grep -E 'ro{1,}t' test  ##o字符出现1-任意次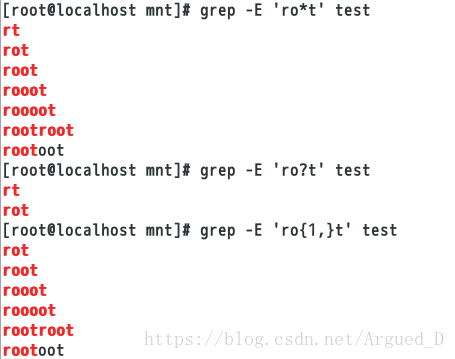
[root@localhost mnt]# grep -E 'ro{1,3}t' test  ##o字符出现1-3次
[root@localhost mnt]# grep -E 'ro{,3}t' test   ##o字符出现0-3次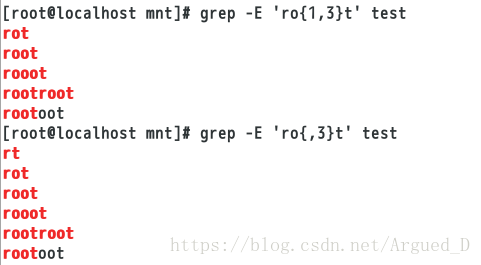
[root@localhost mnt]# grep -E '(root){2,}' test   ##显示两个以上的root行
[root@localhost mnt]# grep -E 'r.*t' test ##显示r和t之间的任意字符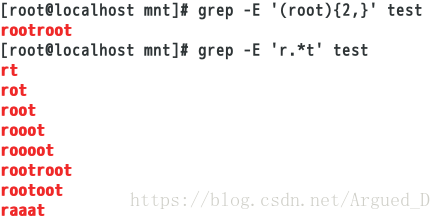
3、grep中字符的匹配位置设定
^关键字
关键字$
\<关键字
关键字\>
\<关键字\>
命令操作内容
[root@localhost mnt]# grep -E 'r....' test  ##过滤r开头后面有四个字符的行
[root@localhost mnt]# grep -E 'r....\>' test  ##过滤r开头后面只有有四个字符的行
[root@localhost mnt]# grep -E '\<....r' test  ##过滤r结尾前面只有四个字符的行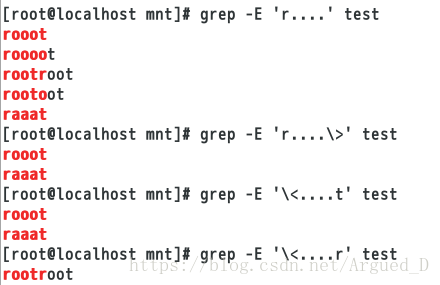
4、写一个shell脚本列出可登陆用户
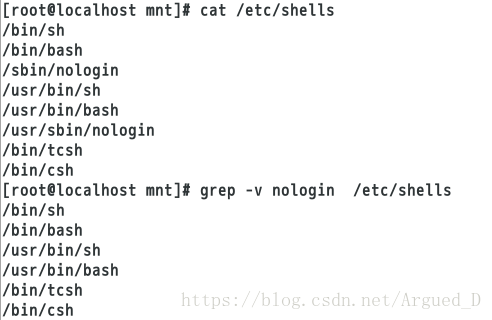
[root@localhost mnt]# cat /etc/shells
[root@localhost mnt]# grep -v nologin  /etc/shells  ##过滤/etc/shells里面有关于nologin字符串
[root@localhost mnt]# echo `grep -v nologin /etc/shells` ##将过滤后的结果写在一行
[root@localhost mnt]# echo `grep -v nologin /etc/shells` |sed 's/ /|/g'   ##将写在同一行的结果空格用|替代

脚本编写:
[root@localhost mnt]# vim show_loginuser.sh
[root@localhost mnt]# chmod +x show_loginuser.sh  ##给脚本一个可执行权限
脚本运行结果:
[root@localhost mnt]# /mnt/show_loginuser.sh  ##运行脚本
[root@localhost mnt]# useradd -s /bin/tcsh user1 ##建立user1用户
[root@localhost mnt]# su - user1   ##切换到user1用户
[user1@localhost ~]$ logout
[root@localhost mnt]# /mnt/show_loginuser.sh  ##再次运行脚本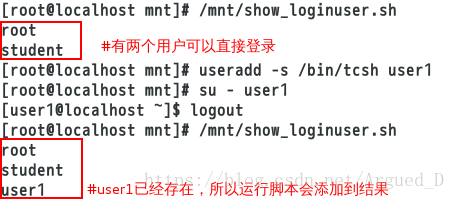
sed行编辑器
sed(Stream EDitor),是一种行编辑工具,它一次处理一行内容。处理时,把当前匹配到的行存储在临时缓冲区中,称为“模式空间”(pattern space),接着用sed命令对这些数据做出相应的增删改查操作,处理完成后,默认输出至屏幕,而未被匹配到的行也将默认输出至屏幕。而原来的文件内容并没有发生改变,除非使用重定向存储输出。
一、sed的命令格式
1.调用sed命令有两种形式
    sed [options]'command'file(s)
    sed [options] -f scriptfile file(s)
2.sed 对字符的处理
p 显示
d 删除
a 添加
c 替换
w 写入
i 插入
二、sed命令具体用法
1.p模式操作(显示)
[root@localhost mnt]# rm -fr *
[root@localhost mnt]# cp /etc/fstab /mnt
[root@localhost mnt]# sed -n '/^#/p' fstab  ##显示以#开头的行
[root@localhost mnt]# sed -n '/^#/!p' fstab  ##显示除了以#开头的行
[root@localhost mnt]# sed -n '/0$/p' fstab  ##显示以0结尾的行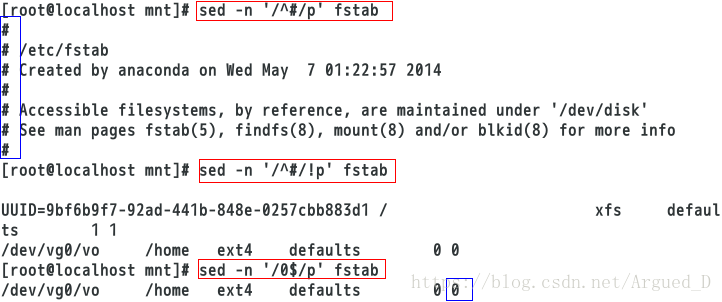
[root@localhost mnt]# cat -n fstab ##查看fstab文件的行数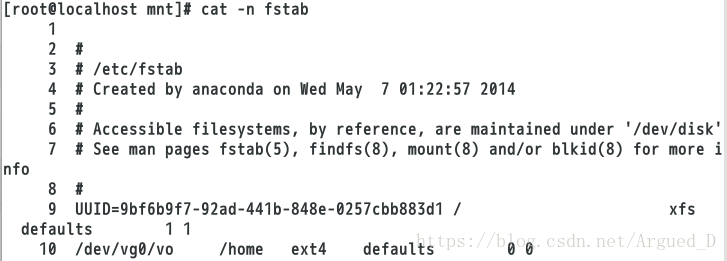
[root@localhost mnt]# cat -n fstab |sed -n '2,6p' ##显示2-6行
[root@localhost mnt]# cat -n fstab |sed -n -e '2p' -e '6p' ##显示第二行和第六行(-e表示多个条件)
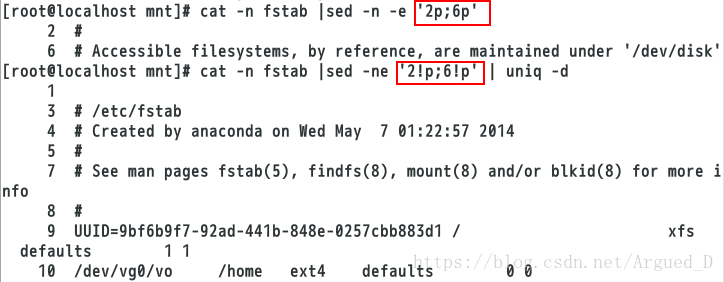
[root@localhost mnt]# cat -n fstab |sed -n -e '2p;6p' ##显示第二行和第六行
[root@localhost mnt]# cat -n fstab |sed -ne '2!p;6!p' | uniq -d ##显示除了第二行和第六行
2.d操作模式(删除)
[root@localhost mnt]# sed -e '2d;6d' fstab ##除了2和6行都显示
[root@localhost mnt]# sed -e '/^#/d' fstab ##删除以#开头的行
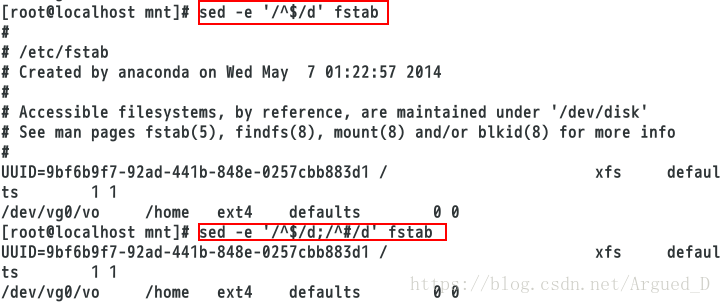
[root@localhost mnt]# sed -e '/^$/d' fstab ##删除空格行
[root@localhost mnt]# sed -e '/^$/d;/^#/d' fstab ##删除空格行和#开头的行
3、a操作模式(添加)
[root@localhost mnt]# vim westos
[root@localhost mnt]# cat westos
[root@localhost mnt]# sed '/hello/aworld' westos
[root@localhost mnt]# sed '/hello/aworld\nwestos' westos ##\n在world后面换行添加
[root@localhost mnt]# sed 's/hello/hello world/g' westos  ##将hello更换成hello world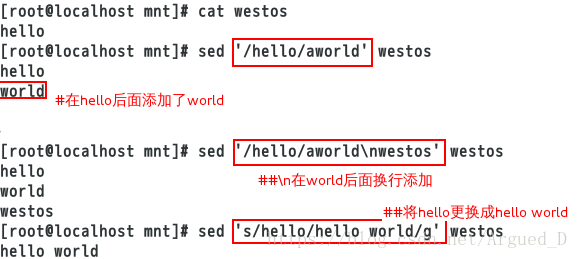
4、i操作模式(插入)
[root@localhost mnt]# sed '/hello/iwestos' westos
5、c操作模式
[root@localhost mnt]# cat westos
[root@localhost mnt]# sed '/hello/chello world' westos
##将hello替换成hello world
6、w操作模式(写入)
[root@localhost mnt]# sed -n '/bash$/p' passwd > file
[root@localhost mnt]# cat file
[root@localhost mnt]# rm -fr file
[root@localhost mnt]# sed -n '/bash$/wfile' passwd
[root@localhost mnt]# cat file
注意:w和>的区别:w做的是一个命令,>做的是两个命令;w的效率要比>高

[root@localhost mnt]# sed '/hello/p' westos
[root@localhost mnt]# sed '/hello/=' westos
[root@localhost mnt]# echo `sed '/hello/=' westos`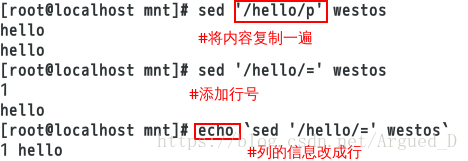
[root@localhost mnt]# sed '6r westos' fstab ##将westos的内容加到fstab文件的第六行下面
7、sed其他用法
 sed '/^UUID/w /mnt/test' fstab       ##将文件fstab以UUID开头的那一行写入/mnt/test
 sed -n '/^UUID/w /mnt/test' fstab    ##同上,但是不输出结果
 sed '/^UUID/=' fstab                 ##将文件fstab以UUID开头的行号输出
 sed '1r /mnt/hello' fstab        ##将/mnt/hello文件写入fstab的第1行
sed '$r /mnt/hello' fstab ##将/mnt/hello文件写入fstab的最后1行[root@localhost mnt]# sed -n '/^UUID/=' fstab ##只显示行数
[root@localhost mnt]# sed '/^UUID/=' fstab ##显示行数和内容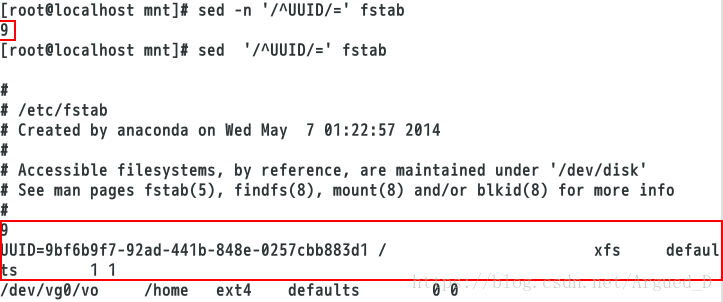
[root@localhost mnt]# sed '=' fstab | sed 'N;s/\n//g'
##在文件前面加行号
[root@localhost mnt]# sed '=' fstab | sed 'N;s/\n/ /g'
##内容和行号之间有空格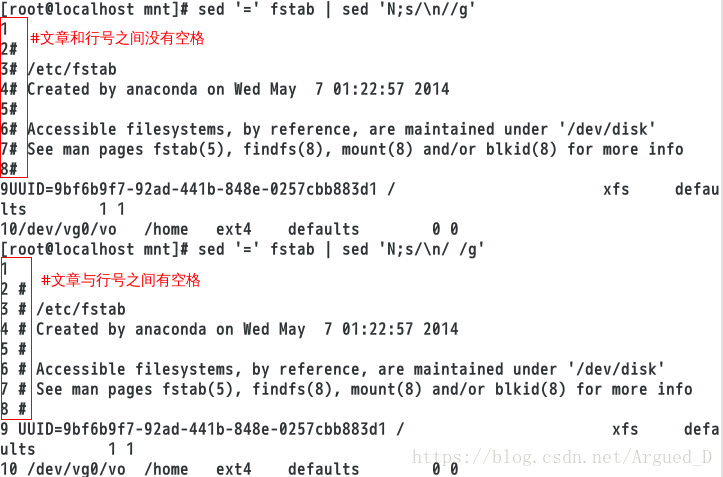
[root@localhost mnt]# sed 'G' fstab
##在内容的每一行后面加一个空行
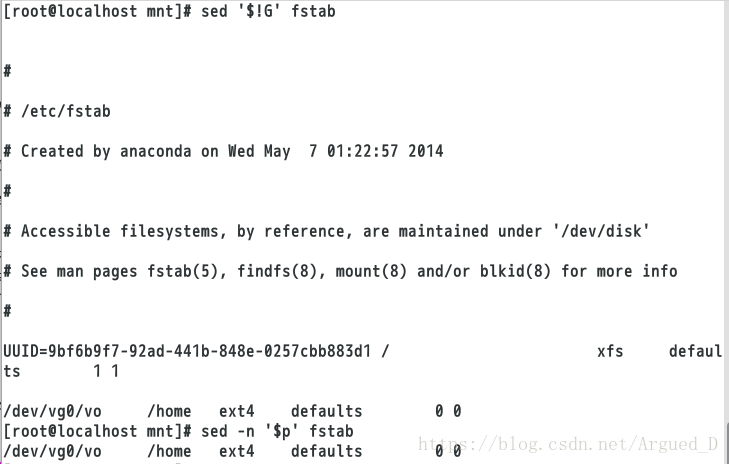
[root@localhost mnt]# sed '$!G' fstab
##在最后一行不加空行
[root@localhost mnt]# sed -n '$p' fstab
##显示最后一行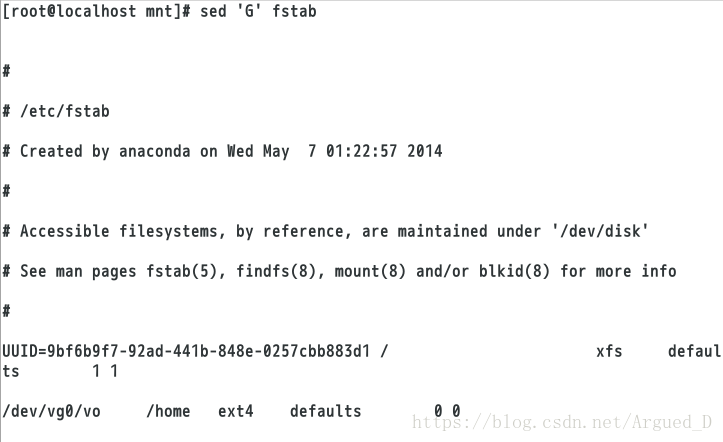
8、s替换模式
[root@localhost mnt]# sed 's/nologin/westos/g' passwd
##将全文的nologin替换成westos(/g是替换全文)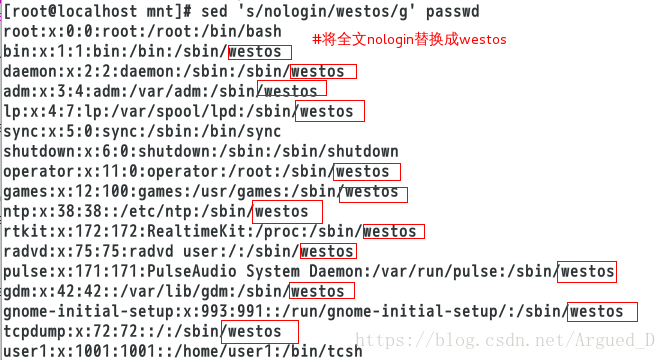
[root@localhost mnt]# sed '3,5s/nologin/westos/g' passwd ##替换3到5行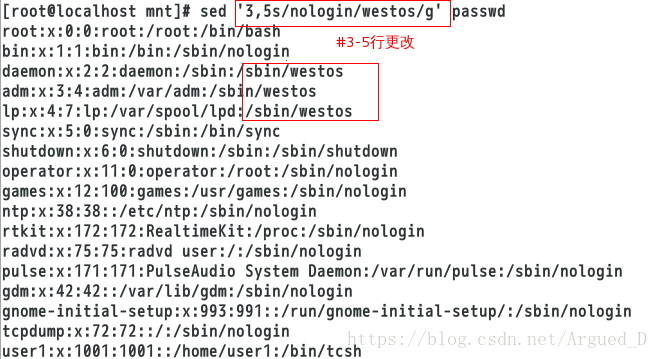
[root@localhost mnt]# sed '/adm/,/sync/s/nologin/westos/g' passwd
##替换关键字adm到sync之间的内容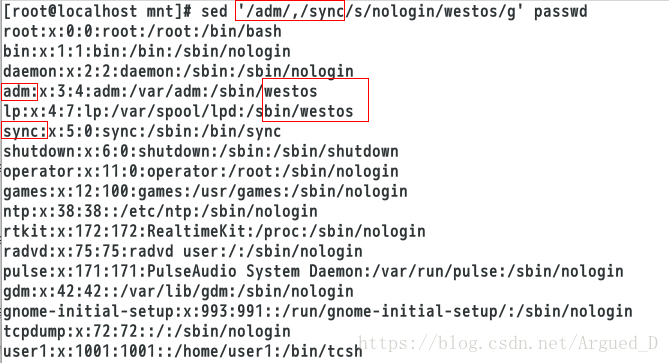
[root@localhost mnt]# sed -e '/adm/,/sync/s/nologin/westos/g;s/sbin/dmf/g' passwd
##多条指令同时执行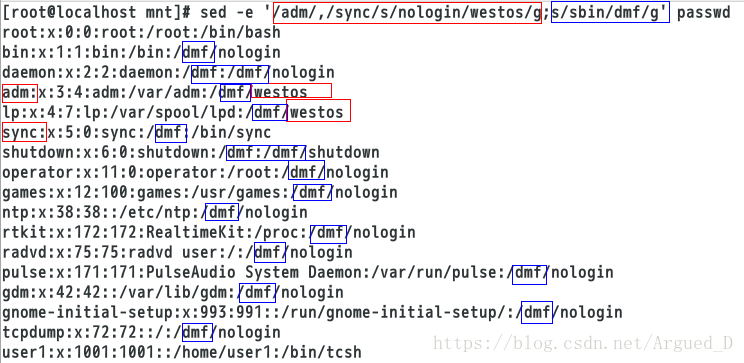
[root@localhost mnt]# vim file
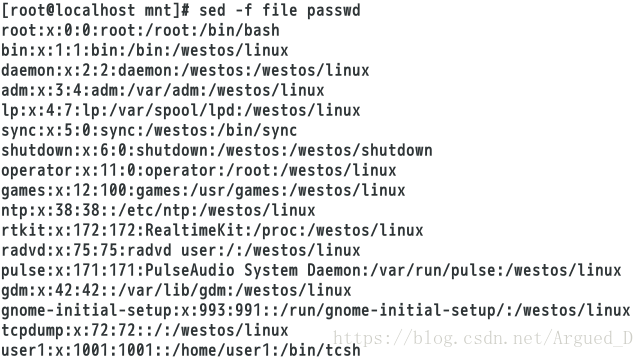
[root@localhost mnt]# sed -f file passwd ##执行file里的替换命令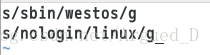
[root@localhost mnt]# cat passwd  ##所有的替换都不会改变原文件
[root@localhost mnt]# sed -f file -i passwd  ##将原文件改变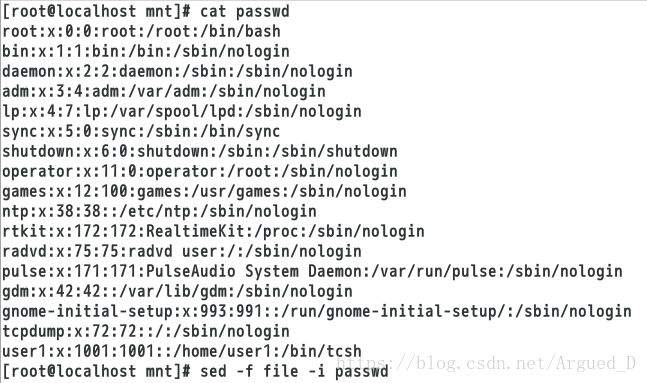
9、写一个shell脚本同时建立三个用户
[root@localhost mnt]# vim userfile
user1
user2
user3
[root@localhost mnt]# vim passfile
user1123
user2123
user3123
[root@localhost mnt]# vim user_create.sh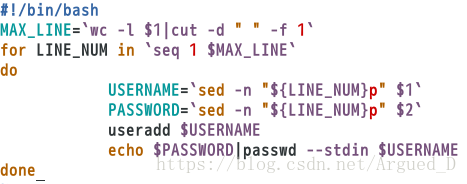
[root@localhost mnt]# sh user_create.sh userfile passfile ##执行脚本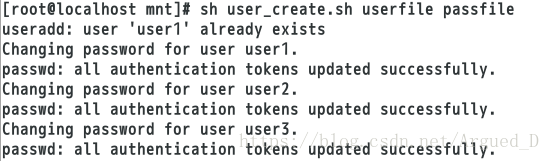
[root@localhost mnt]# id user1
[root@localhost mnt]# id user2
[root@localhost mnt]# id user3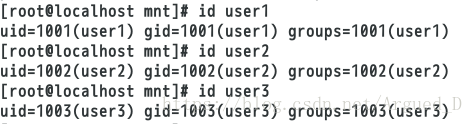
10、编写脚本自动安装httpd并使用指定端口
[root@localhost mnt]# vim install_apache.sh ##编辑脚本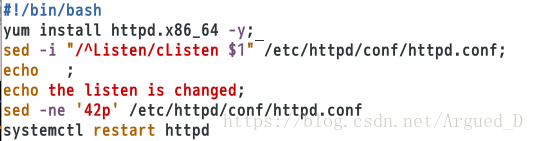
[root@localhost mnt]# sh install_apache.sh 8080   ##运行脚本
[root@localhost mnt]# netstat -antlupe | grep 8080  ##查看8080端口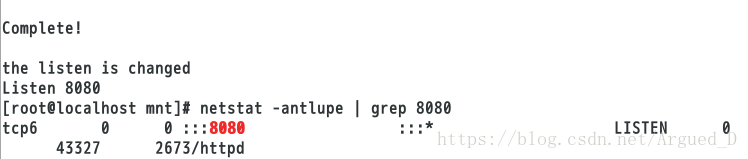
三、awk报告生成器
awk概述
awk是一个强大的文本分析工具,相对于grep的查找,sed的编辑,awk在其对数据分析并生成报告时,显得尤为强大。简单来说awk就是把文件逐行的读入,以空格为默认分隔符将每行切片,切开的部分再进行各种分析处理。
1、awk参数
awk -F : 'BEGIN{print "NAME"}{print $1}' passwd
  ##以:为分隔符,处理前打印 NAME ,打印第1列
awk -F : 'BEGIN{print "NAME"}{print $1}END{print NR}' passwd
  ##以:为分隔符,处理前打印 NAME ,打印第1列,处理后打印行数(NF列)
awk -F : '/bash$/{print $7}' passwd
  ##以:为分隔符,打印以bash结尾行的第7列
awk -F : '/bash$/' passwd
  ##以:为分隔符,打印以bash结尾行
awk -F : 'NR==3' passwd
  ##以:为分隔符,打印第3行
awk -F : 'BEGIN{print "NAME"}NR<=3&&NR>=2{print $1}' passwd
  ##以:为分隔符,处理前打印 NAME ,打印2-3行的第1个字符
awk 'BEGIN{a=34;print a+12}'
  ##输出34加上12的运算结果
awk -F :'/^ro/{print}' /etc/passwd
  ##打印出以ro开头的行
 awk -F :'/^[a-d]/{print $1,$6}' passwd.txt
  ##打印出开头除了a-d的行
awk -F :'/^a|nologin$/{print }' passwd.txt
  ##打印出开头为a结尾为nologin的结尾行
2、命令内容
[root@localhost mnt]# awk -F ":" '{print $1}' passwd
##打印第一列
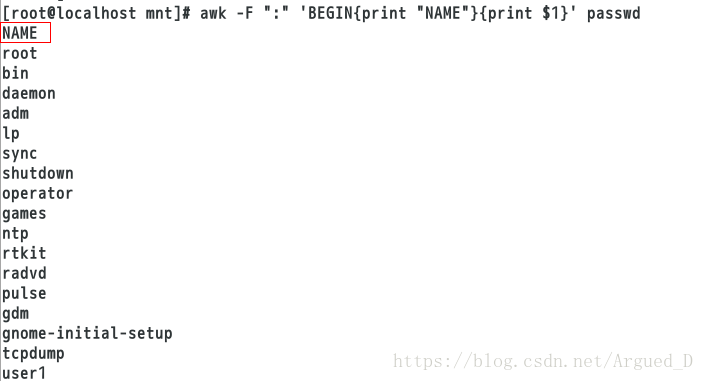
[root@localhost mnt]# awk -F ":" 'BEGIN{print "NAME"}{print $1}' passwd
##以:为分隔符,处理前打印NAME,打印第1列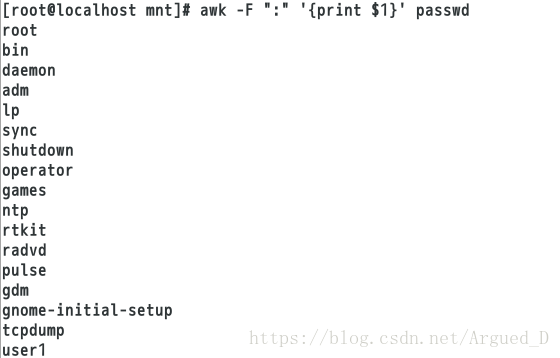
[root@localhost mnt]# awk '/bash$/{print}' passwd
##打印bash结尾的行
[root@localhost mnt]# awk -F ":" 'BEGIN{N=0}/bash$/{N++}END{print N}' passwd
##从零开始统计bash结尾的行数
[root@localhost mnt]# awk '/^a|nologin$/{print}' passwd   ##打印a开头的同时nologin结尾的行
[root@localhost mnt]# awk -F ":" '$1~/^r/{print}' passwd   ##打印以r开头的行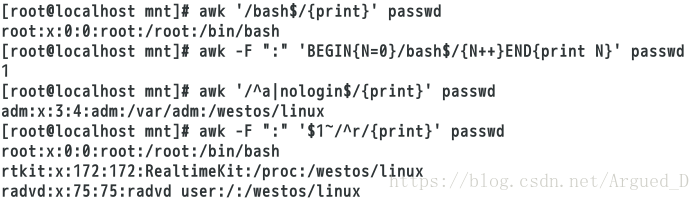
[root@localhost mnt]# awk -F ":" '$1!~/^r/{print}' passwd
##打印第一列不是以r开头的行
[root@localhost mnt]# awk -F ":" '$7!~/bash$/{print}' passwd
##打印第七列不是bash结尾的行
[root@localhost mnt]# awk -F ":" '{print NR,$0}' passwd
##打印行数,0代表所有列
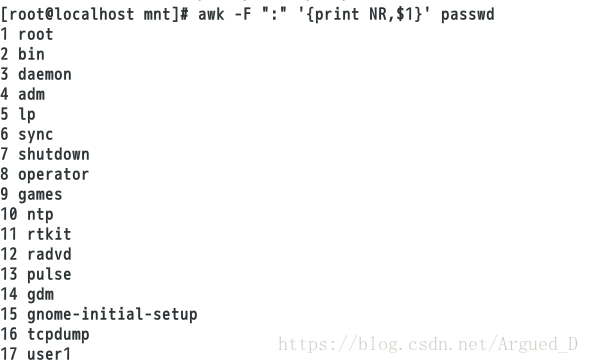
[root@localhost mnt]# awk -F ":" '{print NR,$1}' passwd ##打印行数,1代表第一列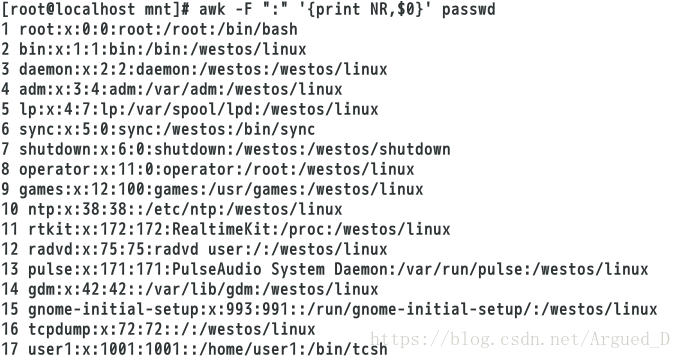
[root@localhost mnt]# awk -F ":" '$6!~/^\/home/&&/bash$/{print $1}' /etc/passwd  ##以:为分隔符,打印家目录下不是bash结尾的,打印第一列
[root@localhost mnt]# awk -F ":" 'BEGINA{n=0}$6!~/^\/home/&&/bash$/{n++}END{print n}' /etc/passwd  ##以:为分隔符,打印数目
3、脚本实验
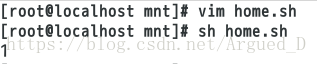
打印能登陆系统且家目录不是/home的用户个数
[root@localhost mnt]# vim home.sh  ##编写脚本
[root@localhost mnt]# sh home.sh ##执行脚本
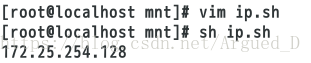
打印设备eth0的IP
[root@localhost mnt]# vim ip.sh
[root@localhost mnt]# sh ip.sh 
打印能登录系统的用户
[root@localhost mnt]# vim user.sh
[root@localhost mnt]# sh user.sh 

awk显示文件行数
[root@localhost mnt]# vim show.sh
[root@localhost mnt]# sh show.sh  /etc/passwd
