一、相机标定基本理论
1、相机成像系统介绍
2、相机内参介绍
3、相机外参介绍
二、相机标定方法
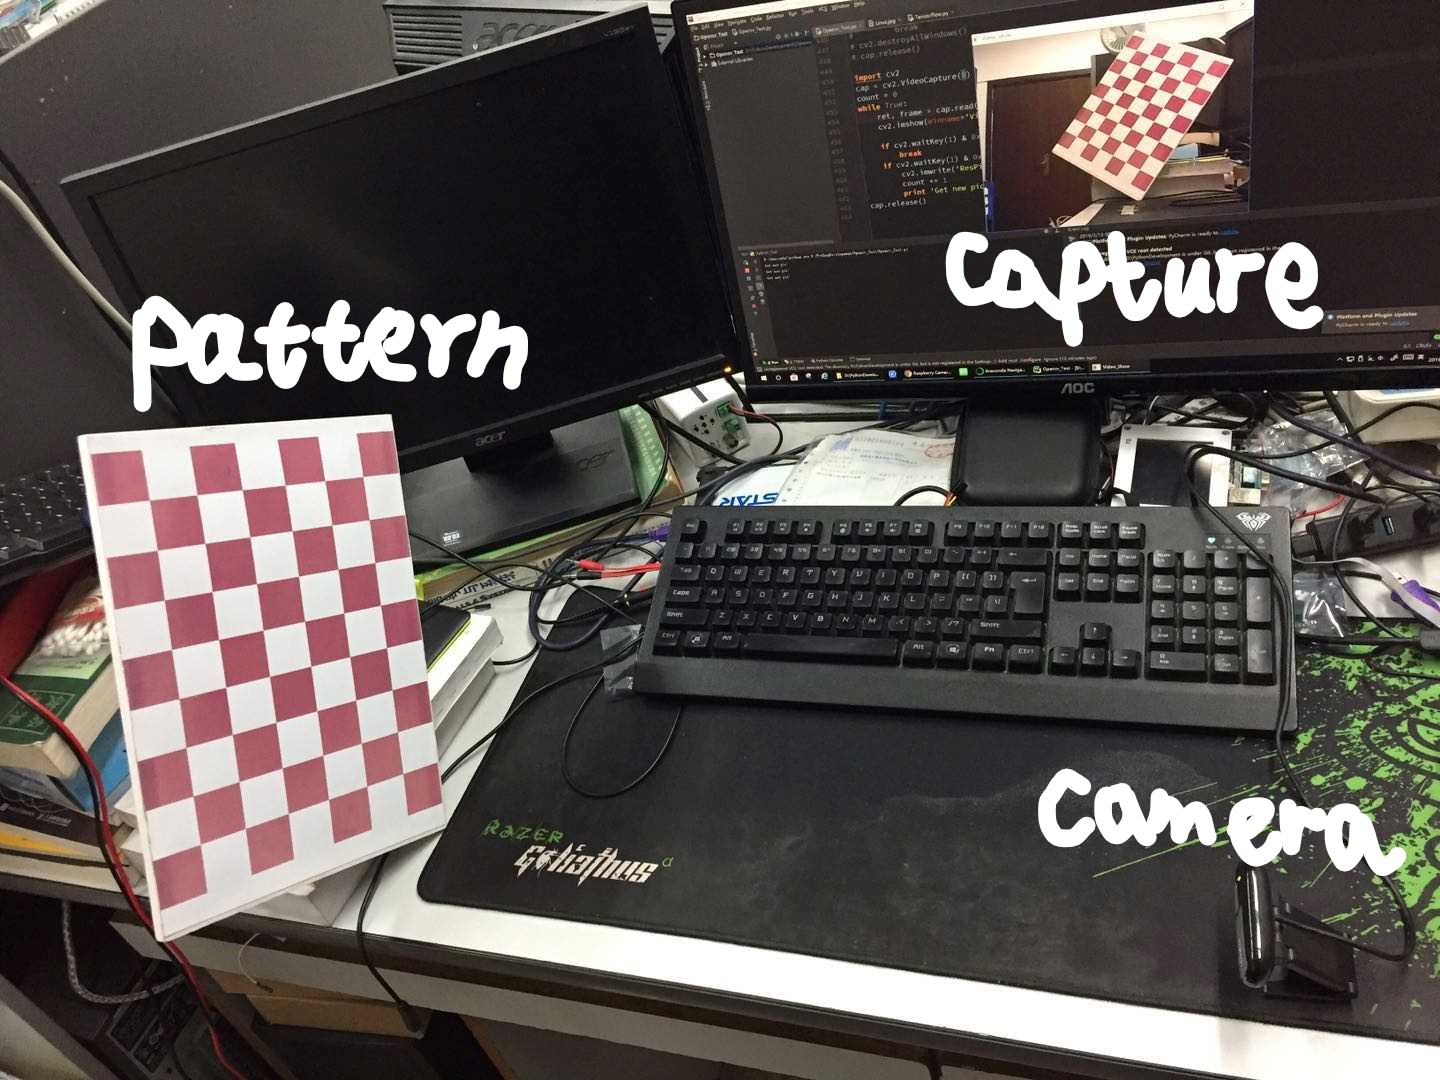
1、采样标准pattern模板图像若干
 1 import cv2
 2 cap = cv2.VideoCapture(0)
 3 count = 0
 4 while True:
 5     ret, frame = cap.read()
 6     cv2.imshow(winname='Video_Show', mat=frame)
 7
 8     if cv2.waitKey(1) & 0xFF == ord('q'):
 9         break
10     if cv2.waitKey(1) & 0xFF == ord('r'):
11         cv2.imwrite('ResPic' + str(count) + '.jpg', frame)
12         count += 1
13         print 'Get new pic!'
14 cap.release()
1)系统实际拍摄场景 2)硬件设备Logitech_Camera

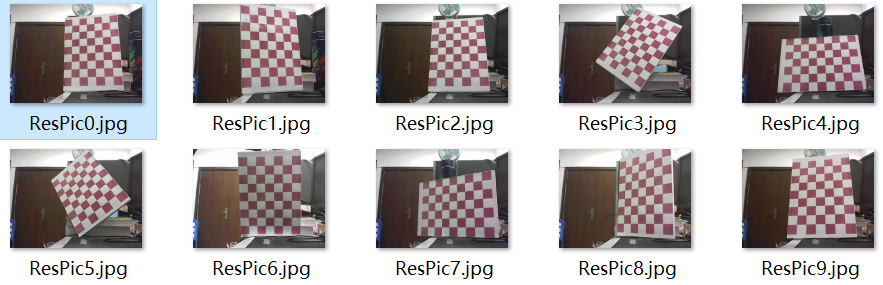
3)捕获素材如下所示(部分图像)
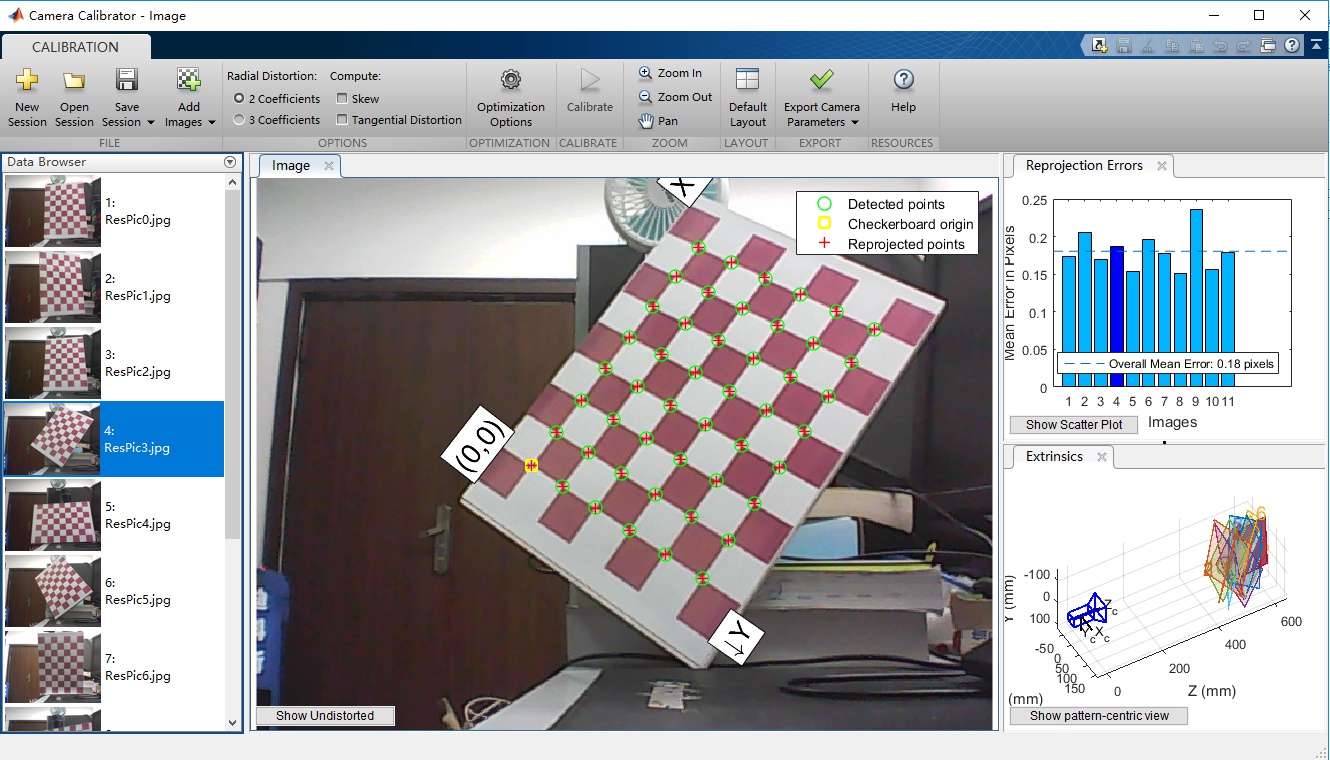
2、使用MATLAB工具箱进行相机标定
1)使用流程:
step1:打开Matlab 2015软件,上方栏目有一个应用程序,在应用程序下有一个工具箱,Camera Calibrator.
step2:打开工具箱,单击左上角的Add Images,选中捕获的所有的ResPic?.jpg,打开之后需要选择方块大小,取d=30mm.
step3:点击工具箱中间的绿色按钮Calibrate,单击开始我们的内参以及外参的计算和仿真,之后控制台输出Camera参数.
step4:我们可以选择到处MATLAB Script来分析Camera的标定流程.
2)仿真结果:
MATLAB导出的脚本代码:Camera_Calibrator.m


 1 % Auto-generated by cameraCalibrator app on 13-Mar-2019
 2 %-------------------------------------------------------
 3
 4
 5 % Define images to process
 6 imageFileNames = {'D:\PythonDevelopment\Opencv_Test\data\ResPic0.jpg',...
 7     'D:\PythonDevelopment\Opencv_Test\data\ResPic1.jpg',...
 8     'D:\PythonDevelopment\Opencv_Test\data\ResPic2.jpg',...
 9     'D:\PythonDevelopment\Opencv_Test\data\ResPic3.jpg',...
10     'D:\PythonDevelopment\Opencv_Test\data\ResPic4.jpg',...
11     'D:\PythonDevelopment\Opencv_Test\data\ResPic5.jpg',...
12     'D:\PythonDevelopment\Opencv_Test\data\ResPic6.jpg',...
13     'D:\PythonDevelopment\Opencv_Test\data\ResPic7.jpg',...
14     'D:\PythonDevelopment\Opencv_Test\data\ResPic8.jpg',...
15     'D:\PythonDevelopment\Opencv_Test\data\ResPic9.jpg',...
16     'D:\PythonDevelopment\Opencv_Test\data\ResPic10.jpg',...
17     };
18
19 % Detect checkerboards in images
20 [imagePoints, boardSize, imagesUsed] = detectCheckerboardPoints(imageFileNames);
21 imageFileNames = imageFileNames(imagesUsed);
22
23 % Generate world coordinates of the corners of the squares
24 squareSize = 30;  % in units of 'mm'
25 worldPoints = generateCheckerboardPoints(boardSize, squareSize);
26
27 % Calibrate the camera
28 [cameraParams, imagesUsed, estimationErrors] = estimateCameraParameters(imagePoints, worldPoints, ...
29     'EstimateSkew', false, 'EstimateTangentialDistortion', false, ...
30     'NumRadialDistortionCoefficients', 2, 'WorldUnits', 'mm', ...
31     'InitialIntrinsicMatrix', [], 'InitialRadialDistortion', []);
32
33 % View reprojection errors
34 h1=figure; showReprojectionErrors(cameraParams, 'BarGraph');
35
36 % Visualize pattern locations
37 h2=figure; showExtrinsics(cameraParams, 'CameraCentric');
38
39 % Display parameter estimation errors
40 displayErrors(estimationErrors, cameraParams);
41
42 % For example, you can use the calibration data to remove effects of lens distortion.
43 originalImage = imread(imageFileNames{1});
44 undistortedImage = undistortImage(originalImage, cameraParams);
45
46 % See additional examples of how to use the calibration data.  At the prompt type:
47 % showdemo('MeasuringPlanarObjectsExample')
48 % showdemo('StructureFromMotionExample')
3、采用Python及Opencv进行相机标定
三、其他扩展内容
四、参考文献&参看链接
相机标定Reference01:https://www.cnblogs.com/Jessica-jie/p/6596450.html
相机标定Reference02:https://www.cnblogs.com/Undo-self-blog/p/8448500.html
相关文件参考我的博客园文件:https://files.cnblogs.com/files/uestc-mm/Camera_calibration.7z