1.OpenCV安装
说到OpenCV的安装,我想做人脸识别,网上找了很多教程,都涉及到OpenCV,而很多教程是基于Adrian Rosebrock的这篇教材Raspbian Stretch: Install OpenCV 3 + Python on your Raspberry Pi
刚刚看到这篇教程的时候,着实被它的流程吓到了,步骤确实很多,以前装P4开发环境的经历告诉我,这个过程一定不会很顺利。
于是我想按照这个教程复现一遍。
(1)安装依赖
$ sudo apt-get update && sudo apt-get upgrade
$ sudo apt-get install build-essential cmake pkg-config
$ sudo apt-get install libjpeg-dev libtiff5-dev libjasper-dev libpng12-dev
$ sudo apt-get install libavcodec-dev libavformat-dev libswscale-dev libv4l-dev
$ sudo apt-get install libxvidcore-dev libx264-dev
$ sudo apt-get install libgtk2.0-dev libgtk-3-dev
$ sudo apt-get install libatlas-base-dev gfortran
$ sudo apt-get install python2.7-dev python3-dev
刚开始我是在现有的Raspberry Pi系统上直接安装的,这之前已经配好了网站服务器、FTP服务器等前序博客所做的事情,系统已经不是那么“干净”了。于是我运行上面第三条命令时就报错了,提示要安装的xxx依赖于xxx,但是xxx不会被安装。百度了很多方法,都没有办法解决。差点就想放弃了,第二天决定重新烧录一个干净的系统,并且做好系统备份(很重要!!)
重新烧录的系统果然“干净”,一路顺利,完成依赖的安装。
(2)下载OpenCV源码
$ cd ~
$ wget -O opencv.zip https://github.com/Itseez/opencv/archive/3.3.0.zip
$ unzip opencv.zip
$ wget -O opencv_contrib.zip https://github.com/Itseez/opencv_contrib/archive/3.3.0.zip
$ unzip opencv_contrib.zip
对网速要求比较高,所幸学校的网络比较快。但是下载完毕,运行unzip解压时报错:Archive: opencv.zip End-of-central-directory signature not found. Either this file is not a zipfile, or it constitutes one disk of a multi-part archive. In the latter case the central directory and zipfile comment will be found on the last disk(s) of this archive.
按照网上的方法试着用jar解压,可以成功,暂时没有什么问题了。
(3)安装pip
$ wget https://bootstrap.pypa.io/get-pip.py
$ sudo python get-pip.py
$ sudo python3 get-pip.py
(4)安装Python虚拟机
$ sudo pip install virtualenv virtualenvwrapper
$ sudo rm -rf ~/.cache/pip
配置~/.profile,添加内容:
# virtualenv and virtualenvwrapper
export WORKON_HOME=$HOME/.virtualenvs
export VIRTUALENVWRAPPER_PYTHON=/usr/bin/python3
source /usr/local/bin/virtualenvwrapper.sh
使之生效
source ~/.profile使用Python3 安装虚拟机
$ mkvirtualenv cv -p python3虚拟机完成安装之后,后续的所有操作全部在虚拟机中进行。按照教程的说明,一定要看清楚命令行前面是否有(cv),以此作为是否在虚拟机的判断!
以后要重新进入虚拟机,可运行下面的命令
$ source ~/.profile
$ workon cv
再次提醒:后续所有操作均在虚拟机中
安装numpy
$ pip install numpy(5)编译OpenCV
$ cd ~/opencv-3.3.0/
$ mkdir build
$ cd build
$ cmake -D CMAKE_BUILD_TYPE=RELEASE \
-D CMAKE_INSTALL_PREFIX=/usr/local \
-D INSTALL_PYTHON_EXAMPLES=ON \
-D OPENCV_EXTRA_MODULES_PATH=~/opencv_contrib-3.3.0/modules \
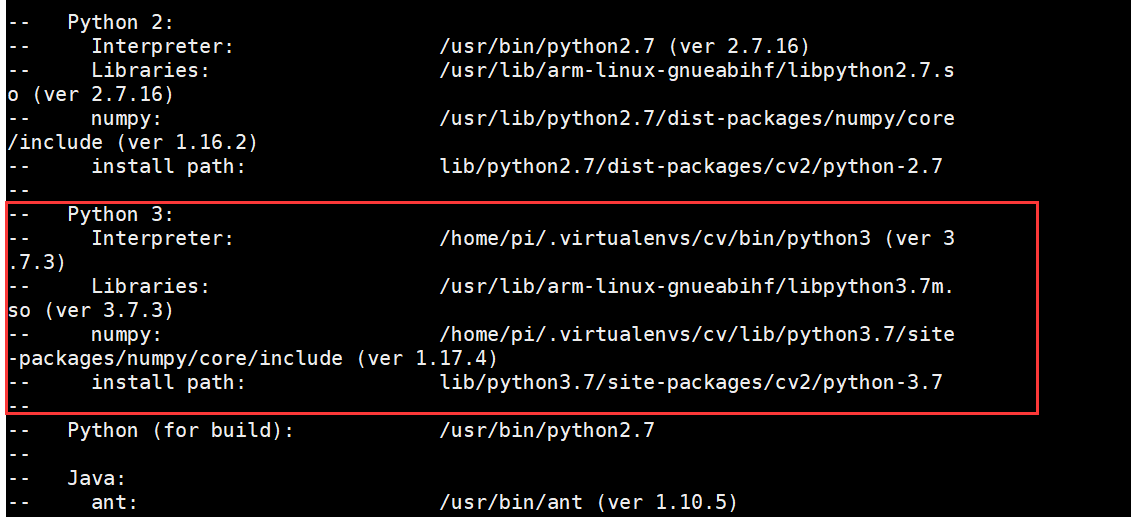
-D BUILD_EXAMPLES=ON ..按照教程提示,编译前检查Python相关配置,结果发现除了Interpreter,其他信息都没有。。。
我按照教程的建议,再三确认了的确在虚拟环境中,然而无济于事。。。
又想放弃了。
第三天,我突然想也许是OpenCV版本太久了,我到Github上看,最新的版本已经到了4.1.2,而且教程中也说了可以把3.3.0改成最新的版本。那既然其他环节都是最新的,那这个相应的也最新吧。于是我重新下载了4.1.2,这次unzip也十分顺利!
再次运行编译前的检查,这次没有问题了。
编译前,按照教程,增大了交换空间CONF_SWAPSIZE=1024
$ sudo nano /etc/dphys-swapfile  #虚拟机中sudo才可以修改

$ sudo /etc/init.d/dphys-swapfile stop
$ sudo /etc/init.d/dphys-swapfile start
$ make -j4 #开始编译(耗时1个多小时)
安装OpenCV
$ sudo make install
$ sudo ldconfig
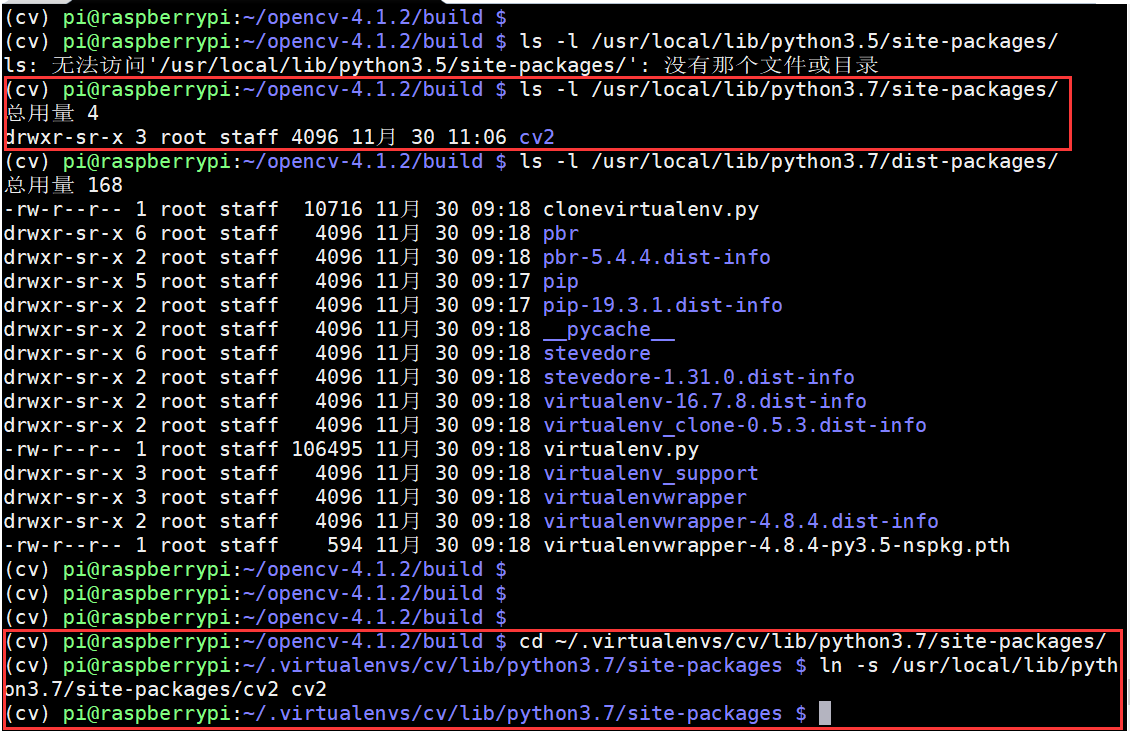
之后按照教程,检查OpenCV的安装位置,然而按照教程的命令输入,发现是空的!于是我去核对了一下编译前检查的结果,发现我的Python是3.7而不是教程用的3.5,问题解决!同时,我装好的文件名只有cv,没有后面的so
$ ls -l /usr/local/lib/python3.7/site-packages/

$ cd ~/.virtualenvs/cv/lib/python3.7/site-packages/
$ ln -s /usr/local/lib/python3.7/site-packages/cv2 cv2
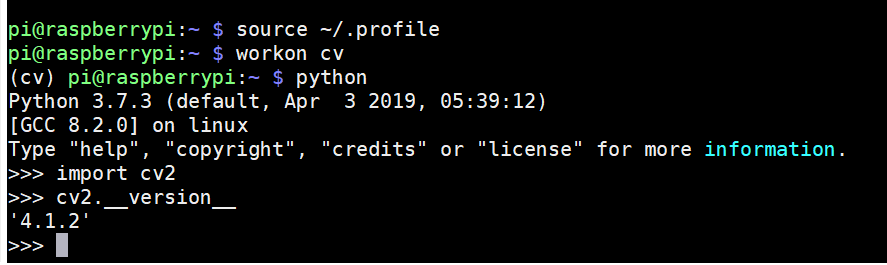
(6)验证安装
$ source ~/.profile
$ workon cv
$ python
>>> import cv2
>>> cv2.__version__
'4.1.2'
>>>
成功了!记得备份系统!
之后继续按照作者的另一个教程Accessing the Raspberry Pi Camera with OpenCV and Python完成摄像头模块picamera安装,摄像头的初始配置之前已经完成,再此不再赘述。
$ source ~/.profile
$ workon cv
$ pip install "picamera[array]"
按照教程给的示例代码,验证了Python控制摄像头拍照的效果,发现照片完全是黑的,经过分析,调高了示例代码中sleep的时间,让摄像头曝光时间增加,效果明显。
# import the necessary packages
from picamera.array import PiRGBArray
from picamera import PiCamera
import time
import cv2

# initialize the camera and grab a reference to the raw camera capture
camera = PiCamera()
rawCapture = PiRGBArray(camera)

# allow the camera to warmup
time.sleep(3) #此处把0.1改成了3

# grab an image from the camera
camera.capture(rawCapture, format="bgr")
image = rawCapture.array

# display the image on screen and wait for a keypress
cv2.imshow("Image", image)
cv2.waitKey(0)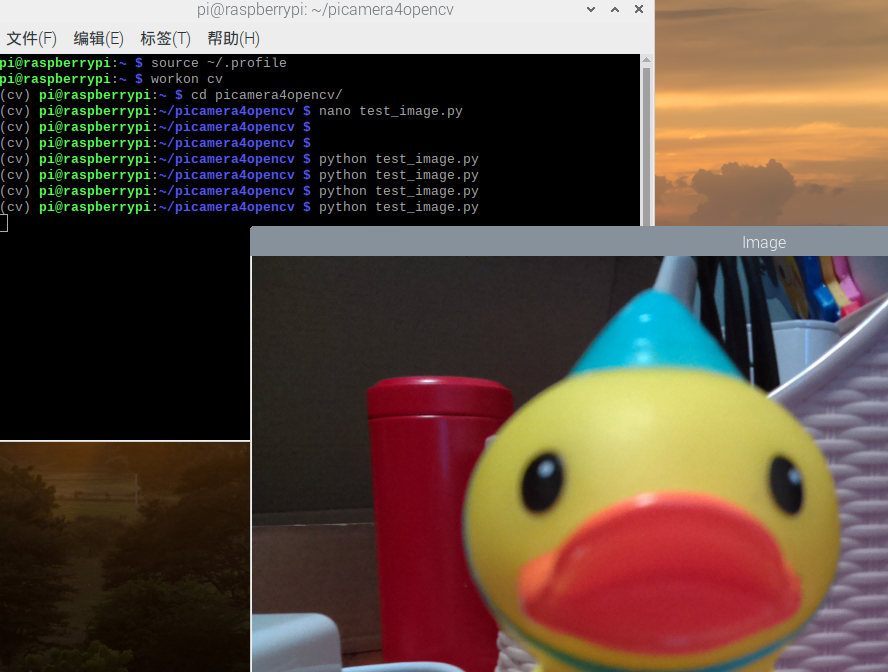
不得不说,这个大神写的教程确实很赞。建议用“干净”的系统安装,可以适当提高OpenCV的版本。编译过程很长,万一失败了,真的很打击积极性,所幸成功了。