Flash是python下的一个轻量级web服务框架,通过Flash可以快速的搭建api服务器和各位网站,在深度学习中Flash用的最多的就是模型的部署。配合上一些c++ dll库的调用,比如这个库(python通过导入自定义dll实现显存释放_万里鹏程转瞬至的博客-CSDN博客)可以实现python下的显存释放,在工程上堪称完美。
博主在这里简单分析Flash建站的使用经验,如url绑定、get参数获取、上传文件、下载文件等等的实现。
Flask的安装:pip install Flask
1、基本使用
以下代码实现了flask的基本使用,app既为flask的运行对象,python函数通过@app.route('url')实现url与函数的绑定,一个python函数可以绑定多个url。函数return的值,既为浏览器客户端页面的显示结果。
from flask import Flask, render_template, request
from flask import jsonify, session, make_response, request,send_file
from werkzeug.utils import secure_filename

import os

app = Flask(__name__)

@app.route('/')
@app.route('/index')
@app.route('/index.html')
def index():
    return request.host+"<br/>"+ request.url+"   <br/>hello world"

if __name__ == '__main__':
    #host=0.0.0.0 表示支持该服务器的所有ip地址
    #port指端口
    #debug=True指输出调试信息
   app.run(host="0.0.0.0",debug=True,port=14000)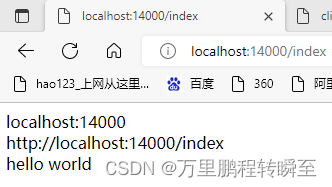
2、html模板(template)的使用
使用template返回html内容可以大量简化服务器代码,做到mvc的分离(模型m、视图v、控制器c)。这里模型是指数据库模型、视图指html页面、控制器指后端具体的功能代码。flask可以将一些python变量传递给模板,然后在html中动态生成内容。具体如下所示
@app.route('/get_template_html')
def template():
    kwargs = {
        "files": ["dir1", "dir2", "file1.txt", "file2.jpg"]
    }
return render_template('hello.html',**kwargs)这里的模板的文件名为hello.html,模板文件必须存储到./template目录下。可以看到的是,模板文件是支持变量的遍历、判断,还支持一些过滤器来获取变量的属性(比如:长度、first、last、join等等操作),更多模板的语法可以参考flask 模板语法__missTu_的博客-CSDN博客_flask模板语法
<html>
<head>
  <title>File Upload</title>
</head>
<body>
  控制结构 {

   { '{%  %}'  }}<br/>
  变量取值 {

   { '{

   {  }}' }}支持list、dict、tuple和基本python变量类型<br/>
  注释 {

   { '{#  #}'  }}<br/>

  '变量file的长度为:'{

   {files|length}},这是通过过滤器获取的。更多过滤器函数可以参考https://blog.csdn.net/weixin_29370077/article/details/112575271
  {% for file in files %}
    {% if loop.index0<=1 %}
        <li>dir: <a href="{

   {file + '\\'}}">{

   {file+ '\\'}}</a></li>
    {% else %}
        <li>file: <a href="{

   {file}}">{

   {file}}</a></li>
    {% endif %}
  {% endfor %}

  <br/>
  <br/>
    这是一个上传文件的界面
    <form action="/uploader" method="POST" enctype="multipart/form-data">
        <input type="file" name="file"  />
        <input type="submit" value="提交" />
    </form>
    下载图片:<a href="/webhdfs/v1?filename=0007A.jpg">download</a>
    下载图片:<a href="/downfile?filename=0007A.jpg">downfile</a>
</body>
</html>
在浏览器打开的效果为

3、cookie的设置与获取
cookie的设置代码很简单,只有response.set_cookie('Name','Hyman') 一行。但是cookie是与服务器http相应所绑定的元信息,设置cookie前需要获取response。在这里博主通过make_response('Hello World')获取response,make_response可以将模板或str包装成response用于返回给浏览器。前面直接用return输出信息到浏览器,其实在后端也是通过了make_response的包装。在获取到response对象后,我们还可以设置其他信息,比如headers。
@app.route('/set_cookie')
def set_cookie():
    #temp = render_template('hello.html')
    #response = make_response(temp)
    response=make_response('Hello World');
    response.headers['X-Parachutes'] = 'parachutes are cool'
    response.set_cookie('Name','Hyman')
    #name=request.cookies.get('Name')
    return response
获取cookie的代码为request.cookies.get('Name')
4、session的设置与获取
使用session需要注意的是,要设置app.secret_key,同时要设置session的有效期。具体如下列代码所示。app.secret_key可以是任意字符串。
#使用session时需要设置secret_key
app.secret_key = "affedasafafqwe"
@app.route("/setAgetSession")
def setAgetSession():
    name = request.args.get("name")
    session['name'] = name  # 设置“字典”键值对
    session.permanent = True  # 设置session的有效时间,长期有效,一个月的时间有效,
    return "now session name: "+session['name']
5、上传文件
这里用到了请求方法(GET、POST方式)判断,因为在很多的站点上传文件的页面和后端接口都是同一个url,通过请求方式的不同判断具体情况。GET请求对应着上传页面,POST请求对应着上传文件。上传图片前,请先创建upload目录
app.config['UPLOAD_FOLDER'] = 'upload/'
#请求方式判断request.method
@app.route('/uploader',methods=['GET','POST'])
def uploader():
    if request.method == 'POST':
        f = request.files['file']#跟表单里file中的name要一样
        f.save(os.path.join(app.config['UPLOAD_FOLDER'], secure_filename(f.filename)))
        return 'file uploaded successfully'
    else:
        return render_template('hello.html')
在表单页面中,post请求是要单独设置的,否则默认是get方式
    这是一个上传文件的界面
    <form action="/uploader" method="POST" enctype="multipart/form-data">
        <input type="file" name="file"  />
        <input type="submit" value="提交" />
    </form>
6、下载文件
下载文件只有一种方式,但是在请求url上有两种格式。
格式一:直接通过目录的方式下载文件,示例url:http://localhost:14000/down/static/image/head.tif
@app.route("/down/<path:sub_dir1>/<path:sub_dir2>/<filename>", methods=['GET', 'POST'])
def down(sub_dir1, sub_dir2, filename):
    file_path = os.path.join(os.getcwd()+ "\\"+sub_dir1+"\\"+sub_dir2+"\\" , filename)
    if os.path.isfile(file_path):
        send_file(file_path, as_attachment=True)
    else:
        return "<br/>"+file_path+"<br/>The downloaded file does not exist"
页面请求结果如下所示

格式二:通过get参数传递要下载的文件名,示例url: http://localhost:14000/downfile?filename=stasdfstic-sdfsdfsfdssfs/head.tif
@app.route("/downfile")
def download_file():
    filename = request.args.get('filename')
    file_path = os.path.join(os.getcwd() , filename)
    if os.path.isfile(file_path):
        return send_file(file_path, as_attachment=True)
    else:
        return "<br/>"+file_path+"<br/>The downloaded file does not exist"
运行结果如下所示

7、获取get参数返回json
这里需要注意的是传递get格式为url?key1=value1&key2=value2.......,第一个get参数与url之间通过?连接,后面的get参数之间通过&连接。json对象不能之间返回,使用jsonify将json转换为字符串后即可。
示例url:http://localhost:14000/jsonstr?key1=aaaaaaaaaaaaaa&kery2=bbbbbbbbbbbbbbb
@app.route("/jsonstr")
def jsonstr():
    key1 = request.args.get('key1')
    key2 = request.args.get('key2')
    json={

    'key1':key1,'key2':key2}
    return jsonify(json)
请求结果
