敏而好学,不耻下问。——孔子
Flutter从前年出来以后,慢慢的被各大老板看好,并招聘一些会进行双端页面开发。目前在开发者如果有开源的插件让我们去使用那简直太好了,如果没有开源的插件,也许我们就需要自定义了。一个小小的问题,够让你折腾很久了。
最近遇到的问题通过在对话框上弹出流式标签进行选择,一开始用的GridView,布局完成后发现了一个问题,每一项的宽度一样了。流式布局需要的是不一样,或许我们可以从流式布局(Wrap、Flow)去进行一个选择,今天我首选Wrap着手来开发一个颜色标签选择器。


开始了
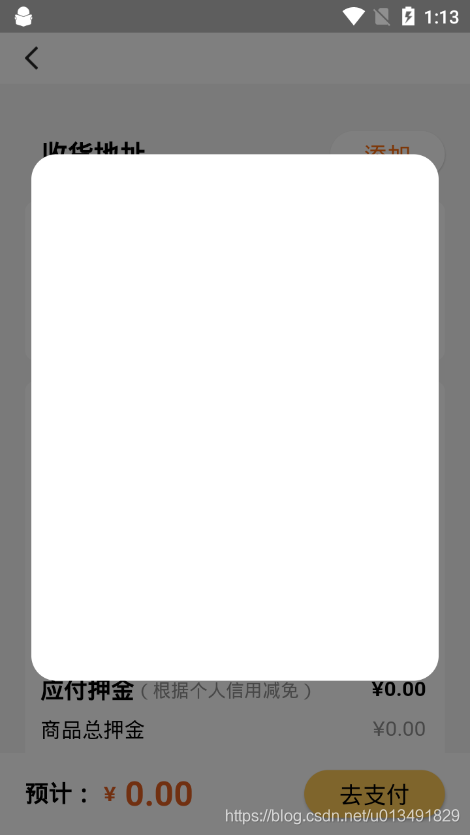
1、除了使用dialog,我们也可以把StatefulWidget改成成对话框的样式,
2、设置StatefulWidget宽、高、边距以及背景颜色达到对话框的效果。
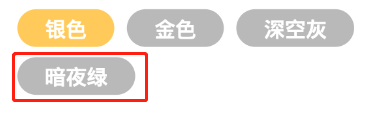
3、流式布局wrap添加多个自定义圆角标签
4、通过点击其中一个标签来改变其他标签的背景色。
接下来我们要一一实现这些小目标了。虽然不能向业界那些大佬那样,任何一个目标就是几个亿,但是我们可以在程序中实现自己的每一个小目标。
StatefulWidget修改成对话框
首先设置Container宽高和背景颜色-半透明,为了看起来像个对话框;接下来设置对话框的圆角。
 @override
  Widget build(BuildContext context) {
    double marginLr = ViewUtils.currentWidth(50.0);
    double marginTb = ViewUtils.currentHeight(300.0);
    return Container(
      color: Color(0x80000000),
      child: Container(
        padding: EdgeInsets.only(
            left: ViewUtils.currentWidth(48.0),
            right: ViewUtils.currentWidth(48.0)),
        margin: EdgeInsets.only(
            top: marginTb, left: marginLr, right: marginLr, bottom: marginTb),
      ),
    );
  }
 @override
  Widget build(BuildContext context) {
    double marginLr = ViewUtils.currentWidth(50.0);
    double marginTb = ViewUtils.currentHeight(300.0);
    return Container(
      color: Color(0x80000000),
      child: Container(
        padding: EdgeInsets.only(
            left: ViewUtils.currentWidth(48.0),
            right: ViewUtils.currentWidth(48.0)),
        margin: EdgeInsets.only(
            top: marginTb, left: marginLr, right: marginLr, bottom: marginTb),
        decoration: BoxDecoration(//边框颜色+圆角
          color: Colors.white,
          borderRadius: BorderRadius.all(
            Radius.circular(ViewUtils.currentWidth(40.0)),
          ),
        ),
      ),
    );
}流式布局wrap每一项布局样式+圆角背景(BoxDecoration,borderRadius)+文本(Text)+点击事件( GestureDetector\onTap)
  @override
  Widget build(BuildContext context) {
    double marginLr = ViewUtils.currentWidth(50.0);
    double marginTb = ViewUtils.currentHeight(300.0);
    return Container(
      color: Color(0x80000000),
      child: Container(
        padding: EdgeInsets.only(
            left: ViewUtils.currentWidth(48.0),
            right: ViewUtils.currentWidth(48.0)),
        margin: EdgeInsets.only(
            top: marginTb, left: marginLr, right: marginLr, bottom: marginTb),
        child: Column(
          crossAxisAlignment: CrossAxisAlignment.start,
          children: <Widget>[
            _label(context),
            Container(
              padding: EdgeInsets.only(
                  bottom: ViewUtils.currentHeight(30.0),
                  top: ViewUtils.currentHeight(30.0)),
              child: Text(
                "颜色",
                style: TextStyle(
                    fontSize: 22.0,
                    color: Color(0xFF6D7278),
                    decoration: TextDecoration.none),
              ),
            ),
            Wrap(
              spacing: ViewUtils.currentWidth(20.0),
              runSpacing: ViewUtils.currentHeight(20.0),
              children: _widgets(this),
            ),
          ],
        ),
        decoration: BoxDecoration(
          color: Colors.white,
          borderRadius: BorderRadius.all(
            Radius.circular(ViewUtils.currentWidth(40.0)),
          ),
        ),
      ),
    );
  }
List<String> colors = ["银色", "金色", "深空灰", "暗夜绿"];
List<bool> colorCheck = [true, false, false, false];
Widget _colorLvItem(index) {
Radius radius = Radius.circular(ViewUtils.currentHeight(40.0));
return GestureDetector(
onTap: () {
setState(() {
for (int i = 0; i < colorCheck.length; i++) {
colorCheck[i] = (i == index);
}
ViewUtils.toast(context,colors[index]);
});
},
child: Container(
padding: EdgeInsets.only(
top: ViewUtils.currentHeight(10.0),
bottom: ViewUtils.currentHeight(10.0),
left: ViewUtils.currentWidth(44.0),
right: ViewUtils.currentWidth(44.0)),
decoration: new BoxDecoration(
color: Color(colorCheck[index] ? 0xFFFFCA59 : 0x4F1E1E1E),
borderRadius: BorderRadius.all(radius),
),
child: Text(
colors[index],
style: TextStyle(
color: Color(0xFFffffff),
fontSize: 16.0,
decoration: TextDecoration.none),
),
),
);
}
List<Widget> _widgets(State state) {
return colors.asMap().keys.map((index) => _colorLvItem(index)).toList();
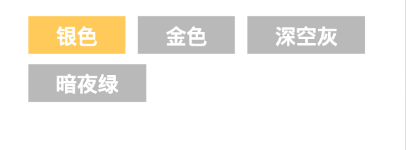
}GestureDetector+onTap()+setState()缺一不可:
如果没有setState,我们就无法去动态修改颜色数组的值:
若取消setState,效果如何呢?

我们点击其他标签切换颜色的时候没有颜色变化了。
setState(){}的调用时吧视图重新绘制了一遍,所以为了完成重新绘制,你懂的。
总结:不管在新的技术或者看似很简单的技术面前,我们不要去退缩,要跟好的完成每一个细节,也许离成功就不远了。
参考:
流式布局 Wrap:https://book.flutterchina.club/chapter4/wrap_and_flow.html?h=wrap
手势识别:https://book.flutterchina.club/chapter8/gesture.html?h=GestureDetector
List :https://www.dartcn.com/guides/language/language-tour#list
Map :https://www.dartcn.com/guides/language/language-tour#map
