概述
-
在树莓派4B 32位buster 上安装PyTorch及其小伙伴,以及onnxruntime,需要先安装依赖,然后安装在对应系统架构下(准确来说是linux_armv7l架构)编译得到的wheel文件
-
对于linux_armv7l,我只找到最高0.7.2的torchaudio和最高1.8.1的onnxruntime,据说0.8.x及之后的torchaudio无法在linux_armv7l上编译
-
0.7.x的torchaudio
- Linux默认backend为sox,0.8.x及之后的torchaudio,默认backend为sox_io,本文给出了设置0.7.x的torchaudio默认backend为sox_io的方法
- Windows默认backend为soundfile(需要
pip install soundfile),但是采用的是legacy的interface,0.8.x及之后的torchaudio,默认interface为new,本文给出了设置0.7.x的torchaudio默认interface为new的方法
-
0.7.2的torchaudio,对应1.7.1的PyTorch、0.8.2的torchvision、0.8.1的torchtext和0.1.4的torchcsprng,以及1.8.1的onnxruntime。这些wheel文件与其他必要的wheel文件的下载链接
链接:https://pan.xunlei.com/s/VNNvhoY3VEgAxNfm4guCtiiqA1#
提取码:bua5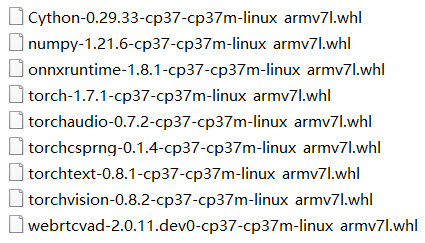
-
本文所用的树莓派4B 32位系统是buster Legacy,默认Python版本3.7,因此给出的wheel文件也是cp37的,如果需要其他Python版本的wheel文件,可以去下列地址下载
pytorch-armv7l、pytorch-aarch64、onnxruntime-armv7l -
由于这些包安装比较麻烦,并且版本不太可能更新,所以本文将它们安装在全局环境下,想要让Python的虚拟环境使用全局环境的包,可以参考树莓派配置Python虚拟环境、安装PyQt5、安装PySide2
PyTorch
- 安装依赖
sudo apt-get update sudo apt-get install python3-pip libjpeg-dev libopenblas-dev libopenmpi-dev libomp-dev # above 58.3.0 you get version issues pip3 install setuptools==58.3.0 # 也可以用pip直接安装Cython,但是很多镜像源没有对应的wheel包,下载会较慢 pip3 install Cython-0.29.33-cp37-cp37m-linux_armv7l.whl- 系统自带的numpy版本为1.16.2,过低,在
import torch时会出现RuntimeError: module compiled against API version 0xf but this version of numpy is 0xd。因此需要更新numpy,可以用pip3 install numpy --upgrade,但是需要编译wheel文件,耗时比较久,直接使用wheel文件进行安装
pip3 install numpy-1.21.6-cp37-cp37m-linux_armv7l.whl - 系统自带的numpy版本为1.16.2,过低,在
- 安装wheel
pip3 install torch-1.7.1-cp37-cp37m-linux_armv7l.whl - 检查是否安装成功
python3 >>> import torch >>> torch.rand(5,3) - 提示
- 使用PyTorch的fft模块会出错
RuntimeError: fft: ATen not compiled with MKL support,这个问题其实不用重新编译一遍PyTorch,你只需要安装numpy,用numpy的fft模块替代相应运算即可 - 用numpy替代后,numpy的输出类型是
dtype('complex128'),做进一步计算可能会出错RuntimeError: expected scalar type Double but found Float,这是因为torch的输出类型是torch.complex64,所以需要转换数据类型
import torch import torch.fft import numpy as np a = torch.arange(10) try: b = torch.fft.rfft(a, dim=-1, norm=None) except: b = np.fft.rfft(a.numpy(), axis=-1, norm=None) b = torch.from_numpy(b).to(torch.complex64) - 使用PyTorch的fft模块会出错
torchvision
- 安装依赖
sudo apt-get install libjpeg-dev zlib1g-dev libpython3-dev sudo apt-get install libavcodec-dev libavformat-dev libswscale-dev - 安装wheel
pip3 install torchvision-0.8.2-cp37-cp37m-linux_armv7l.whl - 检查是否安装成功
python3
>>> import torchvision
>>> torchvision.get_image_backend()
>>> torchvision.get_video_backend()
torchaudio
- 安装依赖
- 由于0.7.x的torchaudio,默认backend为sox,所以需要安装sox以及一些编码器
sudo apt install sox sudo apt install lame sudo apt install libsox-fmt-all - 安装wheel
pip3 install torchaudio-0.7.2-cp37-cp37m-linux_armv7l.whl - 检查是否安装成功
python3 >>> import torchaudio >>> torchaudio.list_audio_backends()- Linux下
import torchaudio会显示UserWarning: "sox" backend is being deprecated. The default backend will be changed to "sox_io" backend in 0.8.0 and "sox" backend will be removed in 0.9.0.,可以进入/home/pi/.local/lib/python3.7/site-packages/torchaudio/backend/utils.py(ctrl+鼠标点击torchaudio,再寻找该文件),修改_init_audio_backend()函数,使默认backend为sox_io,如下
def _init_audio_backend(): backends = list_audio_backends() if 'sox_io' in backends: set_audio_backend('sox_io') elif 'sox' in backends: set_audio_backend('sox') elif 'soundfile' in backends: set_audio_backend('soundfile') else: warnings.warn('No audio backend is available.') set_audio_backend(None)- Windows下
import torchaudio会显示UserWarning: The interface of "soundfile" backend is planned to change in 0.8.0 to match that of "sox_io" backend and the current interface will be removed in 0.9.0.,可以进入C:\Users\dedsec\miniconda3\envs\speaker_recognition\lib\site-packages\torchaudio\__init__.py(ctrl+鼠标点击torchaudio即可进入),修改USE_SOUNDFILE_LEGACY_INTERFACE变量,使默认interface为new,如下
USE_SOUNDFILE_LEGACY_INTERFACE = False - Linux下
onnxruntime
- 如果前面的安装都没问题,那么onnxruntime直接安装即可
pip3 install onnxruntime-1.8.1-cp37-cp37m-linux_armv7l.whl