1.首先我们需要引进两个额外的jar包放在lib下:
	com.springsource.org.apache.commons.fileupload-1.2.0.jar;
	com.springsource.org.apache.commons.io-1.4.0.jar
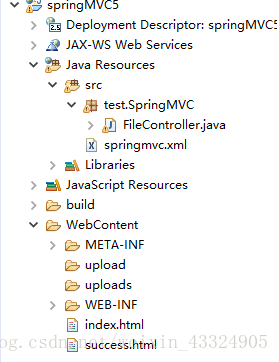
项目结构为:
2.然后简单配置下web.xml:
  <servlet>
  	<servlet-name >springmvc</servlet-name>
  	<servlet-class>org.springframework.web.servlet.DispatcherServlet</servlet-class>
  	<init-param>
  		<param-name>contextConfigLocation</param-name>
  		<param-value>classpath:springmvc.xml</param-value>
  	</init-param>
  </servlet>
  <servlet-mapping>
  	<servlet-name>springmvc</servlet-name>
    <url-pattern>*.do</url-pattern>
  </servlet-mapping>

  <filter>
       <filter-name>characterEncodingFilter</filter-name>
       <filter-class>org.springframework.web.filter.CharacterEncodingFilter</filter-class>
       <init-param>
           <param-name>encoding</param-name>
           <param-value>UTF-8</param-value>
       </init-param>
       <init-param>
           <param-name>forceEncoding</param-name>
           <param-value>true</param-value>
       </init-param>
   </filter>
   <filter-mapping>
       <filter-name>characterEncodingFilter</filter-name>
       <url-pattern>*.do</url-pattern>
   </filter-mapping>
3.我的springmvc文件放在了src下面,内容为:
<?xml version="1.0" encoding="UTF-8"?>
<beans xmlns="http://www.springframework.org/schema/beans"
    xmlns:xsi="http://www.w3.org/2001/XMLSchema-instance"
    xmlns:p="http://www.springframework.org/schema/p"
    xmlns:context="http://www.springframework.org/schema/context"
    xmlns:mvc="http://www.springframework.org/schema/mvc"
    xsi:schemaLocation="http://www.springframework.org/schema/beans
        http://www.springframework.org/schema/beans/spring-beans.xsd
        http://www.springframework.org/schema/mvc
        http://www.springframework.org/schema/mvc/spring-mvc.xsd
        http://www.springframework.org/schema/context
        http://www.springframework.org/schema/context/spring-context.xsd">

	<context:component-scan base-package="test.SpringMVC"/>
	<mvc:annotation-driven/>

	<bean id="viewResolver" class="org.springframework.web.servlet.view.InternalResourceViewResolver">
        <property name="prefix" value="/WEB-INF/jsp/" />
        <property name="suffix" value=".jsp" />
	</bean>

	<bean id="multipartResolver" class="org.springframework.web.multipart.commons.CommonsMultipartResolver">
		<!-- 设置文件上传大小最大为:10MB -->
          <property name="maxUploadSize" value="10000000"></property>
        <!-- 设置编码格式   -->
          <property name="defaultEncoding" value="UTF-8"></property>
    </bean>
</beans>
4.创建test.SpringMVC包,写入FileController类:
@Controller
public class FileController {
	//单文件上传
	@RequestMapping("/upload")
	public String fileupload(@RequestParam("file") MultipartFile file ,HttpServletRequest request)throws Exception{
		String filepath=request.getServletContext().getRealPath("/");
		System.out.println(filepath);
		file.transferTo(new File(filepath+"upload/"+file.getOriginalFilename()));
		return "redirect:success.html";
	}
	//多文件上传
	@RequestMapping("/uploads")
	public String filesupload(@RequestParam("files") MultipartFile []files ,HttpServletRequest request)throws Exception{
		String filepath=request.getServletContext().getRealPath("/");
		System.out.println(filepath);
		for(MultipartFile file:files) {
			file.transferTo(new File(filepath+"uploads/"+file.getOriginalFilename()));
		}
		return "redirect:success.html";
	}
	//文件下载
    @RequestMapping(value = "/download",produces = "application/octet-stream;charset=UTF-8")
    public ResponseEntity<byte[]> download() throws Exception {
//        指定文件,必须是绝对路径(你可以自己选择一个文件,用作实验)
    File file = new File("E:/test/a1.jpg");
//        下载浏览器响应的那个文件名
    String dfileName = "a.jpg";
//        下面开始设置HttpHeaders,使得浏览器响应下载
    HttpHeaders headers = new HttpHeaders();
//        设置响应方式
    headers.setContentType(MediaType.APPLICATION_OCTET_STREAM);
//        设置响应文件
    headers.setContentDispositionFormData("attachment", dfileName);
//        把文件以二进制形式返回
    return new ResponseEntity<byte[]>(FileUtils.readFileToByteArray(file), headers, HttpStatus.CREATED);
}

}
5.简单写一个index.html,作为首页:
<!-- 单文件上传 -->
<!-- <form action="upload.do" method="post" enctype="multipart/form-data">
<table>
	<tr>
		<th colspan="2">请选择文件上传!</th>
	</tr>

	<tr>
		<td><input type="file" name="file"/></td>
	</tr>

	<tr>
		<td><input type="submit" name="提交"/></td>
	</tr>
</table>
</form> -->
<form action="uploads.do" method="post" enctype="multipart/form-data">
<table>
	<tr>
		<th colspan="2">请选择文件上传!</th>
	</tr>
	<tr>
		<td>文件一</td>
		<td><input type="file" name="files"/></td>
		<td><a href="download.do">文件下载</a></td>
	</tr>
	<tr>
		<td>文件二</td>
		<td><input type="file" name="files"/></td>
	</tr>
	<tr>
		<td><input type="submit" name="提交"/></td>
	</tr>
</table>
</form>
6.由于我们选择重定向到success.html,所以创建一个html文件,简写一个实验成功界面:
<body>
文件上传成功!
</body>
7.最后记得在WebContent下创建upload和uploads文件夹,分别用来存放单文件和多文件上传的文件,否则会找不到路径的。
8.然后打开浏览器访问:localhost:8080/我们的项目名 即可完成了!