1、需要的环境
-
安装JDK(1.8 以上,推荐 1.8)
-
Python(推荐 Python2.6.X) 使用国内镜像:http://npm.taobao.org/mirrors/
-
安装maven
-
安装mysql
-
idea
2、下载部署dataX
-
datax 下载地址:http://datax-opensource.oss-cn-hangzhou.aliyuncs.com/datax.tar.gz
-
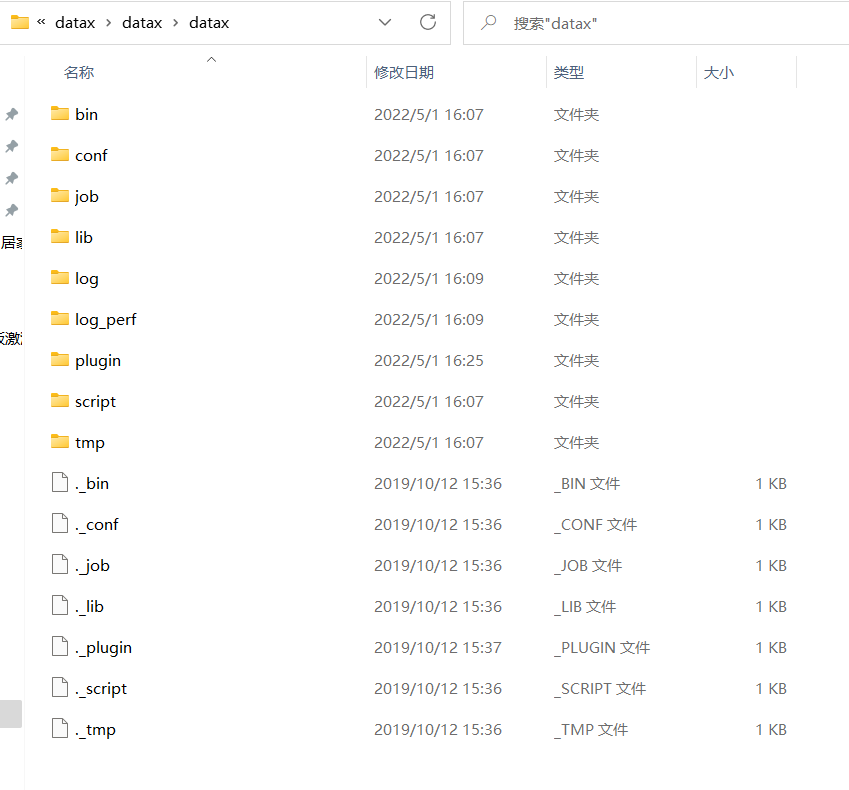
下载完成后选择文件夹解压
-
其中bin目录是脚本目录,job下存放的json文件就是用来运行的。
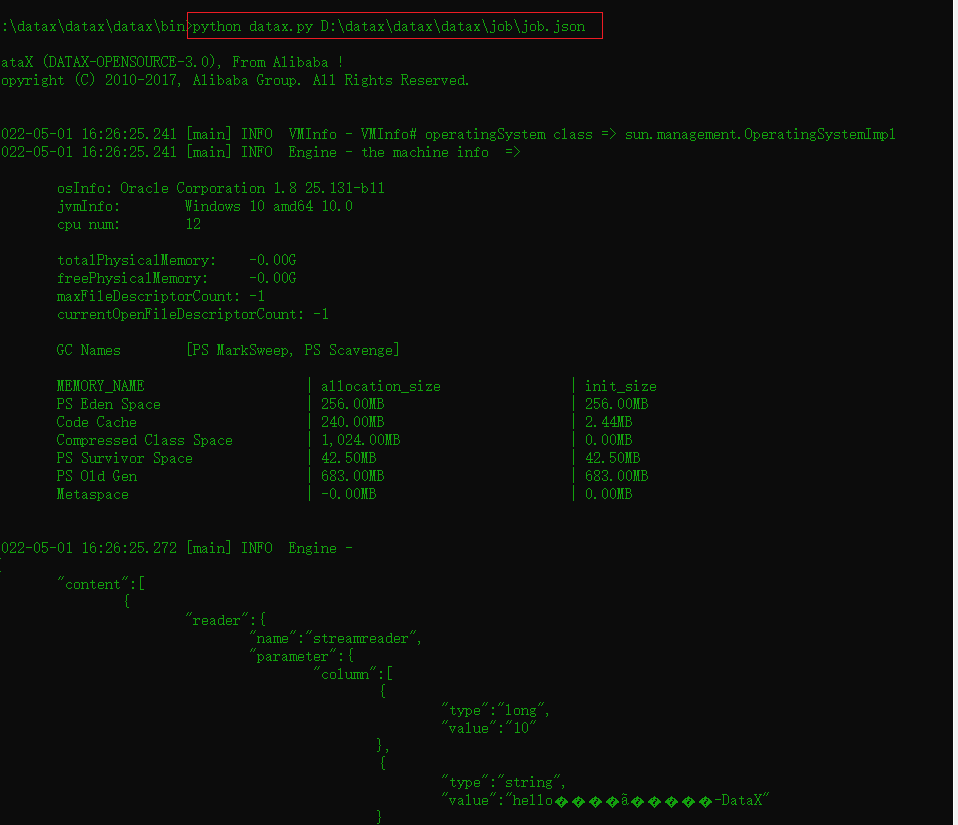
测试:
进入bin目录
python datax.py D:\datax\datax\datax\job\job.json
-
这里的输出结果是乱码,所以这里再提供一种用java运行脚本的方法。可以选择idea运行
package com.tjcu;

import java.io.BufferedReader;
import java.io.File;
import java.io.InputStreamReader;

public class TestDatax {
    public static void main(String[] args) {
        try {
            String windowcmd = "cmd /c python datax.py  D:\\datax\\datax\\datax\\job\\job.json";

            //.exec("你的命令",null,new File("datax安装路径"));
            Process pr = Runtime.getRuntime().exec(windowcmd,null,new File("D:\\datax\\datax\\datax\\bin"));
            BufferedReader in = new BufferedReader(new InputStreamReader(pr.getInputStream()));
            String line = null;
            while ((line = in.readLine()) != null) {
                System.out.println(line);
            }
            in.close();
            pr.waitFor();

        } catch (Exception e) {
            e.printStackTrace();
        }
    }

}
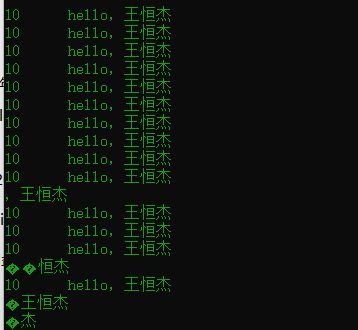
第二种方法就是先输入:
打开cmd,首先输入 CHCP 65001 防止中文乱码
-
在在job文件夹中,修改job.json
{
  "job": {
    "content": [
      {
        "reader": {
          "name": "streamreader",
          "parameter": {
            "sliceRecordCount": 10,
            "column": [
              {
                "type": "long",
                "value": "10"
              },
              {
                "type": "string",
                "value": "hello,你好,王恒杰"
              }
            ]
          }
        },
        "writer": {
          "name": "streamwriter",
          "parameter": {
            "encoding": "UTF-8",
            "print": true
          }
        }
      }
    ],
    "setting": {
      "speed": {
        "channel": 5
       }
    }
  }
}
3、datax-web运行
-
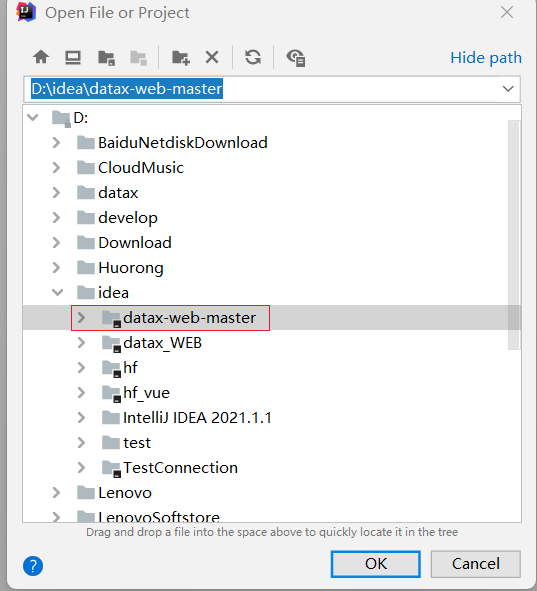
打开idea,打开项目,安装maven依赖
-
mysql数据库导入,新建datax_web数据库,然后找到bin/db/datax_web.sql。导入数据库,这里我用的工具是 navicat

-
需要修改2两个yml。我的修改如下
第一个路径在,datax-admin/src/main/resoures/application.yml。其中数据库地址和用户名密码用自己的
#第一个路径在,datax-admin/src/main/resoures/application.yml。其中数据库地址和用户名密码用自己的
server:
  port: 8080
  #port: ${server.port}
spring:
  #数据源
  datasource:
    #    username: root
    #password: root
    #url: jdbc:mysql://localhost:3306/datax_web?serverTimezone=Asia/Shanghai&useLegacyDatetimeCode=false&useSSL=false&nullNamePatternMatchesAll=true&useUnicode=true&characterEncoding=UTF-8
    password: admin
    username: 1111
    #url: jdbc:mysql://${DB_HOST:127.0.0.1}:${DB_PORT:3306}/${DB_DATABASE:dataxweb}?serverTimezone=Asia/Shanghai&useLegacyDatetimeCode=false&useSSL=false&nullNamePatternMatchesAll=true&useUnicode=true&characterEncoding=UTF-8
    #driver-class-name: com.mysql.jdbc.Driver
    url: jdbc:mysql://127.0.0.1:3306/datax_web
    driver-class-name: com.mysql.cj.jdbc.Driver

    hikari:
      ## 最小空闲连接数量
      minimum-idle: 5
      ## 空闲连接存活最大时间,默认600000(10分钟)
      idle-timeout: 180000
      ## 连接池最大连接数,默认是10
      maximum-pool-size: 10
      ## 数据库连接超时时间,默认30秒,即30000
      connection-timeout: 30000
      connection-test-query: SELECT 1
      ##此属性控制池中连接的最长生命周期,值0表示无限生命周期,默认1800000即30分钟
      max-lifetime: 1800000

  # datax-web email
  mail:
    host: smtp.qq.com
    port: 25
    #username: [email protected]
    #password: xxx
    username: [email protected]
    password: qq密码
    properties:
      mail:
        smtp:
          auth: true
          starttls:
            enable: true
            required: true
        socketFactory:
          class: javax.net.ssl.SSLSocketFactory


management:
  health:
    mail:
      enabled: false
  server:
    servlet:
      context-path: /actuator

mybatis-plus:
  # mapper.xml文件扫描
  mapper-locations: classpath*:/mybatis-mapper/*Mapper.xml
  # 实体扫描,多个package用逗号或者分号分隔
  #typeAliasesPackage: com.yibo.essyncclient.*.entity
  global-config:
    # 数据库相关配置
    db-config:
      # 主键类型  AUTO:"数据库ID自增", INPUT:"用户输入ID", ID_WORKER:"全局唯一ID (数字类型唯一ID)", UUID:"全局唯一ID UUID";
      id-type: AUTO
      # 字段策略 IGNORED:"忽略判断",NOT_NULL:"非 NULL 判断"),NOT_EMPTY:"非空判断"
      field-strategy: NOT_NULL
      # 驼峰下划线转换
      column-underline: true
      # 逻辑删除
      logic-delete-value: 0
      logic-not-delete-value: 1
      # 数据库类型
      db-type: mysql
    banner: false
  # mybatis原生配置
  configuration:
    map-underscore-to-camel-case: true
    cache-enabled: false
    call-setters-on-nulls: true
    jdbc-type-for-null: 'null'
    type-handlers-package: com.wugui.datax.admin.core.handler

# 配置mybatis-plus打印sql日志
logging:
  #level:
  #  com.wugui.datax.admin.mapper: info
  #path: ./data/applogs/admin
  level:
    com.wugui.datax.admin.mapper: error
    #path: ${data.path}/applogs/admin
    path: ./data/applogs/admin


#datax-job, access token
datax:
  job:
    accessToken:
    #i18n (default empty as chinese, "en" as english)
    i18n:
    ## triggerpool max size
    triggerpool:
      fast:
        max: 200
      slow:
        max: 100
      ### log retention days
    logretentiondays: 30

datasource:
  aes:
    key: AD42F6697B035B75
-
第二个applicataion,地址为:datax-executor/src/main/resoures/application.yml
#第二个applicataion,地址为:datax-executor/src/main/resoures/application.yml
# web port
server:
  #  port: ${server.port}
  port: 8081

# log config
logging:
  config: classpath:logback.xml
  #  path: ${data.path}/applogs/executor/jobhandler
  path: ./data/applogs/executor/jobhandler

datax:
  job:
    admin:
      ### datax admin address list, such as "http://address" or "http://address01,http://address02"
      #addresses: http://127.0.0.1:8080
      #addresses: http://127.0.0.1:${datax.admin.port}
      addresses: http://127.0.0.1:8080
    executor:
      appname: datax-executor
      ip:
      port: 9999
      #port: ${executor.port:9999}
      ### job log path
      logpath: ./data/applogs/executor/jobhandler
      #logpath: ${data.path}/applogs/executor/jobhandler
      ### job log retention days
      logretentiondays: 30
    ### job, access token
    accessToken:

  executor:
    #jsonpath: D:\\temp\\executor\\json\\
    jsonpath: D:\datax\datax\datax\bin

  #pypath: D:\datax\datax\datax\bin\datax.py
  pypath: D:\datax\datax\datax\bin\datax.py
-
然后首先运行主应用datax-admin,其次运行执行器 datax-executor
-
初始账号/密码是:admin/123456
Local-API:http://127.0.0.1:8080/doc.html
External-API: http://192.168.43.64:8080/doc.html
web-URL: http://127.0.0.1:8080/index.html
