文章目录
- 前言
- 一、小米便签的部署
- 1.下载小米便签项目源码zip包以及解压
- 2 空项目建立及其注意事项
- 3 将源码对应的文件复制到 Android 项目的对应目录及文件下
- 4.错误1:错误提示乱码
- 5.依赖下载
- 6.错误2:找不到符号 notification.setLatestEventInfo...
- 7.错误3:switch语句报错Constant expression required
- 8.错误4:jar包冲突
- 9.错误5:3 files found with path ‘META-INF/DEPENDENCIES’ ...
- 10.成功部署及运行展示
- 二、遇到的问题汇总
- 1.错误提示乱码
- 1.1 错误显示
- 1.2 报错原因
- 1.3 解决办法
- 2.找不到符号 notification.setLatestEventInfo(......)
- 2.1 错误示例
- 2.2 报错原因
- 2.3 解决办法
- 3.switch语句报错Constant expression required
- 3.1 错误示例
- 3.2 报错原因
- 3.3 解决办法
- 4.jar包冲突
- 4.1 错误示例
- 4.2 错误原因
- 4.3 解决办法
- 5.three files found with path ‘META-INF/DEPENDENCIES’ ...
- 5.1 错误示例
- 5.2 错误原因
- 5.3 解决办法
- 补充
- 1.新版的Android Studio的eclipse项目导入问题
- 问题描述
- 编辑
- 原因
- 2.关于小米便签功能不完全的问题
- 问题描述
- 原因
- 解决办法
- 致谢
- 总结
前言
最近在完成软件工程的结对作业,具体任务是与同学合作,然后部署项目和泛读代码。因为网上小米便签部署的博客大多是 Android Studio 2022以及之前的版本,而我的Android Studio 是 2023.2.1 的版本,在部署项目的过程中肯定会出现一些问题,故编写这篇博客,用来记录问题和复习。
一、小米便签的部署
这里我的Android Studio的版本是 2023.2.1 版本,SDK版本为 API 34,Gradle版本为 8.4。
1.下载小米便签项目源码zip包以及解压
首先我们从github上的开源代码仓库上下载小米便签的源码包。其不带git信息的zip包的下载地址:
https://codeload.github.com/MiCode/Notes/zip/master
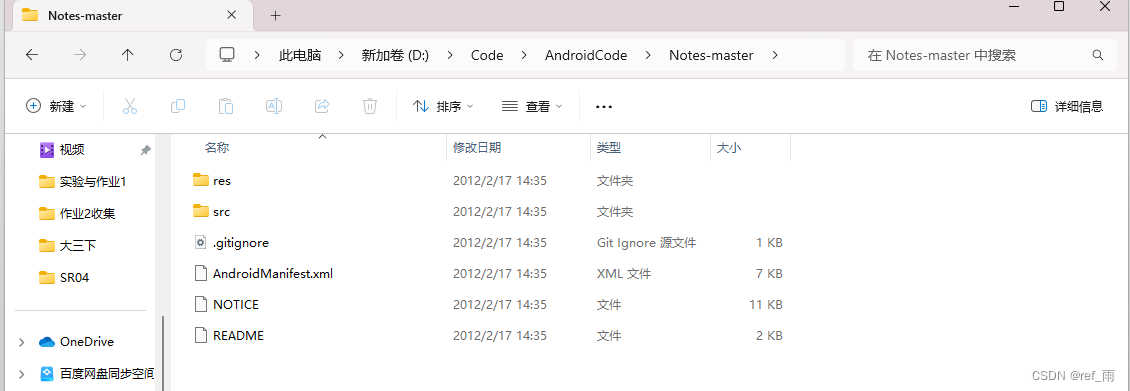
然后我们把下载的zip包进行解压,把Notes-master项目包提取出来。

2 空项目建立及其注意事项
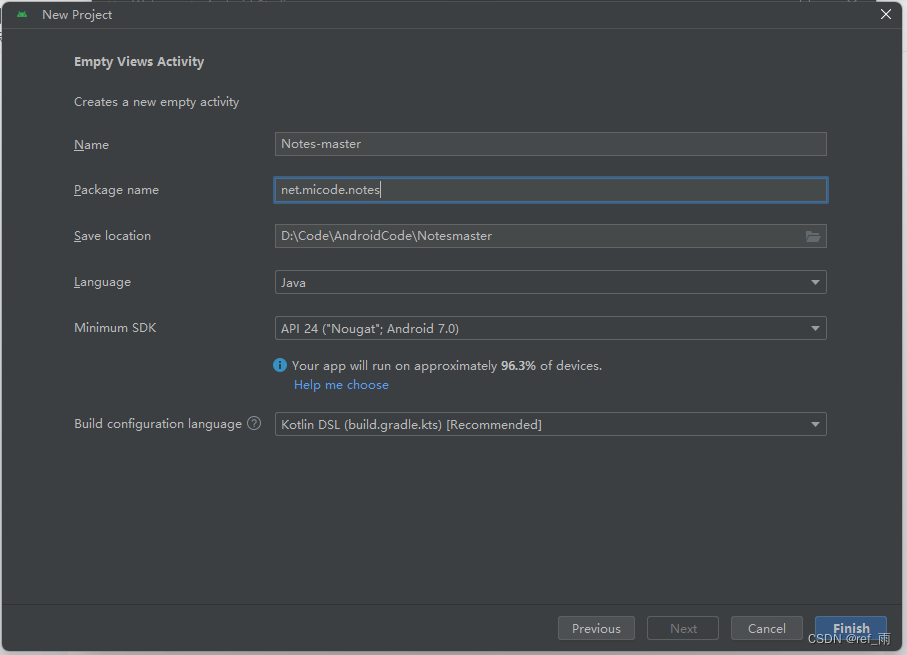
选择New Project,选择Empty Views Activity,新建一个空项目:

如下配置,注意包名为net.micode.notes,因为原项目的开发语言是用Java的,故我们Language也选择Java:
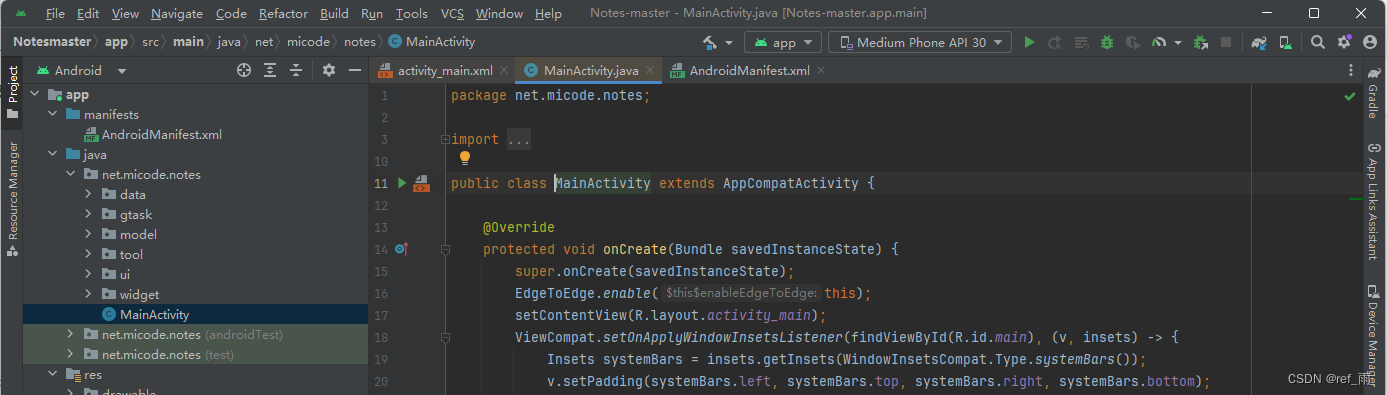
新创建好的项目目录如下:

3 将源码对应的文件复制到 Android 项目的对应目录及文件下
接下来我们开始把原项目的代码搬运过来:
1、首先把项目 Notes-master\src\net\micode\notes 下的包全部导入 Android Studio 的 net\micode\notes 下:


2、把 Notes-master\res 目录下的包全部导入 Android Studio 的 res 中:

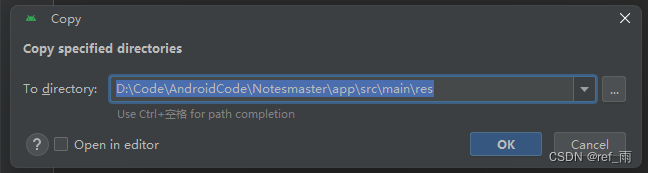
重复的文件全选 Overwrite:

3、开始把清单文件的内容导入:
(把各个Activity标签包裹的内容套入即可)
最好导入完的清单 manifest 内容如下:
<?xml version="1.0" encoding="utf-8"?>
<manifest xmlns:android="http://schemas.android.com/apk/res/android"
    xmlns:tools="http://schemas.android.com/tools">

    <uses-permission android:name="android.permission.WRITE_EXTERNAL_STORAGE" />
    <uses-permission android:name="com.android.launcher.permission.INSTALL_SHORTCUT" />
    <uses-permission android:name="android.permission.INTERNET" />
    <uses-permission android:name="android.permission.READ_CONTACTS" />
    <uses-permission android:name="android.permission.MANAGE_ACCOUNTS" />
    <uses-permission android:name="android.permission.AUTHENTICATE_ACCOUNTS" />
    <uses-permission android:name="android.permission.GET_ACCOUNTS" />
    <uses-permission android:name="android.permission.USE_CREDENTIALS" />
    <uses-permission android:name="android.permission.RECEIVE_BOOT_COMPLETED" />

    <application
        android:allowBackup="true"
        android:dataExtractionRules="@xml/data_extraction_rules"
        android:fullBackupContent="@xml/backup_rules"
        android:icon="@mipmap/ic_launcher"
        android:label="@string/app_name"
        android:roundIcon="@mipmap/ic_launcher_round"
        android:supportsRtl="true"
        android:theme="@style/Theme.Notesmaster"
        tools:targetApi="31">

        <activity
            android:name=".ui.NotesListActivity"
            android:configChanges="keyboardHidden|orientation|screenSize"
            android:label="@string/app_name"
            android:launchMode="singleTop"
            android:theme="@style/NoteTheme"
            android:uiOptions="splitActionBarWhenNarrow"
            android:windowSoftInputMode="adjustPan"
            android:exported="true">

            <intent-filter>
                <action android:name="android.intent.action.MAIN" />
                <category android:name="android.intent.category.LAUNCHER" />
            </intent-filter>
        </activity>

        <activity
            android:name=".ui.NoteEditActivity"
            android:configChanges="keyboardHidden|orientation|screenSize"
            android:launchMode="singleTop"
            android:theme="@style/NoteTheme"
            android:exported="true">

            <intent-filter>
                <action android:name="android.intent.action.VIEW" />
                <category android:name="android.intent.category.DEFAULT" />
                <data android:mimeType="vnd.android.cursor.item/text_note" />
                <data android:mimeType="vnd.android.cursor.item/call_note" />
            </intent-filter>

            <intent-filter>
                <action android:name="android.intent.action.INSERT_OR_EDIT" />
                <category android:name="android.intent.category.DEFAULT" />
                <data android:mimeType="vnd.android.cursor.item/text_note" />
                <data android:mimeType="vnd.android.cursor.item/call_note" />
            </intent-filter>

            <intent-filter>
                <action android:name="android.intent.action.SEARCH" />
                <category android:name="android.intent.category.DEFAULT" />
            </intent-filter>

            <meta-data
                android:name="android.app.searchable"
                android:resource="@xml/searchable" />
        </activity>


        <provider
            android:name="net.micode.notes.data.NotesProvider"
            android:authorities="micode_notes"
            android:multiprocess="true" />

        <receiver
            android:name=".widget.NoteWidgetProvider_2x"
            android:label="@string/app_widget2x2"
            android:exported="true">
            <intent-filter>
                <action android:name="android.appwidget.action.APPWIDGET_UPDATE" />
                <action android:name="android.appwidget.action.APPWIDGET_DELETED" />
                <action android:name="android.intent.action.PRIVACY_MODE_CHANGED" />
            </intent-filter>

            <meta-data
                android:name="android.appwidget.provider"
                android:resource="@xml/widget_2x_info" />
        </receiver>
        <receiver
            android:name=".widget.NoteWidgetProvider_4x"
            android:label="@string/app_widget4x4"
            android:exported="true">

            <intent-filter>
                <action android:name="android.appwidget.action.APPWIDGET_UPDATE" />
                <action android:name="android.appwidget.action.APPWIDGET_DELETED" />
                <action android:name="android.intent.action.PRIVACY_MODE_CHANGED" />
            </intent-filter>

            <meta-data
                android:name="android.appwidget.provider"
                android:resource="@xml/widget_4x_info" />
        </receiver>

        <receiver android:name=".ui.AlarmInitReceiver"
            android:exported="true">
            <intent-filter>
                <action android:name="android.intent.action.BOOT_COMPLETED" />
            </intent-filter>
        </receiver>

        <receiver
            android:name="net.micode.notes.ui.AlarmReceiver"
            android:process=":remote" >
        </receiver>

        <activity
            android:name=".ui.AlarmAlertActivity"
            android:label="@string/app_name"
            android:launchMode="singleInstance"
            android:theme="@android:style/Theme.Holo.Wallpaper.NoTitleBar" >
        </activity>

        <activity
            android:name="net.micode.notes.ui.NotesPreferenceActivity"
            android:label="@string/preferences_title"
            android:launchMode="singleTop"
            android:theme="@android:style/Theme.Holo.Light" >
        </activity>

        <service
            android:name="net.micode.notes.gtask.remote.GTaskSyncService"
            android:exported="false" >
        </service>

        <meta-data
            android:name="android.app.default_searchable"
            android:value=".ui.NoteEditActivity" />

<!--        <activity-->
<!--            android:name=".MainActivity"-->
<!--            android:exported="true">-->
<!--            <intent-filter>-->
<!--                <action android:name="android.intent.action.MAIN" />-->

<!--                <category android:name="android.intent.category.LAUNCHER" />-->
<!--            </intent-filter>-->
<!--        </activity>-->

    </application>

</manifest>
4.错误1:错误提示乱码
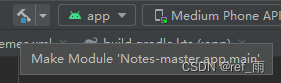
点击小锤子(Make Model '......')构建项目,然后会出现如下问题,但是错误提示乱码:


双击shift,然后搜索vmoption,然后点击Edit Custom VM Options...

然后最末尾补充如下代码:-Dfile.encoding=UTF-8:
![]()
重启项目后再点击绿色的小锤子构建项目,然后这时的报错信息就很清晰了:
5.依赖下载
源码依赖于一个httpcomponents-client组件,以执行网络服务,这里我们需要去下载依赖:
下载链接:
https://dlcdn.apache.org//httpcomponents/httpclient/binary/httpcomponents-client-4.5.14-bin.zip

然后我们把下载好后的zip包解压并放在如下目录:

在 Android Studio 中导入依赖:
选择File -> Project Structure -> All Dependencies -> +

填写绝对路径,这里我下载的依赖库路径是:
D:\Code\AndroidCode\Notesmaster\httpcomponents-client-4.5.14-bin\lib
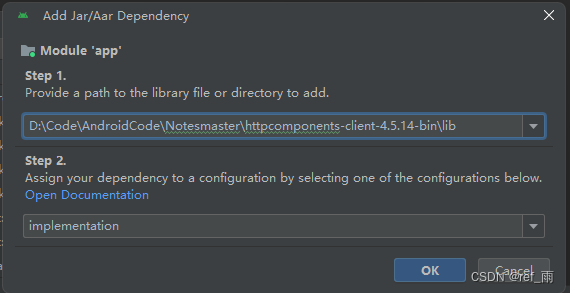
导入后,我们会发现app目录下的build.gradle多了如下内容:

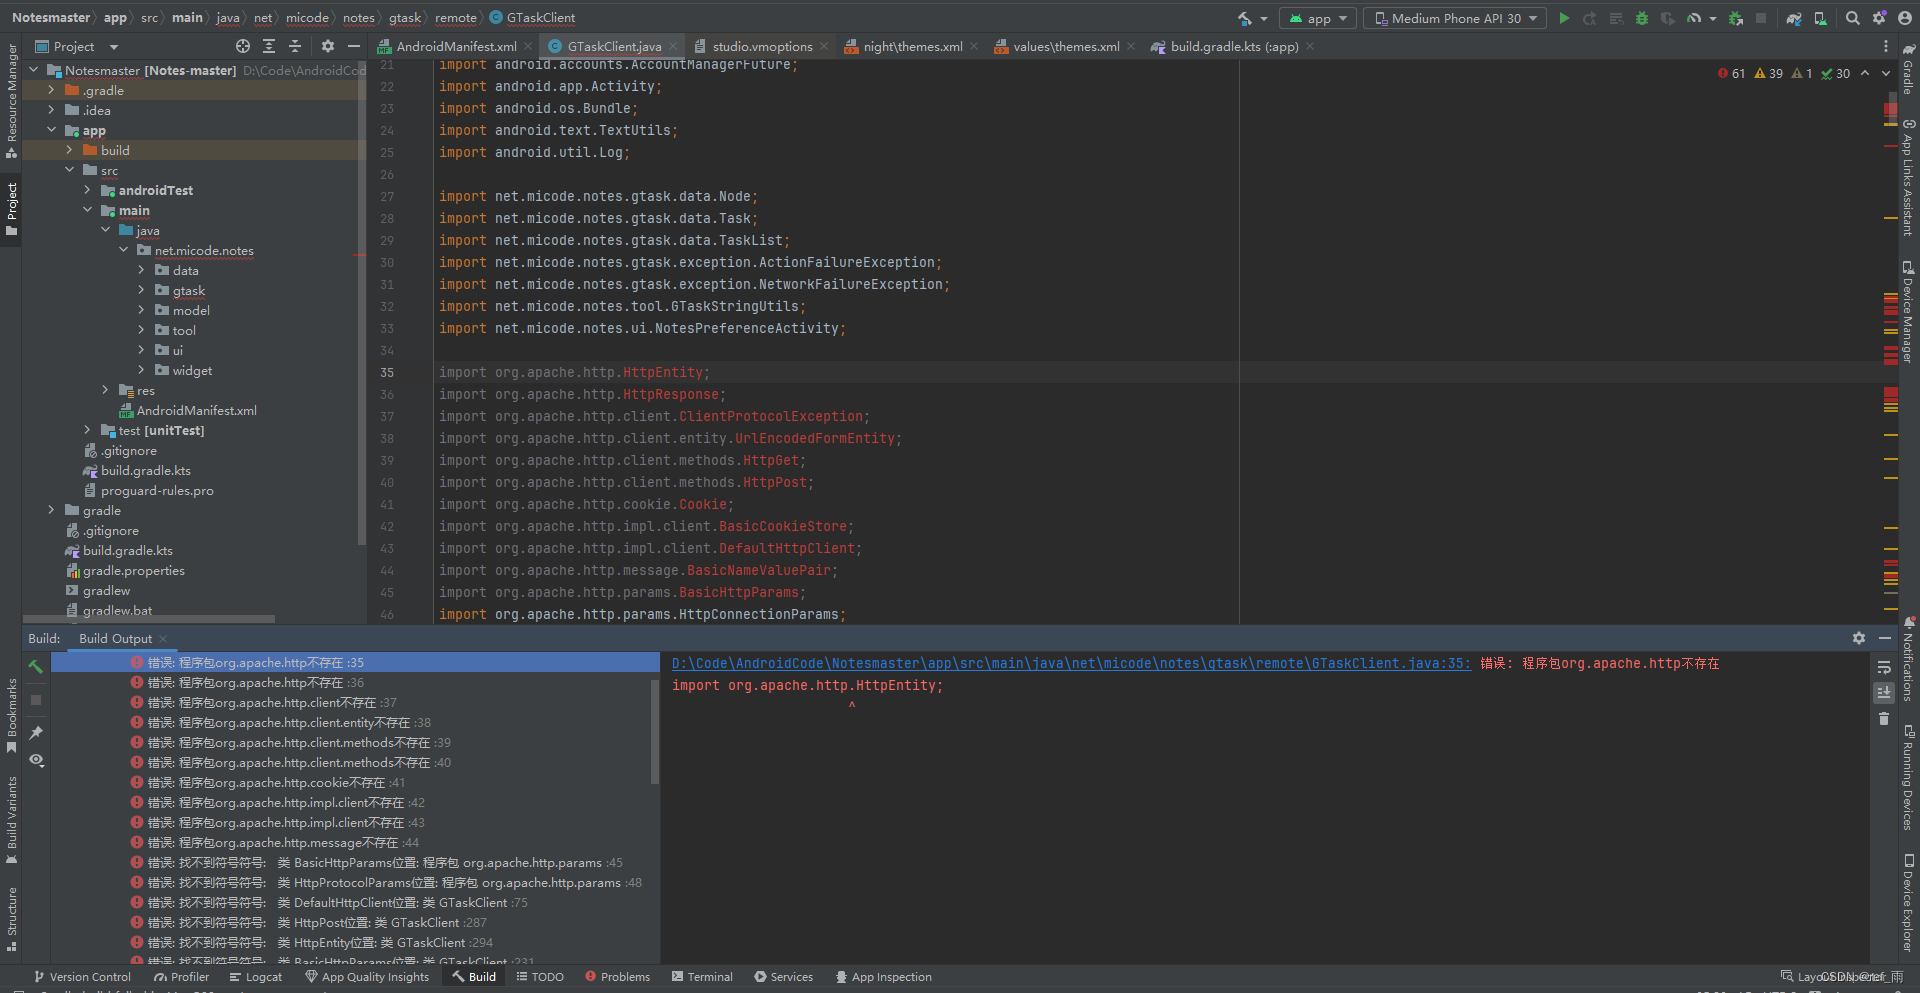
6.错误2:找不到符号 notification.setLatestEventInfo...
这时,又会报如下错误:
错误: 找不到符号 notification.setLatestEventInfo(......)
D:\Code\AndroidCode\Notesmaster\app\src\main\java\net\micode\notes\gtask\remote\GTaskASyncTask.java:80: 错误: 找不到符号
notification.setLatestEventInfo(mContext, mContext.getString(R.string.app_name), content,
^
符号: 方法 setLatestEventInfo(Context,String,String,PendingIntent)
位置: 类型为Notification的变量 notification
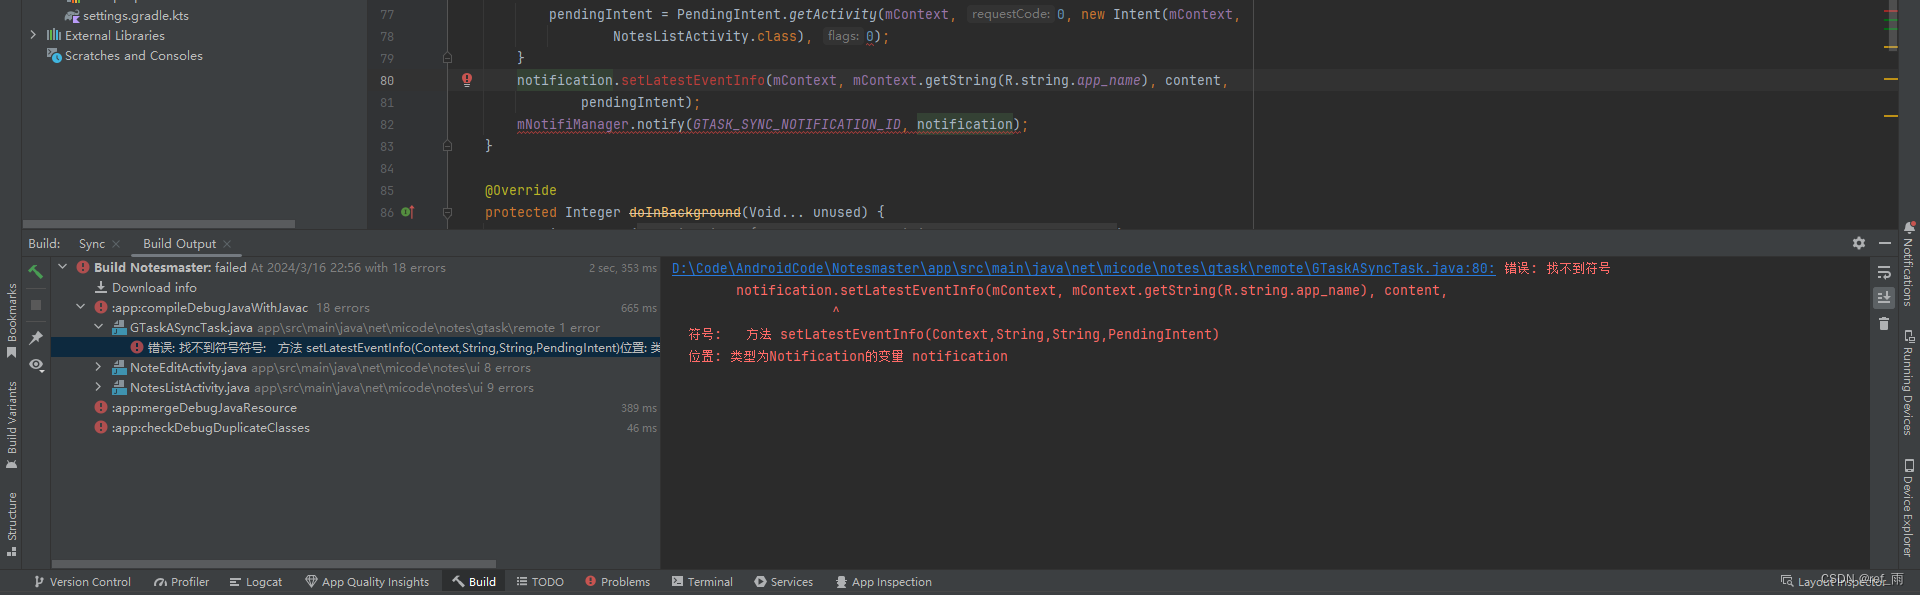
这是因为该函数在Android 6.0及以上版本被去除,可以先注释掉这段函数,后续再想办法解决(使用Android 5.0以下版本的SDK可能不会出现这个问题,不过推荐使用android 5.0或者以上版本的SDK)
故注释如下代码:
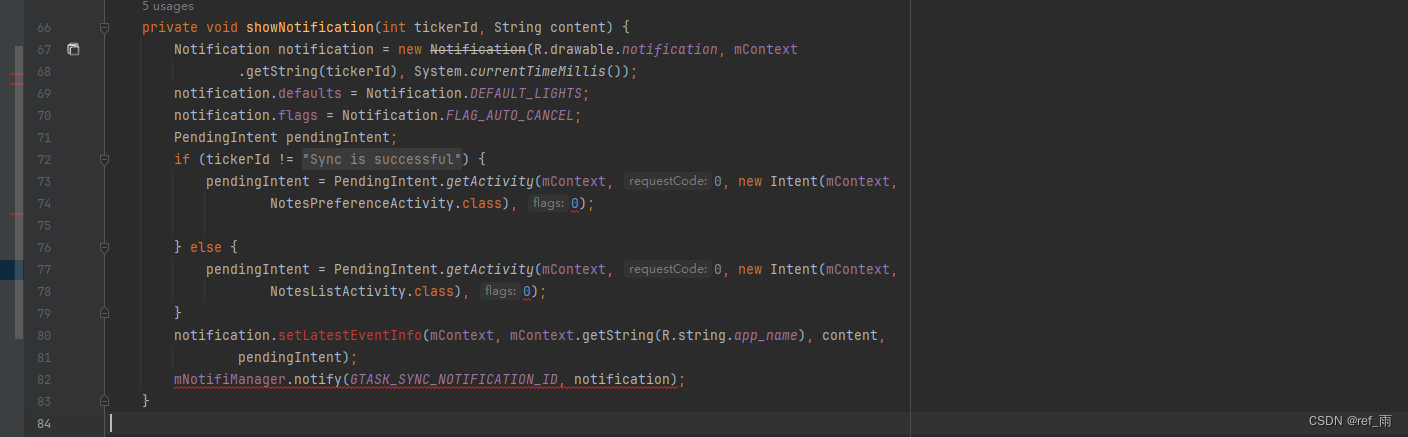
修改为:
private void showNotification(int tickerId, String content) {
    PendingIntent pendingIntent;
    if (tickerId != R.string.ticker_success) {
        pendingIntent = PendingIntent.getActivity(mContext, 0, new Intent(mContext,
                NotesPreferenceActivity.class), PendingIntent.FLAG_IMMUTABLE);
    } else {
        pendingIntent = PendingIntent.getActivity(mContext, 0, new Intent(mContext,
                NotesListActivity.class), PendingIntent.FLAG_IMMUTABLE);
    }
    Notification.Builder builder = new Notification.Builder(mContext)
            .setAutoCancel(true)
            .setContentTitle(mContext.getString(R.string.app_name))
            .setContentText(content)
            .setContentIntent(pendingIntent)
            .setWhen(System.currentTimeMillis())
            .setOngoing(true);
    Notification notification=builder.getNotification();
    mNotifiManager.notify(GTASK_SYNC_NOTIFICATION_ID, notification);
}
7.错误3:switch语句报错Constant expression required
再次构建项目,然后又遇到错误:switch语句报错Constant expression required
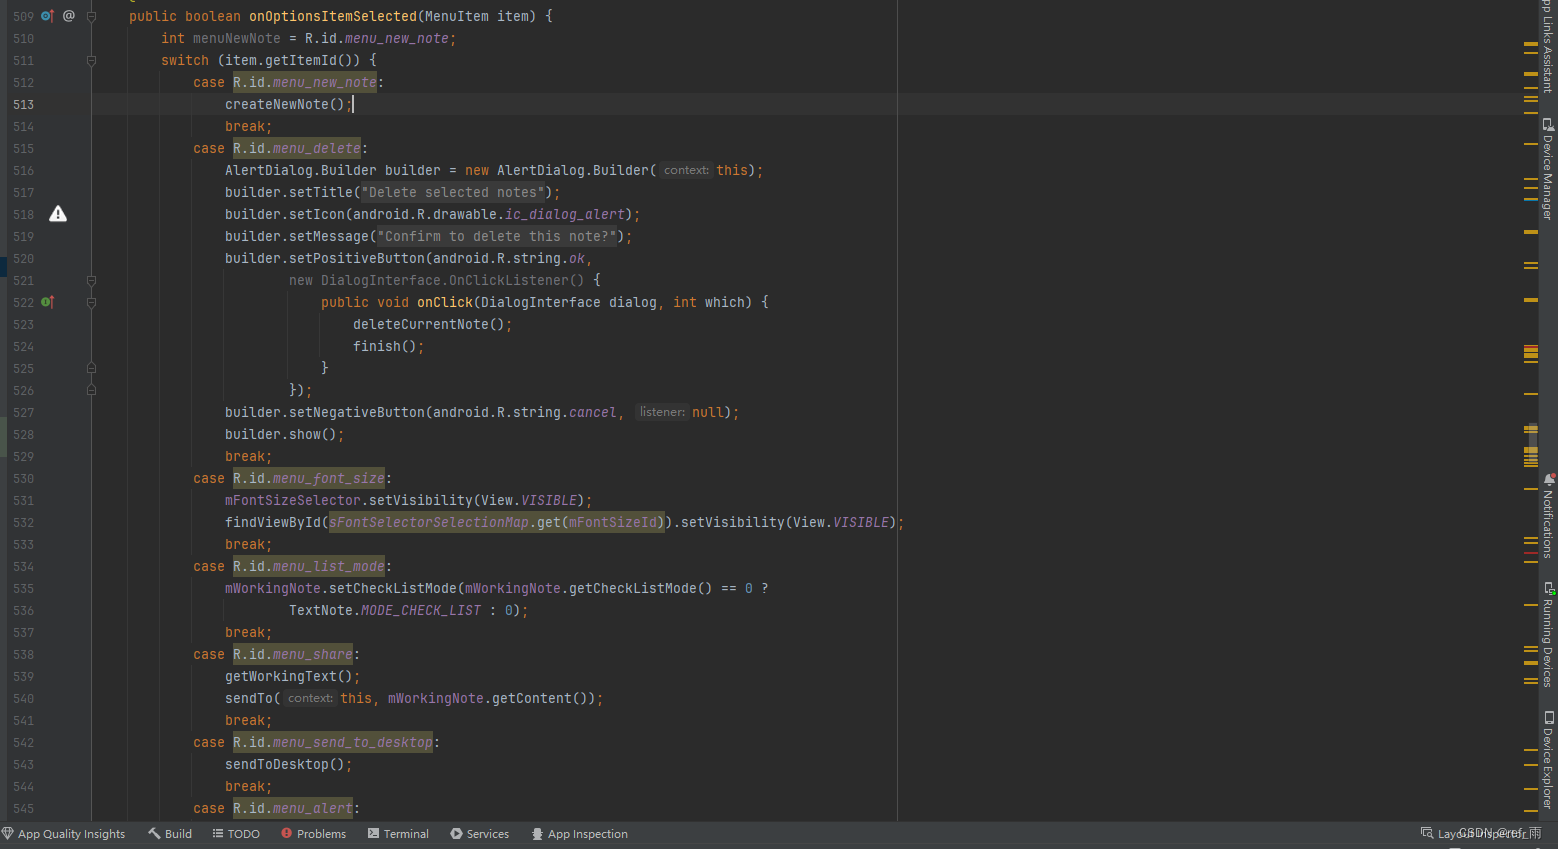
D:\Code\AndroidCode\Notesmaster\app\src\main\java\net\micode\notes\ui\NoteEditActivity.java:511: 错误: 需要常量表达式
case R.id.menu_new_note:
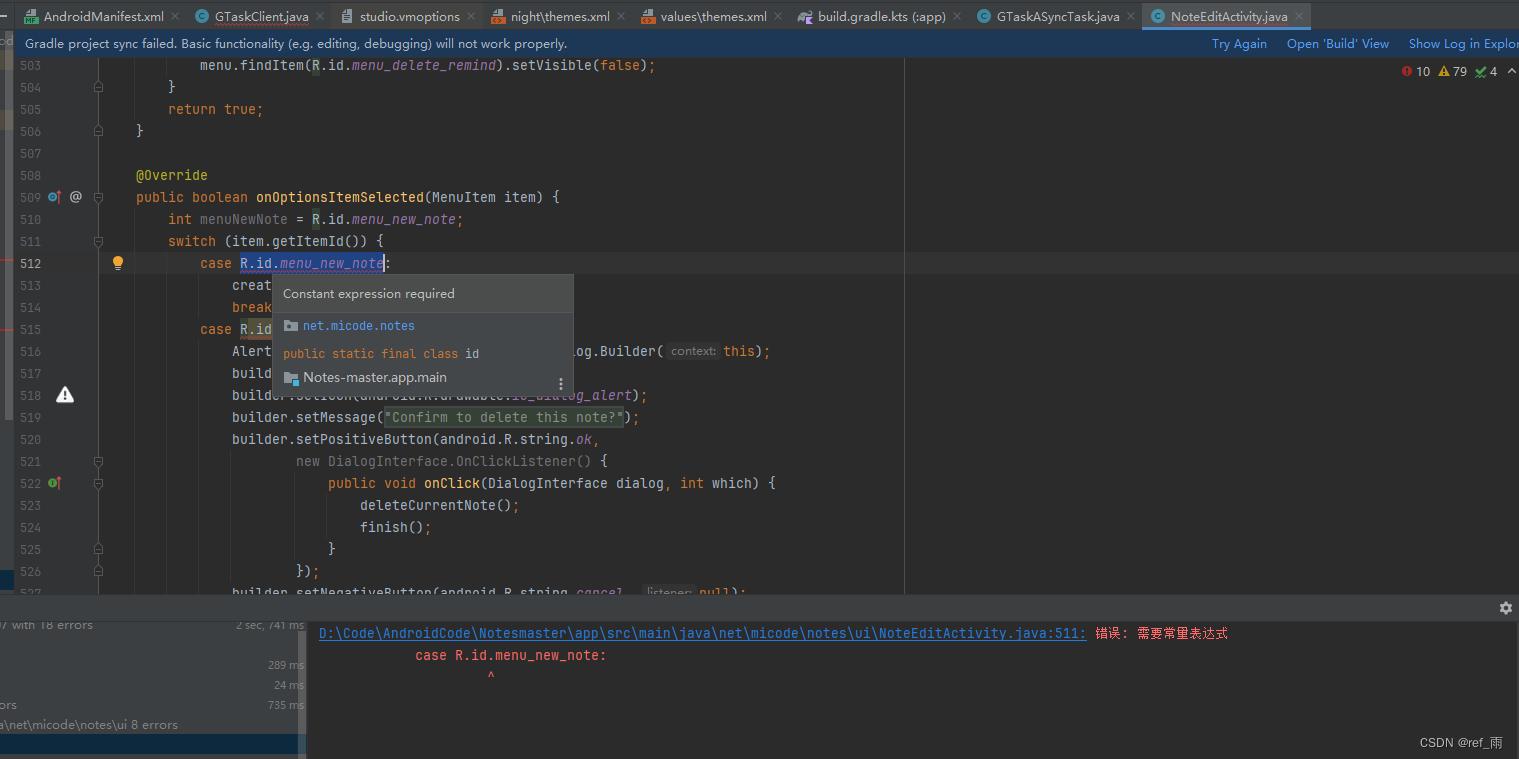
解决办法:
参考链接:【已解决】switch语句报错Constant expression required-CSDN博客
8.错误4:jar包冲突
改好了之后,又又又出现问题了!!!
问题:jar包冲突:

这里是因为我们刚刚导入的依赖有问题,不能全部导入,不然会出现jar包之间的冲突,故把刚刚导入的包部分进行修改,即修改app目录下的 build.gradle:
这部分代码我们刚刚导入的有误:
要把刚刚导入包时自动生成的代码进行修改:
//    部分需要重新修改
//    implementation(fileTree(mapOf(
//        "dir" to "D:\\Code\\AndroidCode\\Notesmaster\\httpcomponents-client-4.5.14-bin\\lib",
//        "include" to listOf("*.aar", "*.jar"),
//        "exclude" to listOf("")
//    )))
    //修改为如下代码:
    implementation(files("D:\\Code\\AndroidCode\\Notesmaster\\httpcomponents-client-4.5.14-bin\\lib\\httpclient-osgi-4.5.14.jar"))
    implementation(files("D:\\Code\\AndroidCode\\Notesmaster\\httpcomponents-client-4.5.14-bin\\lib\\httpclient-win-4.5.14.jar"))
    implementation(files("D:\\Code\\AndroidCode\\Notesmaster\\httpcomponents-client-4.5.14-bin\\lib\\httpcore-4.4.16.jar"))
9.错误5:3 files found with path ‘META-INF/DEPENDENCIES’ ...
然后你懂的,又出错了:
3 files found with path ‘META-INF/DEPENDENCIES’
3 files found with path 'META-INF/DEPENDENCIES'.
Adding a packaging block may help, please refer to
https://developer.android.com/reference/tools/gradle-api/8.3/com/android/build/api/dsl/Packaging
for more information

这里我们需要解决重复包含文件的问题:
参考链接:知士荟
但他的解决办法不适用于新版本的Android Studio,故这里我们尝试其他写法,
在build.gradle(Module:app)的android字段里面,加上这段代码,排除掉冲突的系统依赖包即可
packaging {
resources.excludes.add("META-INF/DEPENDENCIES");
resources.excludes.add("META-INF/NOTICE");
resources.excludes.add("META-INF/LICENSE");
resources.excludes.add("META-INF/LICENSE.txt");
resources.excludes.add("META-INF/NOTICE.txt");
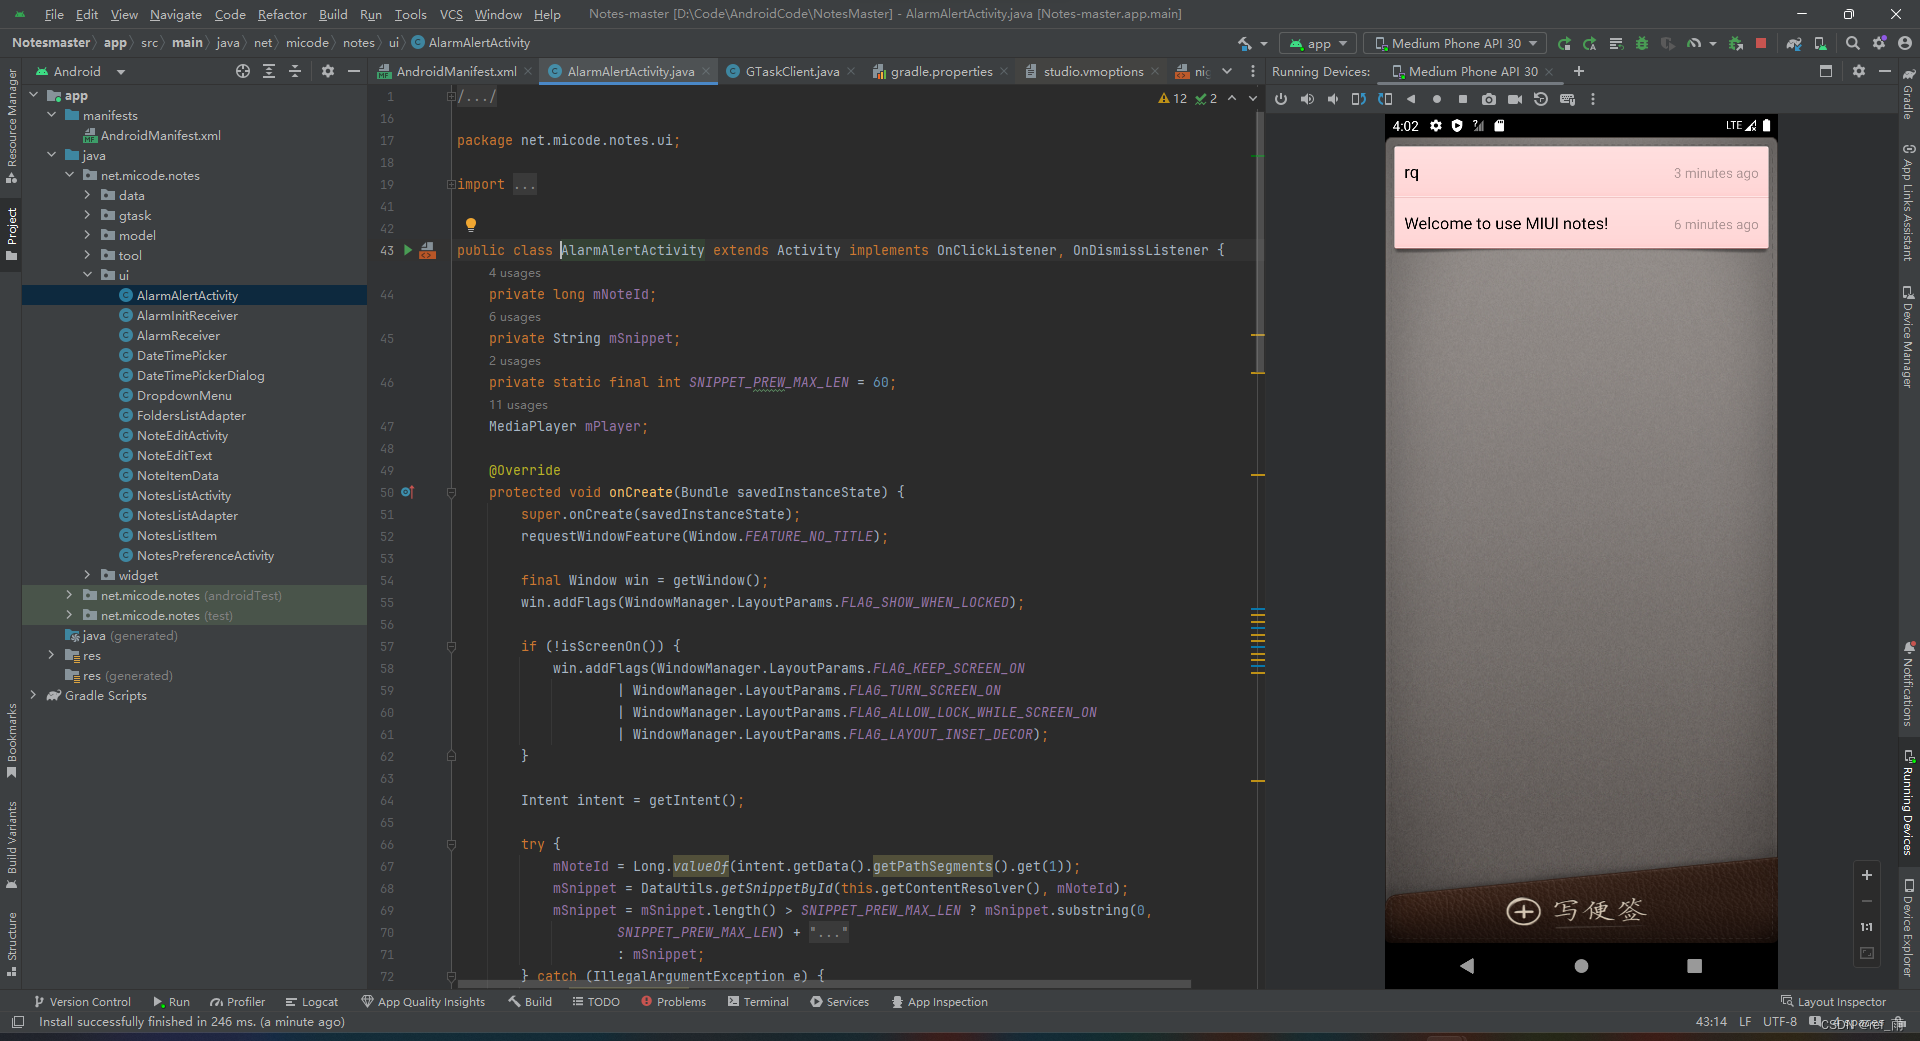
}10.成功部署及运行展示
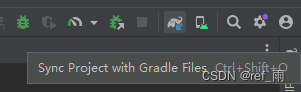
至此,项目部署完成,我们点击 Make Module 这个小锤子 ,以及 Sync Project with Gradle Files 按钮,就可以准备运行 小米便签 APP 了。
点击运行,运行成功!!
二、遇到的问题汇总
如果您看完了小米便签的部署的话,这部分的内容应该对您意义不大,这是笔者对遇到的错误的汇总,以便复习,方便以后遇到类似错误之后及时反应过来。
1.错误提示乱码
1.1 错误显示
错误如下,提示信息都为乱码:
1.2 报错原因
字符格式的设置问题。
1.3 解决办法
双击shift,然后搜索vmoption,然后点击Edit Custom VM Options...
然后最末尾补充如下代码:-Dfile.encoding=UTF-8:
![]()
重启项目后再点击绿色的小锤子构建项目,然后这时的报错信息就很清晰了:
这里还有其他解决办法,具体参考博客:知士荟
原文:
(可能下面build框中会出现不可打印的字符,这是因为没配置好解码方式,配置方法如下,在build.gralde(Module:Notes-master)(或类似的不是app的build.gradle)末尾添加如下字段)

2.找不到符号 notification.setLatestEventInfo(......)
2.1 错误示例
具体报错:
D:\Code\AndroidCode\Notesmaster\app\src\main\java\net\micode\notes\gtask\remote\GTaskASyncTask.java:80: 错误: 找不到符号
notification.setLatestEventInfo(mContext, mContext.getString(R.string.app_name), content,
^
符号: 方法 setLatestEventInfo(Context,String,String,PendingIntent)
位置: 类型为Notification的变量 notification
2.2 报错原因
这是因为该函数在Android 6.0及以上版本被去除,可以先注释掉这段函数,后续再想办法解决(使用Android 5.0以下版本的SDK可能不会出现这个问题,不过推荐使用android 5.0或者以上版本的SDK)
2.3 解决办法
故注释如下代码:
修改为:
private void showNotification(int tickerId, String content) {
    PendingIntent pendingIntent;
    if (tickerId != R.string.ticker_success) {
        pendingIntent = PendingIntent.getActivity(mContext, 0, new Intent(mContext,
                NotesPreferenceActivity.class), PendingIntent.FLAG_IMMUTABLE);
    } else {
        pendingIntent = PendingIntent.getActivity(mContext, 0, new Intent(mContext,
                NotesListActivity.class), PendingIntent.FLAG_IMMUTABLE);
    }
    Notification.Builder builder = new Notification.Builder(mContext)
            .setAutoCancel(true)
            .setContentTitle(mContext.getString(R.string.app_name))
            .setContentText(content)
            .setContentIntent(pendingIntent)
            .setWhen(System.currentTimeMillis())
            .setOngoing(true);
    Notification notification=builder.getNotification();
    mNotifiManager.notify(GTASK_SYNC_NOTIFICATION_ID, notification);
}
3.switch语句报错Constant expression required
3.1 错误示例
具体报错:
D:\Code\AndroidCode\Notesmaster\app\src\main\java\net\micode\notes\ui\NoteEditActivity.java:511: 错误: 需要常量表达式
case R.id.menu_new_note:
3.2 报错原因
在JDK17中switch语句的条件表达式支持使用枚举类型,而这个特性还没被Android Studio支持。
3.3 解决办法
参考链接:【已解决】switch语句报错Constant expression required-CSDN博客
在gradle.properties配置文件下添加如下代码
android.nonFinalResIds=false修改后,编译器便不会报错:
4.jar包冲突
4.1 错误示例
4.2 错误原因
因为我们导入的依赖有问题,不能全部导入,不然会出现jar包之间的冲突。
4.3 解决办法
故把刚刚导入的包部分进行修改,即修改app目录下的 build.gradle:
这部分代码我们刚刚导入的有误:
修改方法1:把刚刚导入依赖包时自动生成的代码进行修改:
//    部分需要重新修改
//    implementation(fileTree(mapOf(
//        "dir" to "D:\\Code\\AndroidCode\\Notesmaster\\httpcomponents-client-4.5.14-bin\\lib",
//        "include" to listOf("*.aar", "*.jar"),
//        "exclude" to listOf("")
//    )))
    //修改为如下代码:
    implementation(files("D:\\Code\\AndroidCode\\Notesmaster\\httpcomponents-client-4.5.14-bin\\lib\\httpclient-osgi-4.5.14.jar"))
    implementation(files("D:\\Code\\AndroidCode\\Notesmaster\\httpcomponents-client-4.5.14-bin\\lib\\httpclient-win-4.5.14.jar"))
    implementation(files("D:\\Code\\AndroidCode\\Notesmaster\\httpcomponents-client-4.5.14-bin\\lib\\httpcore-4.4.16.jar"))
修改方法2:或者修改成这样也可以:
    implementation(fileTree(mapOf(
        "dir" to "D:\\Code\\AndroidCode\\Notesmaster\\httpcomponents-client-4.5.14-bin\\lib",
        "include" to listOf("*.aar", "*.jar"),
        "exclude" to listOf("commons-codec-1.11.jar","httpclient-4.5.14.jar","httpclient-cache-4.5.14.jar",
            "fluent-hc-4.5.14.jar","httpmime-4.5.14.jar")
    )))
选择其中一个方法修改完后便不会再报同样的错。
5.three files found with path ‘META-INF/DEPENDENCIES’ ...
5.1 错误示例
具体报错:
3 files found with path 'META-INF/DEPENDENCIES'.
Adding a packaging block may help, please refer to
https://developer.android.com/reference/tools/gradle-api/8.3/com/android/build/api/dsl/Packaging
for more information
5.2 错误原因
这里是因为我们包含的文件重复了。
5.3 解决办法
这里我们需要解决重复包含文件的问题:
参考链接:知士荟
但他的解决办法似乎不适用于新版本的Android Studio,因为写法变了,故这里我们尝试其他写法。在build.gradle(Module:app)的android字段里面,加上这段代码,排除掉冲突的系统依赖包即可
packaging {
        resources.excludes.add("META-INF/DEPENDENCIES");
        resources.excludes.add("META-INF/NOTICE");
        resources.excludes.add("META-INF/LICENSE");
        resources.excludes.add("META-INF/LICENSE.txt");
        resources.excludes.add("META-INF/NOTICE.txt");
    }
补充
这里虽然我们没用到Android Studio的Import的功能,但我一开始有尝试使用以往Android Studio导入eclipse项目的方法,并在Import项目时出了问题,所以最后这里我也记录一下。
1.新版的Android Studio的eclipse项目导入问题
问题描述
Android Studio最新版本没有Import Project from ADT (Eclipse Android),只有Import Project from external model或者Create project from existing sources.生成出来的项目都没有gradle文件,所以一运行就会Directory 'D:\Code\AndroidCode\Notes-master' does not contain a Gradle build.报错

原因
在官方文档中有说明:如果我们要导入没有用gradle构建的项目,只能通过自己复制源代码到新项目或者为原项目编写一个gradle.build文件,以下是官方文档中的原文:
如果您的 IntelliJ 项目尚未使用 Gradle 构建系统,您可从两种方式中选择其一,以将项目导入到 Android Studio 中,后续部分将进行详述:
- 新建一个空的 Android Studio 项目,然后将现有源代码复制到与新项目关联的目录中。如需了解详情,请参阅有关通过新建空项目进行迁移的部分。
- 为项目新建一个 Gradle build 文件,然后将项目和上述新 build 文件导入到 Android Studio 中。如需了解详情,请参阅通过创建自定义 Gradle build 文件进行迁移部分。
这个是官方文档的链接:https://developer.android.com/studio/intro/migrate?hl=zh-cn#kts
2.关于小米便签功能不完全的问题
问题描述
在小米便签部署完后,我们运行了一下小米便签,尝试其功能,发现只有书写标签的功能。

原因
这是因为源码中在res.values包下的 styles.xml 设置有问题。
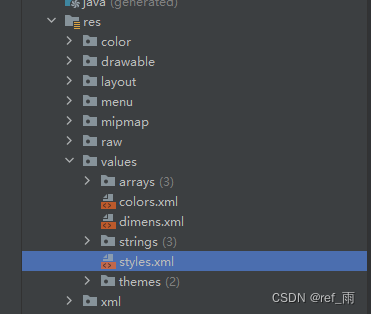

解决办法
把上图截取的代码修改为如下代码,便可看到其他功能:
    <style name="NoteActionBarStyle" parent="@android:style/Widget.Holo.Light.ActionBar.Solid">
        <item name="android:visibility">visible</item>
    </style>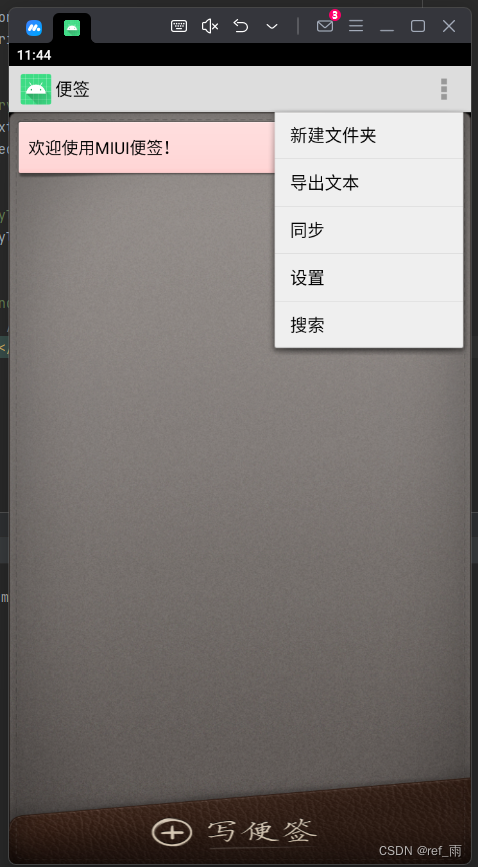
致谢
感谢如下博客提供的解决办法的思路:
总结
Android Studio的2023版本似乎没了之前一键导入eclipse项目并自动构建gradle的功能,故这里我们尝试通过新建项目,然后搬运源码的方式来完成小米便签项目的部署。