vue3.0 中文预览地址
vue3.0 github地址
怎么使用vue-cli生成vue3.0的项目?
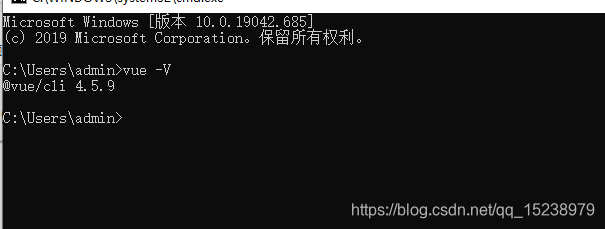
npm install -g @vue/cli
vue3.0新特性
- Vue3采用渐进式开发,向下兼容
- 性能提升
- Composition Api 解决Vue2 组件开发的问题
- 新的API加入
* Teleprot 瞬移组件
* SusPense 解决异步加载组件问题
- 更好TypeScript支持
- 性能提升
* 打包减少41%
* 初次渲染提升55%
* 数据更新快了133%
* 内存使用减少了54%
新建项目
1. 使用 vue-cli 命令行创建项目
通过 9 步对话式的询问,你就可以轻松的创建一个 Vue3 项目。
这里我先用命令行的方式创建一个Vue3项目,直接在命令行中输入vue create vue3-1,输入完成后,他会有这样一句询问。
Your connection to the default yarn registry seems to be slow.
 Use https://registry.npm.taobao.org for faster installation? (Y/n)
意思是你不能科学上网,建议你使用淘宝源,这时候你需要选择Y,也就是使用淘宝源进行创建。如果你已经配置淘宝源不会显示这个选项。
当你选择Y之后,就会跳出三个菜单让你选择。
? Please pick a preset: (Use arrow keys) //请选择预选项
Default ([Vue 2] babel, eslint) //使用Vue2默认模板进行创建
Default (Vue 3 Preview) ([Vue 3] babel, eslint) //使用Vue3默认模板进行创建
Manually select features //手动选择(自定义)的意思
因为你要使用TypeScript进行开发 Vue3 的代码,所以不能直接使用第二项默认模板,这时候我们选择第三项手动选择。选择的时候按回车就可以实现。(如果这时候你没有上面的三个选项,说明的 vue-cli 是旧版本,需要你更新。)
这时候就会出现很多可插拔的选项让你自定义选择:
? Check the features needed for your project: (Press to select, to toggle all, to invert selection)
() Choose Vue version
() Babel
( ) TypeScript
( ) Progressive Web App (PWA) Support
( ) Router
( ) Vuex
( ) CSS Pre-processors //CSS预处理器
(*) Linter / Formatter //格式化工具
( ) Unit Testing //单元测试
( ) E2E Testing //E2E测试
这里我们需要再多选一个TypeScript的选项,然后再按回车进入下一层选择。
? Choose a version of Vue.js that you want to start the project with (Use arrow keys)
2.x
3.x (Preview)
这里要选择 3.x 的版本,点击回车,然后会提示你是否需要使用class-style,教学中旧不使用这个类样式语法了,所以我们选择n。
Use class-style component syntax?
然后会出现下面的选项 ,意思是否使用TypeScript和Babel的形式编译 JSX.这里我们也选择n
Use Babel alongside TypeScript (required for modern mode, auto-detected polyfills, transpiling JSX)? (Y/n)
然后会出现ESLint的一些配置,这里我们选择第一项,默认就好,因为下面这些规则并不是这个课程的重点。
? Pick a linter / formatter config: (Use arrow keys)
ESLint with error prevention only
ESLint + Airbnb config ESLint + Standard config ESLint + Prettier
TSLint (deprecated)
回车后会让你选择增加lint的特性功能。
? Pick additional lint features: (Press to select, to toggle all, to invert selection)
(*) Lint on save //保存的时候进行Lint
( ) Lint and fix on commit //需要帮你进行fix(修理),这项我们不进行选择
回车后让你选择这些配置文件时单独存放,还是直接存放在package.json文件里。这里选择放在单独的文件里。
Where do you prefer placing config for Babel, ESLint, etc.? In dedicated config files
最后一个问题,是问你需不需要把这些配置保存下来,下次好直接进行使用。我这里选择不用(n)。淡然你可以自行选择
Save this as a preset for future projects? (y/N)
如果你同时安装了npm和yarn来个包管理软件,它还会作最后一次询问,让你选择使用什么进行下载。
? Pick the package manager to use when installing dependencies:
Use Yarn
Use NPM
我选择了yarn进行安装,也可能是心里问题,我老觉的 yarn 更快一些,我这里只用了 10 几秒就完成了下载和构建。 出现下面的信息,说明我们已经安装完成了。
Done in 10.33s.
 $ cd vue3-1
 $ yarn serve
根据提示在命令行输入cd vue3-1进入项目,然后再输入yarn serve开启项目预览。这时候就会给出两个地址,都可以访问到现在的项目.
App running at:
- Local: http://localhost:8080/
- Network: http://192.168.0.118:8080/
Note that the development build is not optimized.
To create a production build, run yarn build.
把地址放到浏览器的地址栏,如果看到下面的页面,说明安装正常了。 
vue create vue3.0test
2. 图形可视化构建
vue ui
当你安装了最新版的Vue-cli就可以使用 vue ui这个命令,开启一个 UI 界面,然后会出现下面的提示。
Starting GUI.
 Ready on http://localhost:80
出现提示后,把http://localhost:80地址拷贝到浏览器地址栏中,就会出现下面的界面。

这时候点击创建按钮,然后选择页面下方的在此处创建新项目。这时候会让你输入项目名称和包管理器。我再这里输入了vue3-2,并使用了yarn作为管理器。

可以点击下一步了,之后会让你选择预设模板,这里选择手动。 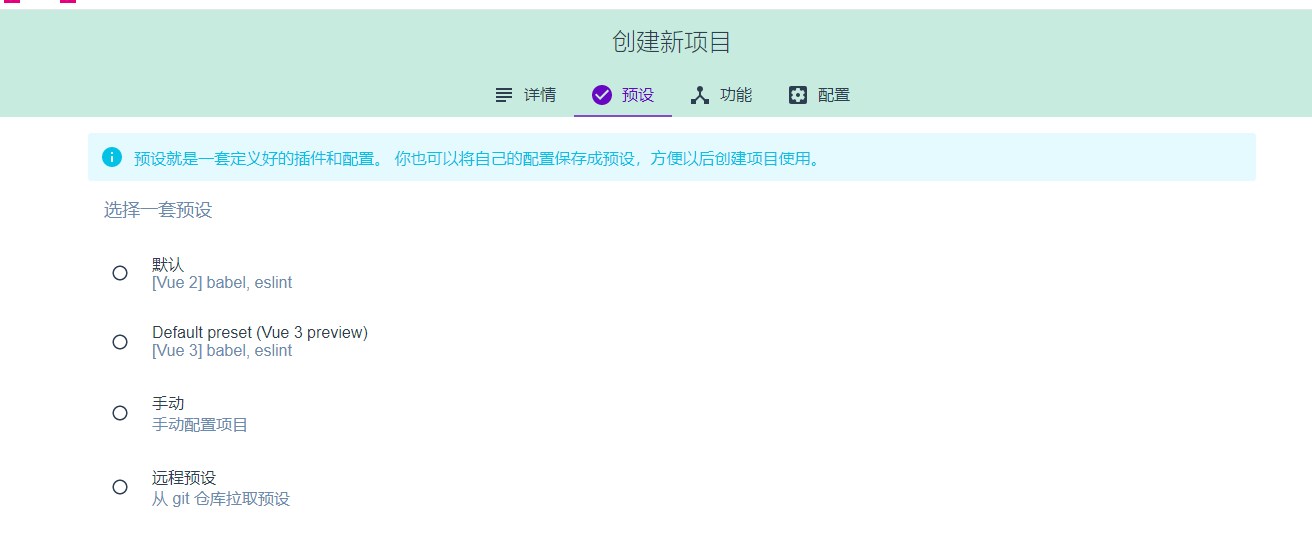
之后就和命令行基本一样了,根据自己的项目来进行配置。(视频中会作详细的演示) 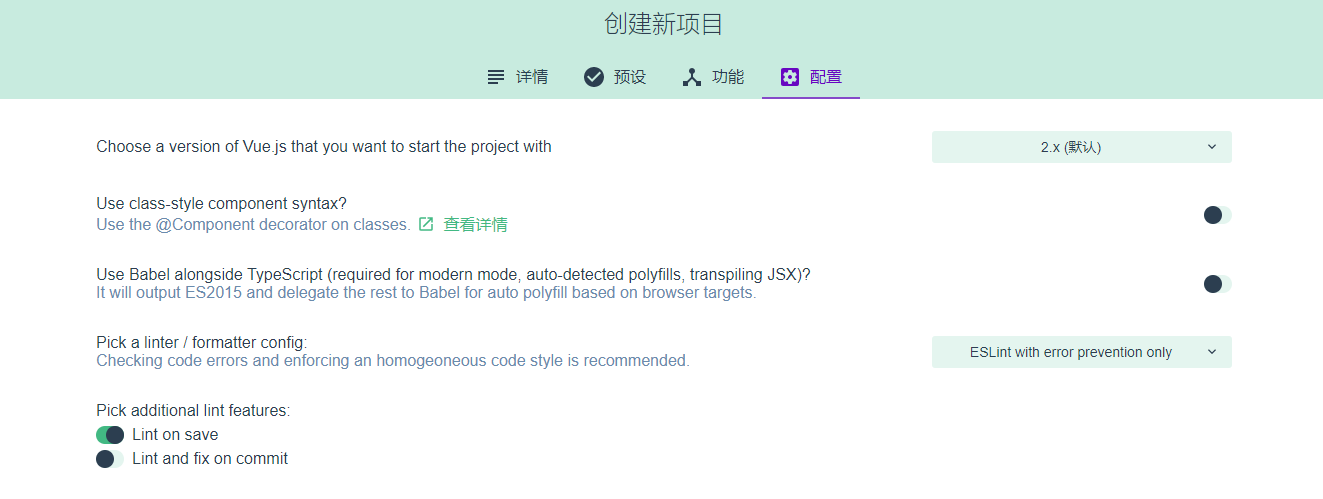
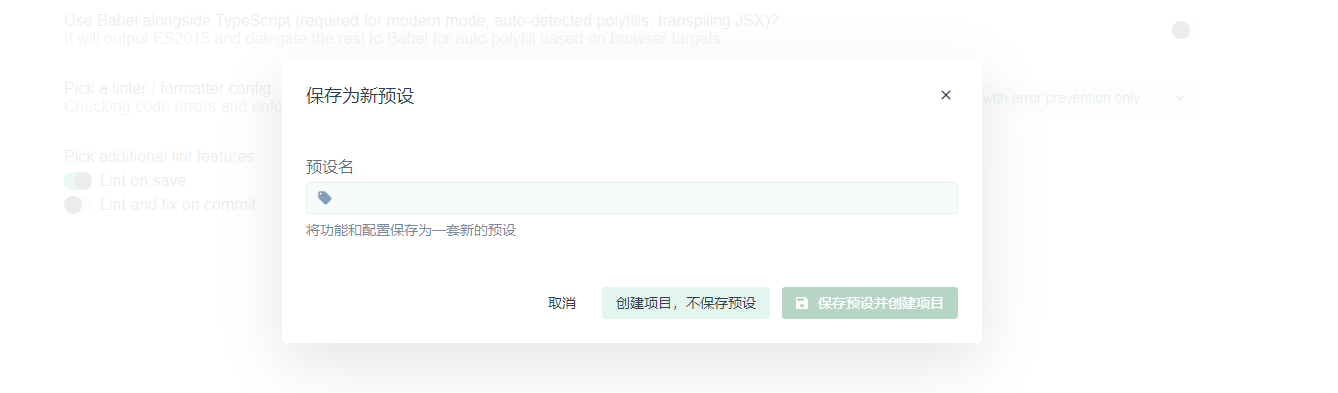
这不完成后,可以选择“创建项目”,然后弹出提示,问是不是保存这个配置,这里依然是不保存。
这时候如果你注意VSCode中的终端,会发现它开始为我们构建项目。大概一分钟左右,会跳出下面的页面,说明项目已经构建完成。 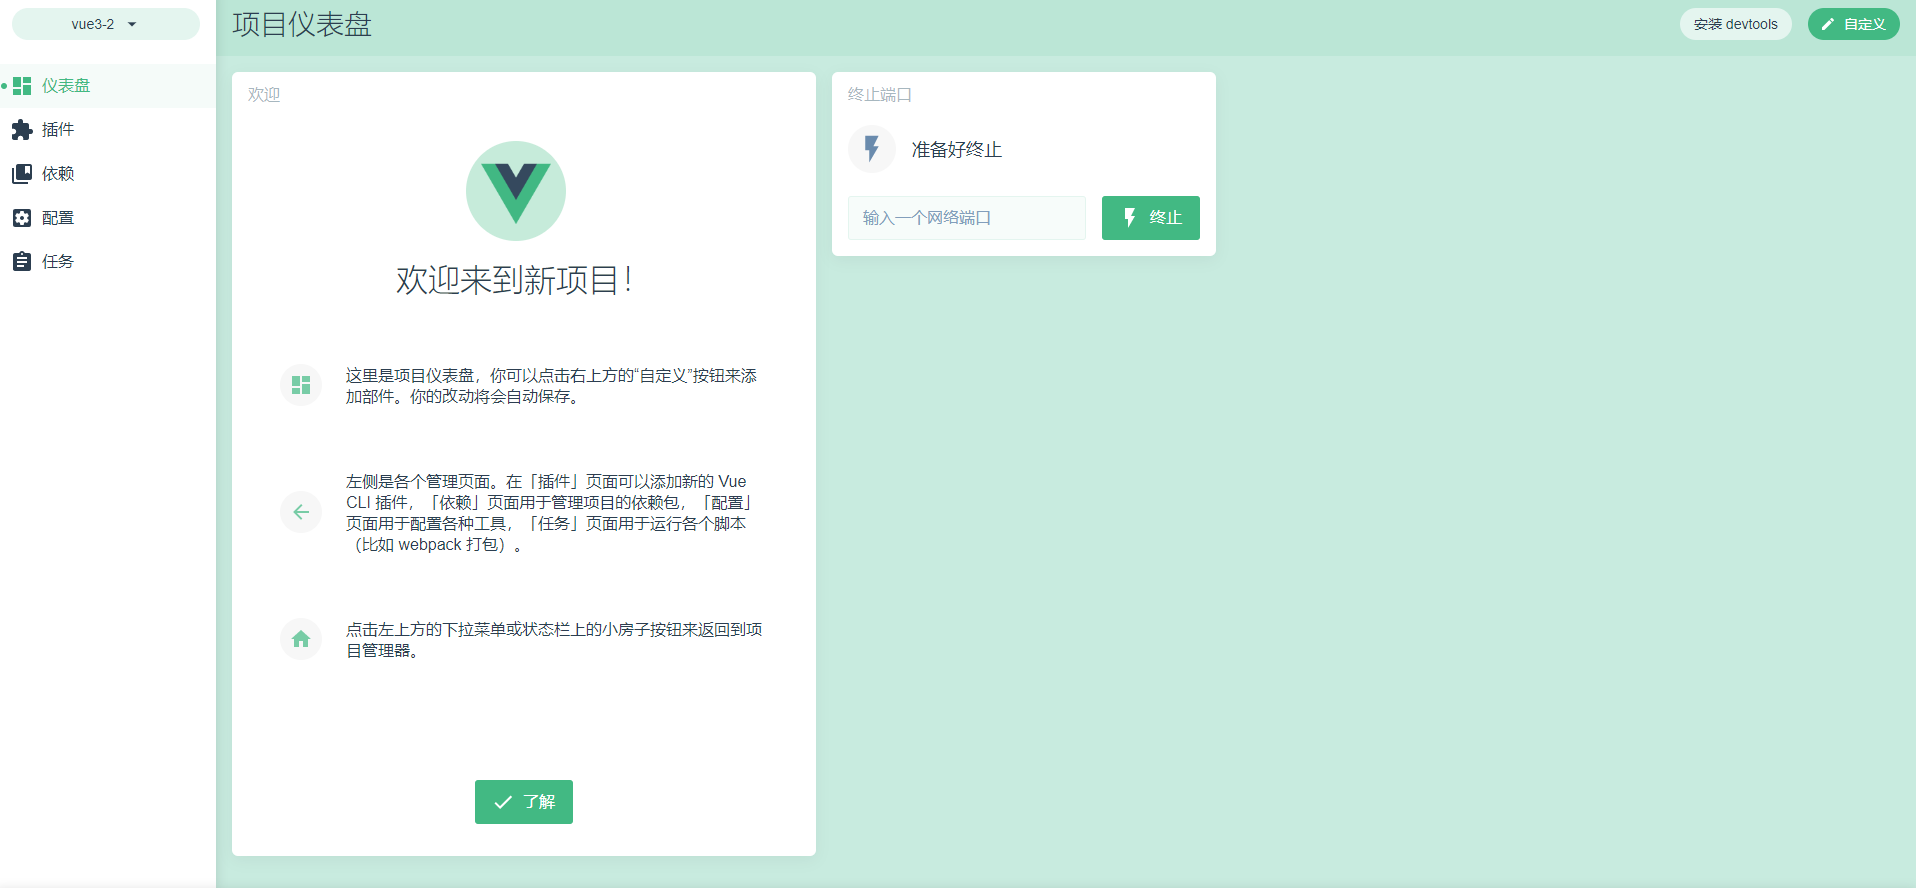
这时候再回到 VSCode 的终端中,进入项目cd vue3-2,然后启动服务npm serve,等到服务启动后在浏览器地址栏输入http://localhost:8080/,就可以看到下面的界面了。
看到这个界面,正面你的 Vue3+TypeScript 项目已经创建好了。下节课学习一下里边的基本结构。
vue3.0 项目结构和目录说明
项目基本目录讲解
项目基本目录讲解
以一个目录树状结构进行展示。后边的作用我也写到了下面
|-node_modules – 所有的项目依赖包都放在这个目录下
 |-public – 公共文件夹
 —|favicon.ico – 网站的显示图标
 —|index.html – 入口的html文件
 |-src – 源文件目录,编写的代码基本都在这个目录下
 —|assets – 放置静态文件的目录,比如logo.pn就放在这里
 —|components – Vue的组件文件,自定义的组件都会放到这
 —|App.vue – 根组件,这个在Vue2中也有
 —|main.ts – 入口文件,因为采用了TypeScript所以是ts结尾
 —|shims-vue.d.ts – 类文件(也叫定义文件),因为.vue结尾的文件在ts中不认可,所以要有定义文件
 |-.browserslistrc – 在不同前端工具之间公用目标浏览器和node版本的配置文件,作用是设置兼容性
 |-.eslintrc.js – Eslint的配置文件,不用作过多介绍
 |-.gitignore – 用来配置那些文件不归git管理
 |-package.json – 命令配置和包管理文件
 |-README.md – 项目的说明文件,使用markdown语法进行编写
 |-tsconfig.json – 关于TypoScript的配置文件
 |-yarn.lock – 使用yarn后自动生成的文件,由Yarn管理,安装yarn包时的重要信息存储到yarn.lock文件中
这就是基本目录结构和用处了,你可以在表中自查。
package.json 中的三条命令
上两节课你可以使用npm run serve或yarn serve查看项目效果,就是因为有package.json中的scripts起到了作用。先来看一下这三条命令。
{

 //----
 “scripts”: {

 “serve”: “vue-cli-service serve”,
 “build”: “vue-cli-service build”,
 “lint”: “vue-cli-service lint”
 },
 //----
 }
能使用vue-cli-service是因为vue-cli自动安装了cli-service这个工具,此处可以在devDependencies中看出哦。
这三个命令的意思是:
- serve : 在开发时用于查看效果的命令,视频中演示看一下效果
- build : 打包打码,一般用于生产环境中使用
- lint : 检查代码中的编写规范
我们顺便讲一下package.json中另外两个比较重要的配置项dependencies和devDependencies。这两个都是用来记录安装包信息的,但如果要想完全搞清楚他们的区别,你先要弄清楚什么是开发环境和生产环境。
-
开发环境: 作为一个程序员,每天作的事情都是在开发环境中,编写代码、测试代码、修改 Bug。也就说这些代码没有上线。
-
生产环境:就是代码已经上线,放到了正式的服务器上,公司开始运营去赚钱的代码。
明白了这两个概念后,dependencies下的包是生产环境中必须用到的,当然开发环境也需要。devDependencies是只有开发环境中使用的,上线后这些包就没用了,打包后也不会打包进去的代码。
从 main.ts 文件讲起
项目里边还有一个非常重要的文件main.ts文件,你可以把它叫做入口文件,这里边只有简单的三行代码。
import { createApp } from “vue”; // 引入vue文件,并导出createApp
 import App from “./App.vue”; // 引入自定义组件,你在页面上看的东西基本都在这个组件里
createApp(App).mount("#app"); // 把App挂载到#app节点上,在public目录下的index.html找节点
顺着这个线索你可以找到App.vue这个组件,打开这个组件,看到里边的内容还是很多的,甚至你可能还有些东西看不明白。
<code class="language-js"><template>
  <img alt="Vue logo" src="./assets/logo.png">
  <HelloWorld msg="Welcome to Your Vue.js + TypeScript App"/>
</template>

<script lang="ts"> import {

     defineComponent } from 'vue';
import HelloWorld from './components/HelloWorld.vue';

export default defineComponent({


  name: 'App',
  components: {


    HelloWorld
  }
}); </script>

<style> #app {


  font-family: Avenir, Helvetica, Arial, sans-serif;
  -webkit-font-smoothing: antialiased;
  -moz-osx-font-smoothing: grayscale;
  text-align: center;
  color: #2c3e50;
  margin-top: 60px;
} </style></code>
在这个根组件里模板、vue 的 js 业务逻辑代码和 css 代码。在业务逻辑代码中,你可以看到引入了一个HelloWorld.vue的自定义组件。
这个自定义组件里边就是放了一些链接和模板用的 html 代码了,可以试着删除一些 html 代码,然后查看效果。
setup()和ref()函数
- setup 函数的用法,可以代替 Vue2 中的 date 和 methods 属性,直接把逻辑卸载 setup 里就可以
- ref 函数的使用,它是一个神奇的函数,我们这节只是初次相遇,要在template中使用的变量,必须用ref包装一下。
- return出去的数据和方法,在模板中才可以使用,这样可以精准的控制暴漏的变量和方法。
在setup中要改变和读取一个值的时候要加上value
代码更加健壮,data和后台交互还是html样式相关的变量完全分离,工作更加复杂,更适合大型程序的多人开发的代码规范性
<template>
  <img alt="Vue logo" src="./assets/logo.png" />
  <h2>欢迎光临红浪漫洗浴中心</h2>
  <div>请选择一位美女为您服务</div>
  <div>
    <button
      v-for="(item, index) in girls"
      :key="index"
      @click="selectGirlFun(index)"
    >
      {

   { index }}:{

   { item }}
    </button>
  </div>
  <div>你选择了【{

   { selectGirl }}】美女为你服务</div>
</template>

<script lang="ts">
import {

      defineComponent, reactive, } from "vue";

export default defineComponent({


  name: "App",
  setup() {


     const girls = ref(["大脚", "刘英", "小红"]);
     const selectGirls = ref("");
     const selectGirlFun = (index: number) => {


       selectGirls.value = girls.value[index];
     };
     return {


       girls,
       selectGirls,
       selectGirlFun,
     };
   },
});
</script>

<style>
#app {


  font-family: Avenir, Helvetica, Arial, sans-serif;
  -webkit-font-smoothing: antialiased;
  -moz-osx-font-smoothing: grayscale;
  text-align: center;
  color: #2c3e50;
  margin-top: 60px;
}
</style>
用 reactive()函数优化程序
- 变量和方法都混淆在一起,我最不能忍受的是在setup中要改变和读取一个值的时候,还要加上value。这种代码一定是可以优化的,需要引入一个新的 APIreactive。它也是一个函数(方法),只不过里边接受的参数是一个 Object(对象)。
<template>
  <img alt="Vue logo" src="./assets/logo.png" />
  <h2>欢迎光临红浪漫洗浴中心</h2>
  <div>请选择一位美女为您服务</div>
  <div>
    <button
      v-for="(item, index) in girls"
      :key="index"
      @click="selectGirlFun(index)"
    >
      {

   { index }}:{

   { item }}
    </button>
  </div>
  <div>你选择了【{

   { selectGirl }}】美女为你服务</div>
</template>

<script lang="ts">
import {

      defineComponent, reactive, ref,toRefs } from "vue";

/* TS 类型注释 */
/* 这时的代码虽然可以完美的运行,但是细心的小伙伴可以发现data这个变量,我们并没有作类型注解,而是采用了TypeScript的类型推断。
这样的代码,在我们公司是不允许出现的,必须要增加类型注解。所以我们先定义一个接口,用接口(interface)来作类型注解。 */
interface DataProps {


  girls: string[];
  selectGirl: string;
  selectGirlFun: (index: number) => void;
}

export default defineComponent({


  name: "App",
  setup() {


    const data: DataProps = reactive({


      girls: ["大脚", "刘英", "小红"],
      selectGirl: '',
      selectGirlFun: (index: number) => {


        data.selectGirl = data.girls[index];
      },
    });
    /* toRefs 可以在模板中响应式使用 */
    const refData = toRefs(data);
    return {


      ...refData
    };
  },
});
</script>

<style>
#app {


  font-family: Avenir, Helvetica, Arial, sans-serif;
  -webkit-font-smoothing: antialiased;
  -moz-osx-font-smoothing: grayscale;
  text-align: center;
  color: #2c3e50;
  margin-top: 60px;
}
</style>
用toRefs 函数优化响应式data变量
<script lang="ts">
import {

     reactive ,toRefs } from "vue";
export default ({


  name: "App",
  setup() {


    const data = reactive({


      selectGirl: '',
    });
    /* toRefs 可以在模板中响应式使用 */
    const refData = toRefs(data);
    return {


      ...refData
    };
  },
});
</script>
vue3.x的声明周期和钩子函数
- setup() :开始创建组件之前,在
beforeCreate和created之前执行。创建的是data和method - onBeforeMount() : 组件挂载到节点上之前执行的函数。
- onMounted() : 组件挂载完成后执行的函数。
- onBeforeUpdate(): 组件更新之前执行的函数。
- onUpdated(): 组件更新完成之后执行的函数。
- onBeforeUnmount(): 组件卸载之前执行的函数。
- onUnmounted(): 组件卸载完成后执行的函数
- onActivated(): 被包含在
<keep-alive>中的组件,会多出两个生命周期钩子函数。被激活时执行。 - onDeactivated(): 比如从 A 组件,切换到 B 组件,A 组件消失时执行。
- onErrorCaptured(): 当捕获一个来自子孙组件的异常时激活钩子函数。
注:使用<keep-alive>组件会将数据保留在内存中,比如我们不想每次看到一个页面都重新加载数据,就可以使用<keep-alive>组件解决。
steup中的钩子函数先于2中的钩子函数早点执行一下
<template>
  <section class="appwrap">
    <img alt="Vue logo" src="./assets/logo.png" />
    <h2>欢迎光临红浪漫洗浴中心</h2>
    <div>请选择一位美女为您服务</div>
    <div>
      <button
        v-for="(item, index) in girls"
        :key="index"
        @click="selectGirlFun(index)"
      >
        {

   { index }}:{

   { item }}
      </button>
    </div>
    <div class="selectwrap">你选择了【{

   { selectGirl }}】美女为你服务</div>
  </section>
</template>

<script lang="ts">
import {


  defineComponent,
  onBeforeMount,
  onBeforeUpdate,
  onMounted,
  onUpdated,
  reactive,
  ref,
  toRefs,
} from "vue";

/* TS 类型注释 */
interface DataProps {


  girls: string[];
  selectGirl: string;
  selectGirlFun: (index: number) => void;
}

const consoleColor = "font-size:12px;color:blue;";
export default defineComponent({


  name: "App",
  setup() {


    console.log("%c 1.开始创建组件--setup()", consoleColor);
    const data: DataProps = reactive({


      girls: ["大脚", "刘英", "小红"],
      selectGirl: "",
      selectGirlFun: (index: number) => {


        data.selectGirl = data.girls[index];
      },
    });
    onBeforeMount(() => {


      console.log("%c 2. 组件挂载页面之前执行--onBeforMount()", consoleColor);
    });
    onMounted(() => {


      console.log("%c 3. 组件挂载页面之后执行--onMounted()", consoleColor);
    });
    onBeforeUpdate(() => {


      console.log("%c 4. 组件更新之前--onBeforeUpdate()", consoleColor);
    });
    onUpdated(() => {


      console.log("%c 5. 组件更新之后--onUpdated()", consoleColor);
    });
    /* toRefs 可以在模板中响应式使用 */
    const refData = toRefs(data);
    return {


      ...refData,
    };
  },
  beforeCreate() {


    console.log("1-组件创建之前-----beforeCreate()");
  },
  beforeMount() {


    console.log("2-组件挂载到页面之前执行-----BeforeMount()");
  },
  mounted() {


    console.log("3-组件挂载到页面之后执行-----Mounted()");
  },
  beforeUpdate() {


    console.log("4-组件更新之前-----BeforeUpdate()");
  },
  updated() {


    console.log("5-组件更新之后-----Updated()");
  },
  /* S ref 写法 */
  // setup() {


  //   const girls = ref(["大脚", "刘英", "小红"]);
  //   const selectGirls = ref("");
  //   const selectGirlFun = (index: number) => {


  //     selectGirls.value = girls.value[index];
  //   };
  //   return {


  //     girls,
  //     selectGirls,
  //     selectGirlFun,
  //   };
  // },
  /* E ref 写法 */
});
</script>

<style>
#app {


  font-family: Avenir, Helvetica, Arial, sans-serif;
  -webkit-font-smoothing: antialiased;
  -moz-osx-font-smoothing: grayscale;
  text-align: center;
  color: #2c3e50;
  margin-top: 60px;
}
</style>
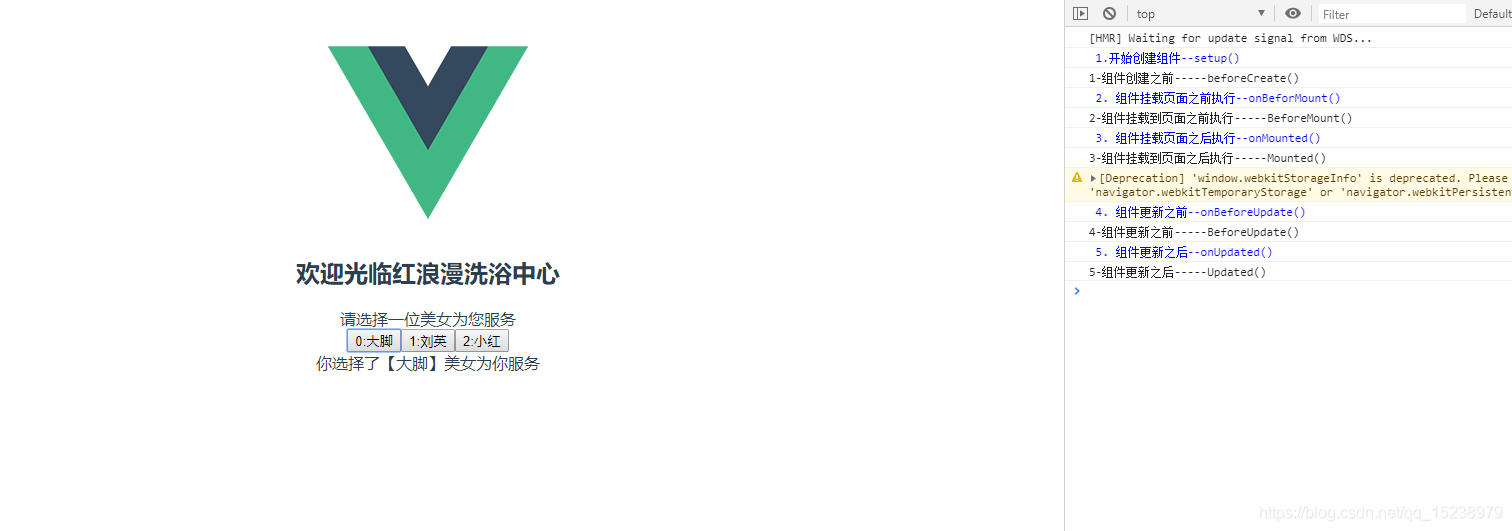
Vue2.x 和 Vue3.x 生命周期对比
你也许会问,那我到底是使用Vue2.x还是Vue3.x的生命周期钩子函数?其实这个无所谓,但是不愿混用,如果你用 setup 这种Vue3的生命周期函数,就不要再使用Vue2的了。为了你更好的掌握,我作了一个函数对比:
Vue2--------------vue3
 beforeCreate -> setup()
 created -> setup()
 beforeMount -> onBeforeMount
 mounted -> onMounted
 beforeUpdate -> onBeforeUpdate
 updated -> onUpdated
 beforeDestroy -> onBeforeUnmount
 destroyed -> onUnmounted
 activated -> onActivated
 deactivated -> onDeactivated
 errorCaptured -> onErrorCaptured
通过这样对比,可以很容易的看出 vue3 的钩子函数基本是再 vue2 的基础上加了一个on,但也有两个钩子函数发生了变化。
BeforeDestroy变成了onBeforeUnmountdestroyed变成了onUnmounted
尤大神的介绍是mount比Destroy更形象,也和beforeMount相对应。
除了这些钩子函数外,Vue3.x还增加了onRenderTracked和onRenderTriggered函数,这两个函数放到下节课再讲解。这节就先到这里了。
setUp 替换了 beforecreate、created 还有data、methods
watch监听器的实现
const successTitle = ref('你选择了');
    const confrimGirls = () => {


      successTitle.value = successTitle.value + data.selectGirl;
      document.title = successTitle.value;
    }
    watch(successTitle,(newVal,oldVal)=>{


      console.log(`%c${

      newVal} newVal`, consoleColorRed);
      console.log(oldVal,'oldVal');
      document.title = newVal;
    })
watch监听多个值
const successTitle = ref('你选择了');
    const confrimGirls = () => {


      successTitle.value = successTitle.value + data.selectGirl;
      document.title = successTitle.value;
    }
    /* watch 单个 */
    // watch(successTitle,(newVal,oldVal)=>{


    //   console.log(`%c${newVal} newVal`, consoleColorRed);
    //   console.log(oldVal,'oldVal');
    //   document.title = newVal;
    // })
    /* watch 多个 */
    watch([successTitle,() => data.selectGirl],(newVal,oldVal)=>{


      console.log(`%c${

      newVal} newVal`, consoleColorRed);
      console.log(oldVal,'oldVal');
      document.title = newVal[0] + '';  //返回的newValue也是一个数组
      // 为啥要加 '' 因为我这ts报错 Type 'object | Ref<unknown> | ComputedRef<unknown> | (() => unknown)' is not assignable to type 'string'. Type 'object' is not assignable to type 'string'.
    })
    /* toRefs 可以在模板中响应式使用 */
    const refData = toRefs(data);
    return {


      ...refData,
      successTitle,
      confrimGirls
    };